Monday
May232016

what I have to show for it!

Quilting show season is well and truly underway. Consequently, I am very stressed!

I'm entering two quilts in the show this year. I won't show full pictures of either one, but I'll talk a little bit about them just to provide a general update.

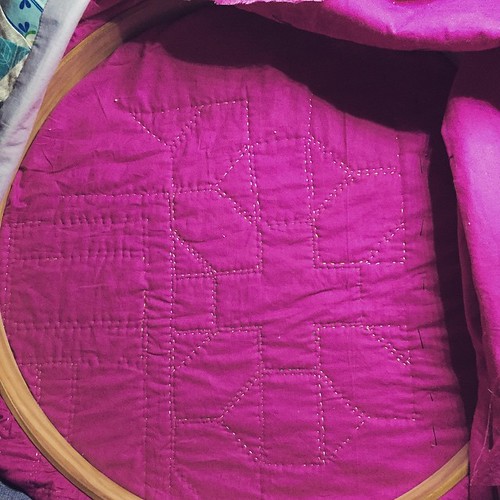
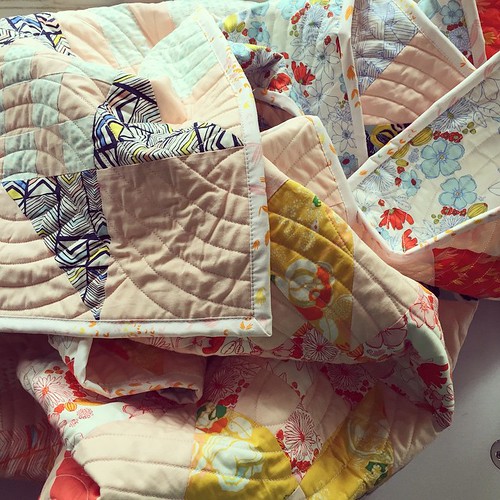
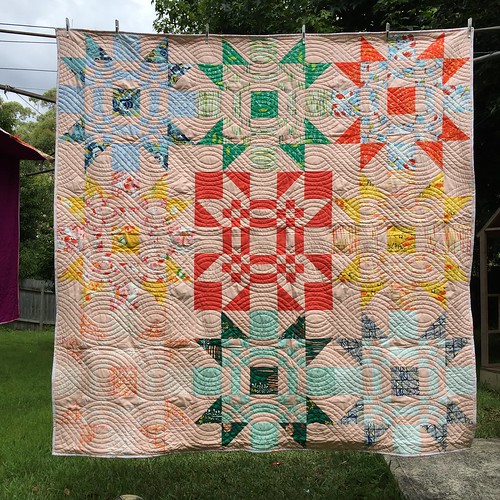
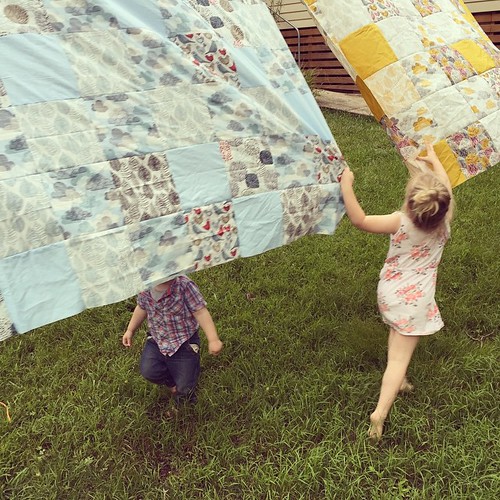
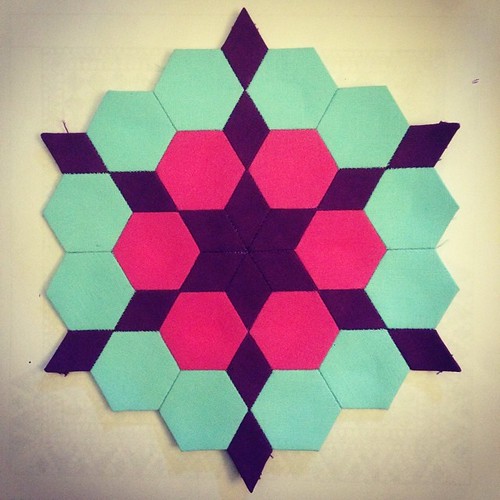
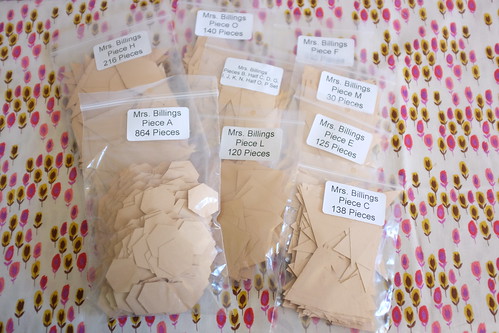
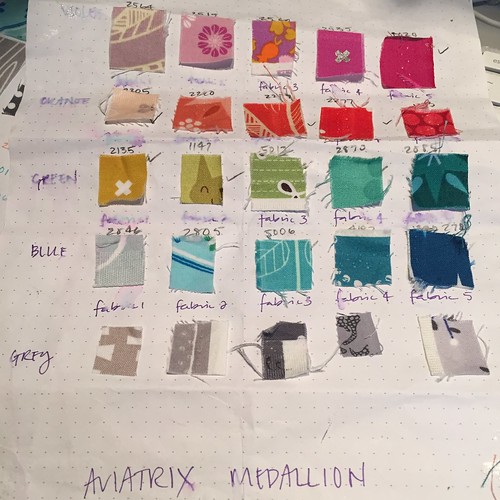
This is my epic Mrs Billings Coverlet. I set myself the date of 31 March 2016 to finish it. I pulled the last papers at 2:15am on 1 April. Then I slept for four hours, did school drop off, came back home, and took a nap.

It is 1:56am on 1 April 2016 and I have FINISHED this bloody quilt top!!!! #jenndoesmrsbillingscoverlet is conquered. Tomorrow I'm going to take it out back & shoot it. (Or drive it up to @leanne_mountvincentquilts!) I'm sick of looking at it! And I'd be

Last year at the show I decided to ask my friend Leanne to quilt it. She's also an award-winning quilter (we have gotten second and third in the same categories, two years running), and she agreed. I emailed her in January, more than a little concerned about the "wobbles" in the top, and she was very kind, and reminded me to BREATHE, and also, a few wobbles were nothing to shed tears of blood over!

I drove the quilt up to her after my nap on that April morning, and we talked over what I wanted ("quilted? modernish? nice? You know?") and she's been sending me progress pictures that are making me SWOON. I never doubted the idea that she was the right quilter for the job, but it's nice to be so vindicated, you know?

+

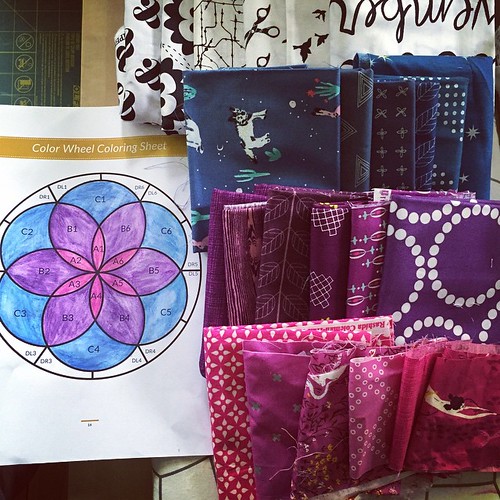
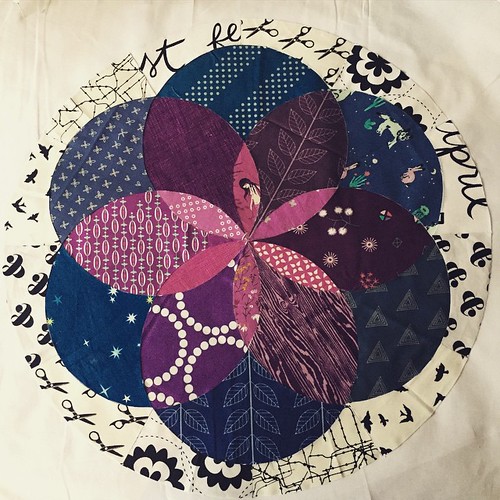
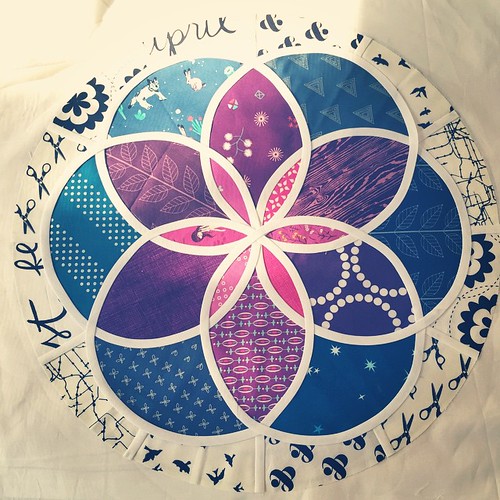
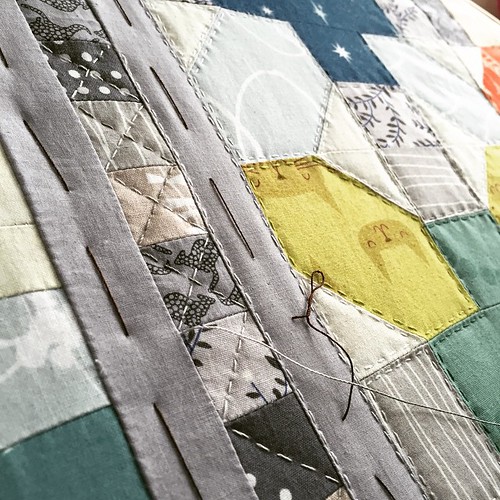
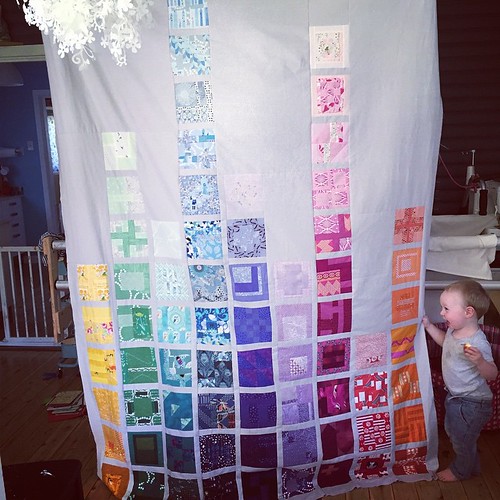
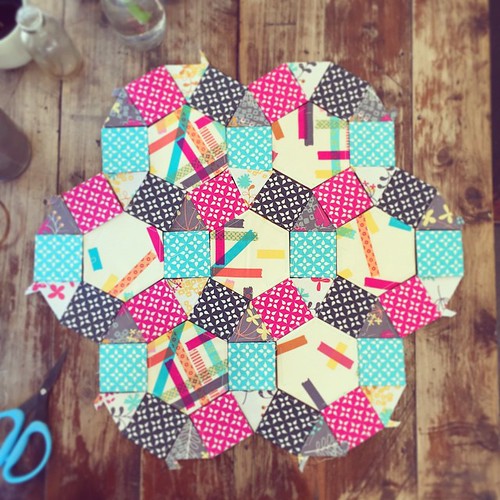
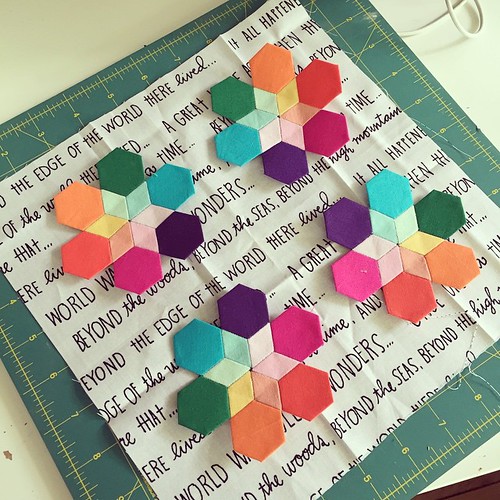
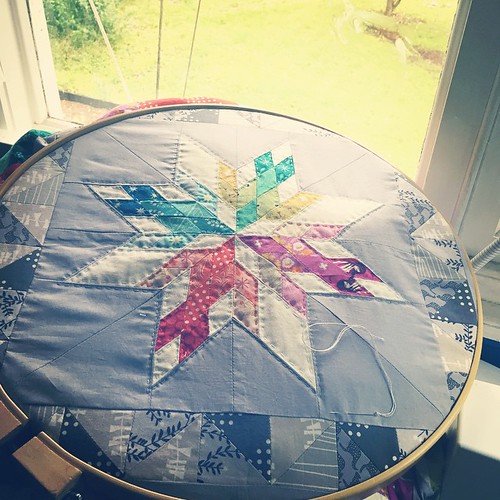
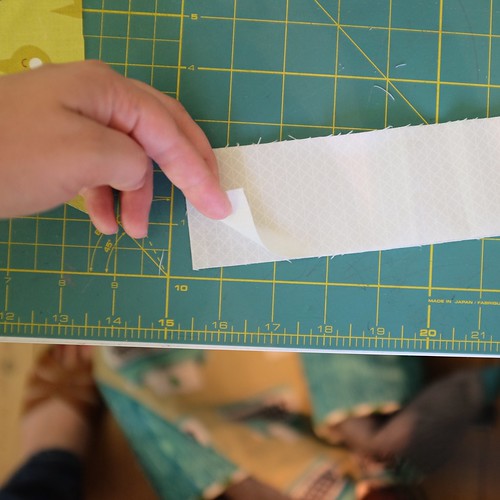
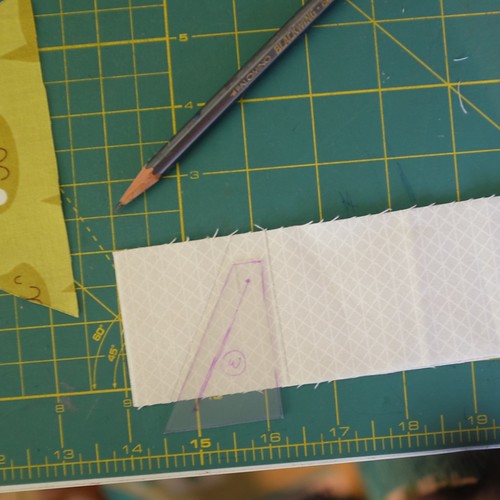
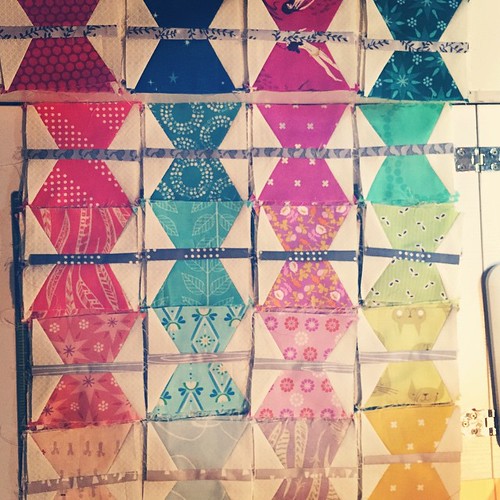
The second quilt I'm entering is one I've been slowly piecing all year. It's called Andromeda.

I mean. This is pretty. But I should have just done matchstick quilting. ๐Ÿ˜‚

 I've been quilting this one to the best of my ability, but I'm hampered by technology. I tell you what, having a stitch regulator would be an incredible thing. I'm currently using a speed control with a faulty on-off switch, which means I stand there and press on-off, turn the dial incrementally, on-off, turn, on-off, turn, on-off, turn, and so on, until the bloody thing decides to work. It also decided to start randomly using the thread cutter every three seconds. (Solved that by unplugging the thread cutter.) It's also fond of punching great holes in my quilt when it decides to speed up (usually as I'm edging toward a stopping point). 

That said, it's still better than wrestling a quilt through a domestic machine, so I'll happily take it!

I have a few more passes of Andromeda to do and then it gets its binding (blue star fabric), its hanging sleeve, and label, and off to the show it goes. After it's been exhibited, it's been promised to my friend Lauren, who is making me a crochet granny square throw in trade. I'm very excited about that! I know Lauren will love this quilt, as she is a big space nerd, like me.

+

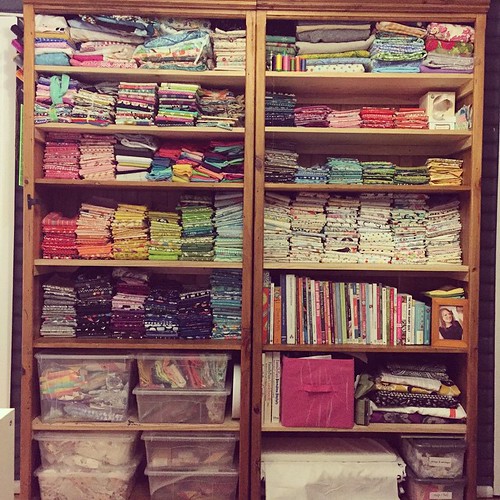
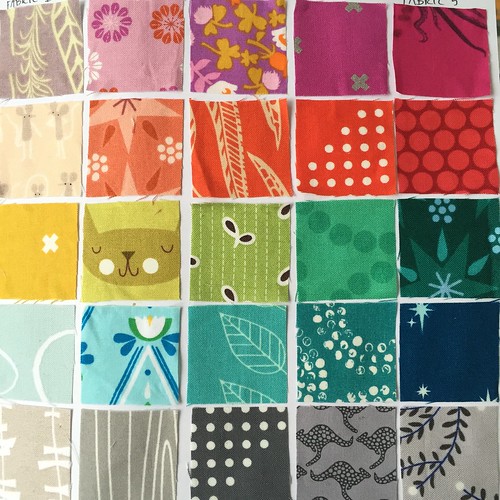
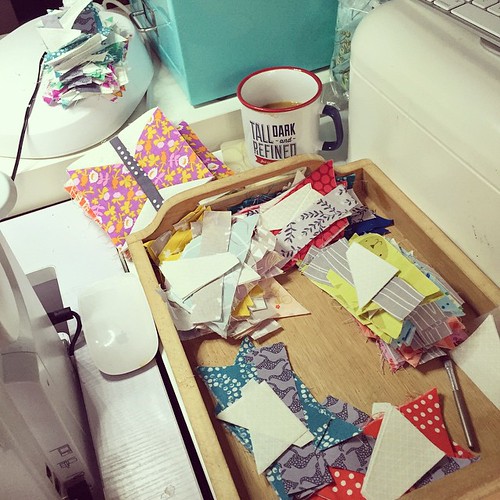
As soon as I've discharged my quilt show obligations, I am going to sit and make a Lizzy House log cabin quilt. I've been organizing my scraps (ironing them took a whole morning of texting my friend Lane about The Raven King) and don't they look beautiful!

I ironed and trimmed my Lizzy scraps in preparation for this whisper palette log cabin idea I had. Not that I have time to start it until August. ๐Ÿ˜…

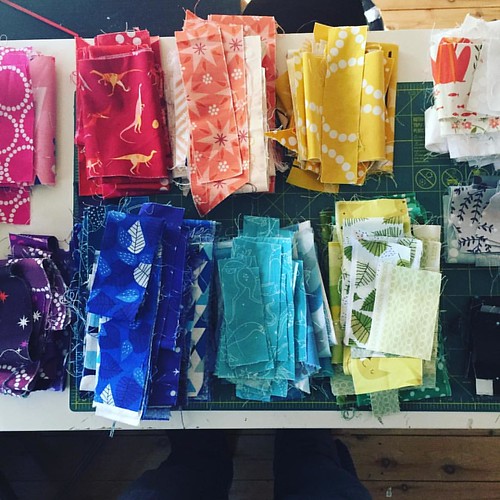
I went and pulled the rest of my Lizzy collection and sorted out what wasn't already a scrap. I'll trim strips off everything and keep all my scraps together for other Lizzy-specific projects. (Since I took the Meadow class last year, I feel especially fond of my Lizzy House collection. She was such a fun and cool person and that class was so great!)

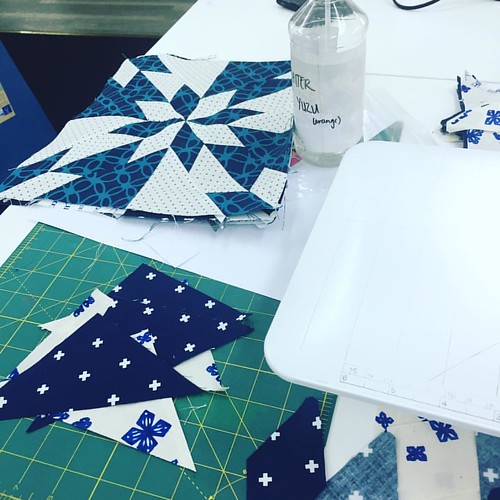
Oh, and one of my husband's friends got married earlier this month, so I started a quilt for them. I dug out all my Cotton + Steel navy and low-volume fabric and began making stacks...and it became a Hunters' Star before my very eyes. I'm taking my time on this one, but I'm enjoying the progress I've made so far!

I love @sydmodsquad day ๐Ÿ’–โœจ

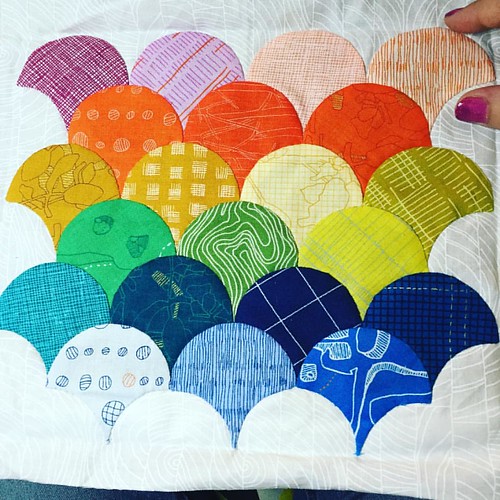
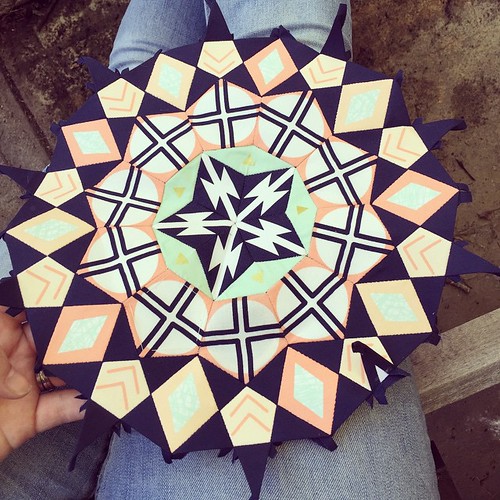
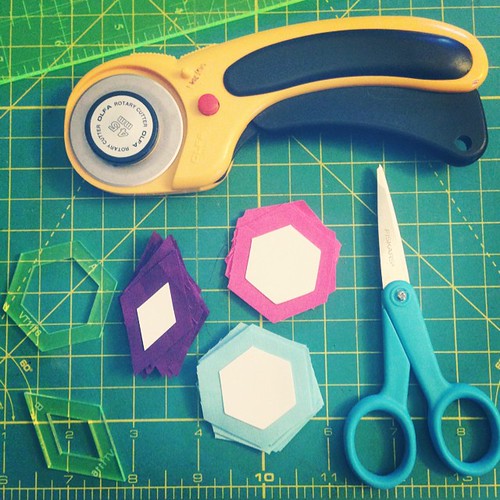
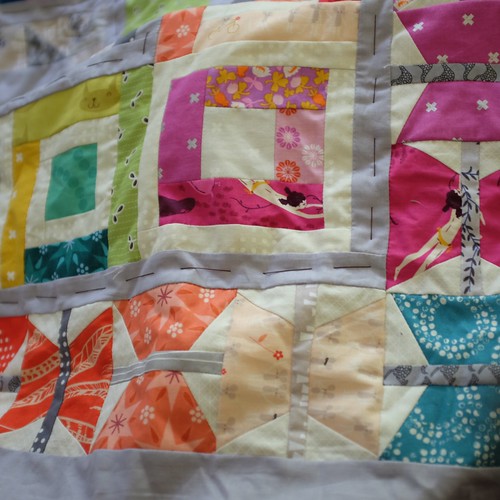
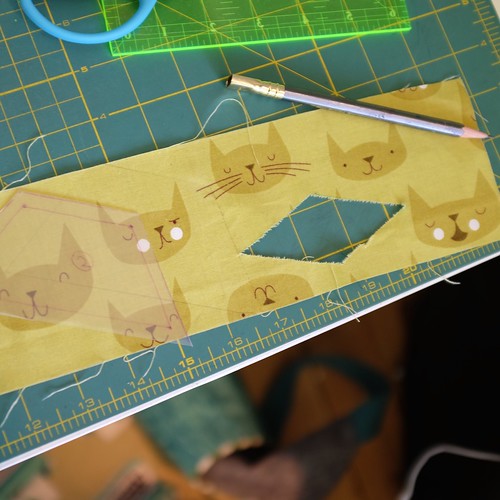
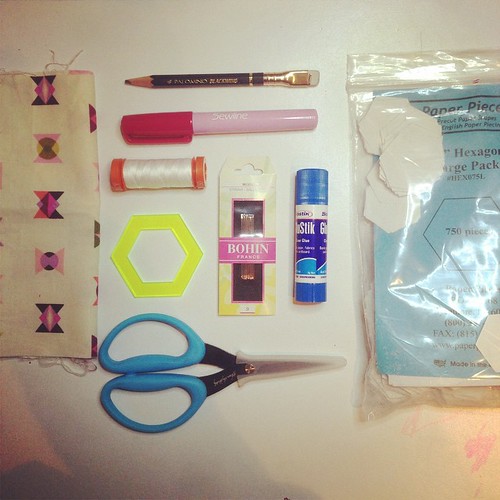
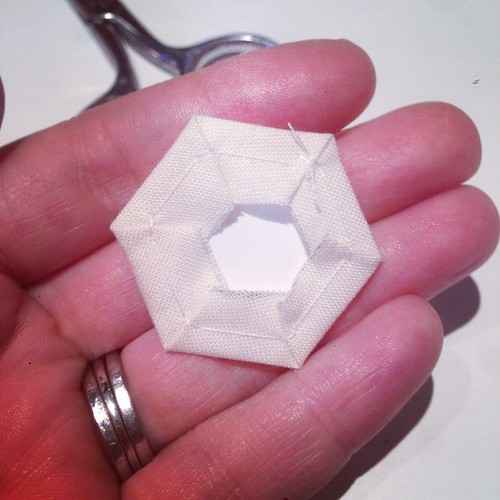
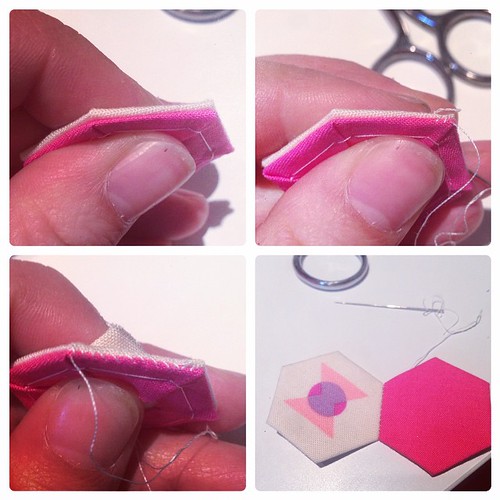
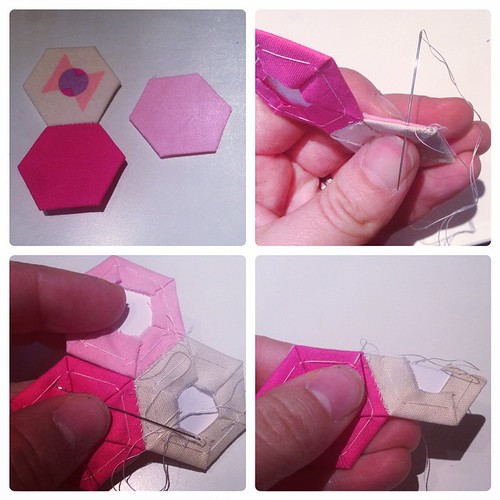
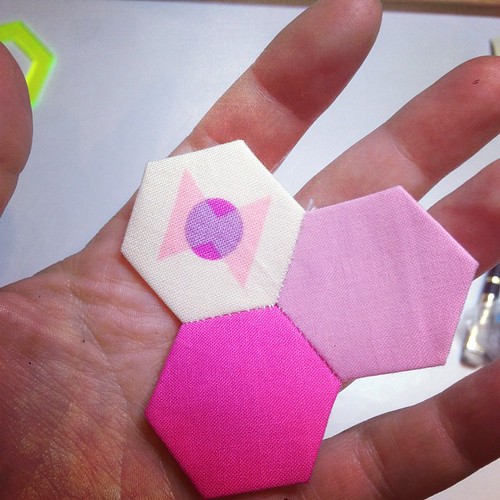
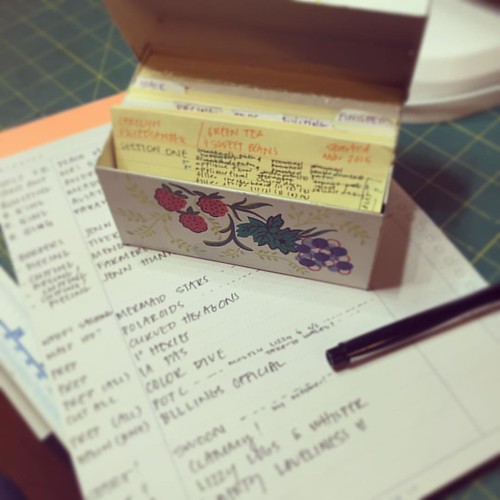
Oh! My current handsewing project is the border part of Green Tea Sweet Beans. There were times I have hated this pattern, but I definitely learned a lot while doing it. (Mostly I learned that I do not like hand piecing at all. Appliqué is fine. EPP is fine. Hand-piecing makes me stabby.)

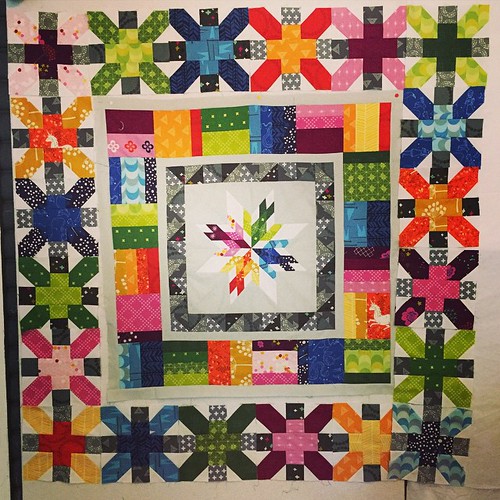
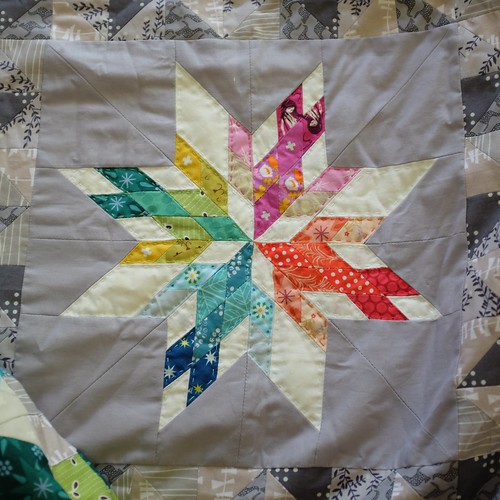
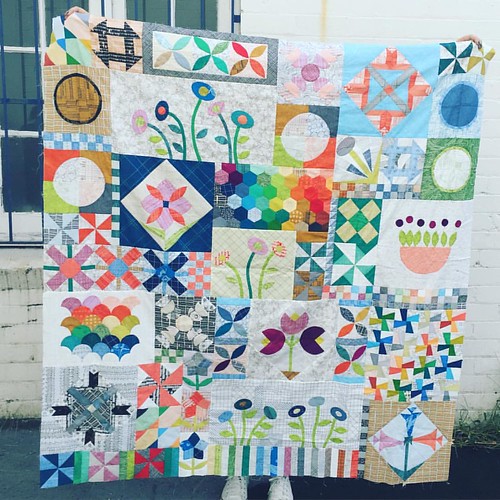
Here is the finished main top, pre-final borders.

Ayyy. #jennteasweetbeans needs a border and some more appliqué but the binding and borders have been picked and main part is done! I feel very chuffed. :)

I've been taking my borders to our SydModSquad handsewing days. It's nice to have something so easy to do and so rewarding to work on already prepped and ready to go.

Stems. :) #jennteasweetbeans

I also had the bright idea to reckon up all my WIPs. More like "Whoops!" I need to get some of these crossed off! It was nice to have them all on one list. I do love my little progress box, though. It's so great to have a dedicated card for each project, and to keep them even after the quilt has been gifted. :)

I had this terrible idea that I should reckon up all my WIPs. I'm sweating now. ๐Ÿ˜…

That's it for now! Time to get back to Andromeda. If I'm very clever I'll be done quilting by Friday. Wish me luck!


Tuesday
May172016

a year and change.

I didn't plan to take a year off blogging. I had so many cool projects planned! I have a lot to say, about everything, all of the time! But life got in the way, and a lot of it was painful and immediate and I didn't know how to process it, so I kept quiet on this platform. I stuck to Instagram and Facebook, and I slowed my sewing way down.

I hated these :)))) but they're done :))))) #jennteasweetbeans

Long story short: we started having problems with our daughter's school in the third week of term, and the subsequent twelve months were spent finding doctors, getting tested, trying new therapies, and ending up with... a diagnosis of a speech delay. Which we already knew.

It was a very hard year.

We are in a new school now, which is closer to our house. It's a parish school, co-ed, and takes kids pre-k through year 6. P tested high for her age group in maths, logic, and puzzles, and low for speech (which, again, we totally knew) and her teacher is on top of speech and social skills as well as keeping her busy. When she came home after less than two weeks and could write her own name, I cried. I cry when she tells me about all her friends and her teacher and what they did every day. I cry because last year she was so miserable and misunderstood and I was scared it ruined school for her, and it feels like we've been given a massive second chance for her to love learning.

I feel like I can finally breathe.

I like that they like each other. Yesterday Piper taught Owen "ring around the rosie". #latergram

Here's hoping I can get back to writing, sewing, and living again, and that I come back to this space to record it.

My favorite picture from Tokyo Disney. ๐Ÿ’–

It's lovely to be covered in babies. :) Even babies who brought the daycare sandbox home in their hair and trousers... ๐Ÿ˜œ

Tuesday
Feb172015

Technicolor Galaxy

Did I mention that I was taking a year off of swaps/bees/sewing responsibilities? So far it has been really nice. I've had a few very necessary breaks from my machine, and spent a bit of time with my laptop. I started making another Aviatrix for a teaching sample. I've been enjoying hand quilting and hand sewing. And I joined the Technicolor Galaxy BOM from Pile O' Fabric.

I changed it up a bit. But I like the low volume fabric as relief around the mixed prints.

It's a skill builder quilt and it's QAYG (quilt as you go). I was extremely daunted by the central block because it looks really complex, but the instructions and the video are REALLY well put together. Not to mention, the Facebook group is actually one of the nicest and most supportive I've ever experienced. Lots of participation and helpful hints! It's wonderful!

I have an extremely sore back, but I'm very pleased with myself. ;)

The first block has a lot of new-to-me techniques, including making 3/8" bias tape for Celtic-style appliqué, glueing down pieces to a muslin before applying the bias tape, and using my brand new tiny Clover iron. (What a useful and cute purchase!)

Oh happy day. Now to quilt it all down!

I am already quilting it - with Aurifil 12wt of course - and loving the way it looks. I will outline all the shapes and then decide on further designs. (It won't be complex, that's for sure.)

I didn't get very far last night, but I'm pretty happy with how it's looking! #technicolorgalaxy #perlequilting

I have a loose plan for the whole quilt, but I may keep it in these shades. It looks pretty as a rainbow, but I think it would be amazing with blue and purple with magenta, warm golds, and lush blue-greens. I may do a few more coloring sheets to see what looks good! I should definitely restrict my palette. I do everything in rainbow, it seems. :)

I think this is where I'm going....

Of course there will be a LOT of low-volume fabrics used in this one!

I already can't wait until next month!

Thursday
Feb122015

busy month.

I can hardly believe how quickly January has gone by.

For example, this one started school.

"It's Kristoff wearing Chapstick" ๐Ÿ˜‚โ„๏ธ

I've heard surprise from a few people - as the Tiny Blonde One is only 4 in July it seems like "school" is the wrong word. It's pre-primary at a nearby Montessori school, and she goes 5 days a week, all morning. So this is it, for us. There's no "proper school" starting moment beyond this one. Her first day she wore a handmade dress and cried on the way home from school. She didn't want it to end. I am so glad this is where she's going! It is wonderful how much she loves it!

Meanwhile, the Little Fellow is a bit bereft at the loss of his only playmate. He's extra cuddly these days. Not that I'm complaining, but I utter the phrase "please give Mama some personal space please!" an awful lot. Daddy loves cuddles though!

The Little Fellow is a great cuddler, and he made sure to show Daddy how happy he was to have him home!

And for some crazy reason (teaching!) I've committed to teaching a class on the Aviatrix Medallion. I needed a class sample, of course...so I started another one. (Heaven help me!) I'm up to Border 3.

It's wobbly on the design wall and that border isn't pieced together yet but...you get the idea.

School gives us a good routine, and I do my shopping on the same day each week...it feels like things are levelling out. I'm involving the Tiny Blonde One in more of the food preparation at home. She helped me stir the salt into the yoghurt and spoon it into the strainer to make labneh.

Look, I'm not saying this is the easiest cheese to make...but it IS. A kilo of Greek yoghurt, salt, a cheesecloth, a strainer, and a bowl to catch the whey. After a night in the fridge it's delicious and amazing. :)

And she is a pro at making "chocolate cakes". She gets so excited to help stir! Maybe because I let her lick the spoon after. :)

Yes, she loves helping me bake "chocolate cakes". Why do you ask? ๐Ÿ˜œ๐Ÿฐ

I'm also keeping up with my book pledge this year. You can check out my Goodreads here. This is the series that has caught me the most. I kind of knew it would. Ugh, I just love it so much. Ronan is my bby.

I'm only on chapter five and I'm FREAKING OUT at how good this is.

I am still stitching away on my original Aviatrix Medallion. We have been watching The 100. I am up to episode 5 of season 2, and I love it. It reminds me of The Vampire Diaries but less about romance, more about the uncovering of the plot twists and the things people will do to survive.

Stitching little kisses into my quilt. X x x

I get a lot of quilting done while I'm watching TV!

And the back of this quilt is looking wonderful too. I love how soft this is.

The back of my hand-quilted #aviatrixmedallion. I always like seeing the backs of these projects too! :)

Finally, I have been working on a La Passacaglia quilt. This is a lot of fun. I got my copy of the book from Busyfingers Patchwork and they sell starter packs as well (note: you'll need extra triangles!).

Rosette 1 is finished!

I think that's about it for January and early February!

Thursday
Jan012015

a new year.

The general consensus is that 2014 was a hard year. So let's put it to bed and move on.

I do like this holiday; there's something a bit nice about the idea of starting fresh. And of course we can do that every day or week or month, but it's nice to have the prospect of such a large chunk of time devoted to getting a bit better. I like to choose resolutions that focus on growth (as opposed to those that focus on whittling down; you all know what I'm talking about). Though I rarely do resolutions myself, to be honest.

I started this year with a freshly organized stash.

And DONE. So much better. #cleanallthethings

(Trust me, it needed it!)

Y'all SERIOUSLY. #honestcraftroom #notdealingwithittonight #insteaddrinkingwhiskey #gahhhh

I started this year with the cutest babies on the planet. They even play together nicely sometimes.

Oh man, these two.

I started this year with this great guy by my side. Every step we take, we take together.

Extremely thankful this guy is home.

I started this year off with a finished group quilt top, ready to be quilted by yours truly. It's a stunning top and Tash did so much work to make it happen.

SydMQG quilt top done!! ๐Ÿ˜๐Ÿ˜๐Ÿ˜

And another long term WIP just about finished. So far 48/64 blocks are done; the last sixteen are just waiting to get started.

25/64 done. Phew. Think I'll have to send this one out! #sailorstars

A good start to 2015.

My husband and I usually drive the babies to sleep. We talk in the car, and listen to music, and it's actually time for us to reconnect as partners, not just be parents. Sometimes we drive to a nearby hill we call the Sunset Spot. Tonight, on the first day of the new year, it did not disappoint.

What a gorgeous end to the first day of 2015. #sunsetspot

My friend Amy chooses a word every year, and I think that's a good idea.

I don't know if I have a word. More like a set of ideas. Scaling back my involvements (no blog hops, swaps, bees, or running anything) was a hard but important decision. Piper starts preschool and the parental involvement is really high at her school; I want to be present for that.

I want to write every day. I did this for 2.5 years and it was amazing. (I write probably 27 days a month, so this isn't a stretch for me. Sometimes it's ten words, sometimes it's ten thousand.)

I want to connect more. I'm anxious, introverted, and naturally a homebody, so eye contact and learning names is terrifying. (I tend to put on this bright, false face and just talk the whole time.) So working on that would be a step in the right direction.

I want to sew almost exclusively from my stash.

I want to keep thinking critically and increase my knowledge.

I want to read more books (and mostly books by female authors). I want to seek out points of view of people that aren't already represented in my life, to gain better understanding and insight. I want to act with intelligence but more than that, compassion.

I want to do no harm, but take no crap.

There's a lot more, but that's just what's at the top of the pile right now.

Happy New Year, everyone. x

I am exceedingly pleased with how well this cute @patchworkthreads tee coordinated with my ModCloth cardi. Eeek!


Sunday
Dec212014

red letter days / spring carnivals

It's nice to send a quilt out once in a while. I had a goal of sending out no more than five to be quilted in 2014 and I think I only sent out two or three. :)

A quick finish and it's off to be gifted!

That said, this is my Red Letter Day quilt. (My post on the class can be found here.) As I took the class with Jeannette, I wanted her very much to quilt it!

She quilted in a simple cable pattern, one I like a lot - I'll be sure to ask for it again. Thanks Jeannette!

Red Letter Day

This 68" square quilt was never going to stay with us - it was always meant to go off into the world. It has been gifted and I'm glad to say, happily recieved!

I keep trying to crowbar in the time to get the kids' room fixed up. It needs painting and the wardrobes fixed to the walls. And then they can move in. I did finally finish their twin quilt tops!

My little loves. ๐Ÿ˜˜

I used the two colorways from Eloise Renouf's Bark and Branch line from Cloud9. I've been hoarding it since it came out for exactly this. When Piper was a tiny little thing I bought cloud artwork from Eloise Renouf and had it professionally framed, and it just so happens to match this fabric range perfectly!

I am hoping to paint their room soon. It will be a warm, medium grey. Good for sleeping and reflecting. (Toddlers have busy days.)

Unfortunately for my house and family, I have been hit by the WRITING BUG. 30K on a new project, the week before Christmas, too. No wonder everything is in disorder and I can't remember what day it is. :)

Luckily my mailbox has been nice and full. Look at all these beautiful bee blocks! Thanks everyone! I know there are more coming but these just tickle me pink. :)

Looking GREAT, Hive 2! #aussiemoderninstabee #trelliscrossroads

And writing hasn't stopped me from digging out my paper pieces box and whipping up a little Spring Carnival goodness. There is a pattern here but I just did it based off pictures with the pieces I had.

A bit of Sunday afternoon EPP. #springcarnival #EPP

I'm finally using my washi fabric! It's so beautiful. This is just set out - not stitched together - that will come later!

Hope your week leading up to Christmas is fun filled. Enjoy the holiday!

Penny x


Wednesday
Dec172014

mrs billings coverlet

As many of you who follow me on Instagram know, I've been working on a particular quilt since my birthday this year. As I turned the big three-oh, I wanted to do something BIG, a project to mark a new decade. I've been toying with making a Farmer's Wife quilt or a Dear Jane, but last Christmas I picked up a copy of Down Under Quilts that had a feature on the famous Mrs Billings Coverlet. I wasn't exactly spell-bound. It's a very BROWN quilt, and as much as I love all quilts and think they are all amazing works of art, this was not my jam.

(This photos is the original coverlet and it's NOT my picture.)

Anyway despite the brownness, it stuck in my head a bit. A few months later I was paging through the magazine deciding whether to keep or recycle it when I spotted it again. I sat down and reread the article and saw that Karen Styles (who is super nice in person by the way) of Somerset Patchwork had actually created a pattern for the Mrs Billings Coverlet!

My birthday was coming up, and I wanted a big project, right? But...I had no real plans to embark on a 94" square, mostly hand-pieced quilt. Ha. Hahaha. That would be freaking ridiculous, right? RIGHT?

By the time, the Sydney Craft & Quilt show was fast approaching, and I knew I would be there as I had two solo quilts showing (one of which won an award!) as well as a group quilt. I saw that Somerset Patchwork would have a booth. I didn't want to buy any pattern that expensive sight unseen. I'll think about it, I said.

Which meant I just need to see it first.

Anyway, I did buy the pattern. It is expensive, so be warned, it's not something to buy on a whim. I had to assure myself and my bemused but extremely supportive husband that, unlike 80% of the patterns I buy, I planned to actually *make* this quilt. I went ahead and splurged on the Paper Pieces starter pack. The pattern from Karen Styles comes with the acrylic templates and 1000 hexagon paper pieces to get you started. So the day before my birthday I cut out all the hexagons for the centre medallion and prepped them.

Prepping for tomorrow's start...those are 5/8" hexies & diamonds. I figure the start of a new decade is a reasonable time to start a bonkers quilt though eh? :) #jenndoesmrsbillingscoverlet

I sewed them on the train on my way to my birthday breakfast. I even finished the medallion that day!

Not bad for my first day being 30! #jenndoesmrsbillingscoverlet

Soon after, my paper pieces arrived in the post, and though daunting, I was ready to get started!

All the paper pieces!

Though I've done relatively little in the five months I've had the pattern, I'm not that worried. I recently went on a border-bender, where I chose and cut and assembled borders ready to be pieced. And I gave myself permission to sew it using the machine. (I had been planning on doing it all by hand.)

Okay swapped out the citrine for pink (top) or navy (right). And swapped out the tulip. It's funny how hung up I get on the strip borders! ๐Ÿ˜ณ #jenndoesmrsbillingscoverlet

The pattern is so far very comprehensive. Each step is fully explained and there are neat little tips in there too (like "cut extra, this shape shows up in another border"). I've only found one pattern error so far but it was a pretty annoying one - the background square upon which the medallion is appliqued is listed as being cut too small. Just use a FQ or something and trim it; trust me. Much easier.

I have been jumping around; I wanted to do some hexagons, and the next ones are a few borders past where I am. But I decided it was okay to skip around a little bit! How good do these cornerstones look? Mad props to Bec Skyberries who sent me that 10" square so I could use this fabric as background for these hexagon rosettes. (I was exactly 4 squares short.)

The corners are done! ๐Ÿ˜Š #jenndoesmrsbillingscoverlet

I should probably get onto the next border, the mint flowers, and just smash that out. I know I'd be happy to have it finished! But I am enjoying hexagons, so...maybe I'll get those basted and ready to go.

I'll try and keep posting about this regularly, under the "jenn does mrs billings coverlet" tag. I also have a Flickr album set up and you find it under the same tag in Instagram.

Do let me know if you're inspired to pick up the pattern, too! I'd love to have a partner in crime!


Thursday
Dec112014

Aviatrix Medallion - Fabric & Thread

Hi everyone!

Having finished the Aviatrix Medallion quilt top and rather hastily basted it, I was ready to quilt. I have had the vision for it for some time: I wanted to echo quilt most of it by hand, using perle cotton.

Now, for a quick refresher, in the Aviatrix Medallion pattern, there are 25 FQs (plus neutral and white bg yardage) required. Each of those, in my version and Elizabeth Hartman's original, is a different color or shade. (If you want to see something cool, you can check out her alternate colorway page. I am seriously considering that winter palette in print fabrics.)

Here are my colors. I stuck pretty close to her original palette.

Aviatrix Color Chart

Each of the fabrics is grouped according to a color family. I will list them all here, left to right. BE WARNED, I am not digging up all the proper names or item codes of these fabrics for this write up. If you're DESPERATE to know, I'll search it out for you, just let me know in the comments. :)

Violet Group

  • Feather, Field Study, Anna Maria Horner, Westminster/Free Spirit (2564)
  • Floral, Mustang, Melody Miller, Cotton + Steel (2515)
  • Calico, Briar Rose, Heather Ross, Windham (2540)
  • XOXO, Basics, Rashida Coleman-Hale, Cotton + Steel (2535)
  • Swimming Sisters, Mendocino, Heather Ross, Westminster/Free Spirit (4020)

Orange Group

  • Mice, Catnap, Lizzy House, Andover (2205)
  • Stars, 1001 Peeps, Lizzy House, Andover (2220)
  • Feather, Field Study, Anna Maria Horner, Westminster/Free Spirit (2277)
  • Dottie, Basics, Rashida Coleman-Hale, Cotton + Steel (2277)
  • Red Spot, Rainy Days & Mondays, Riley Blake Designs (1103)

Green Group

  • XOXO, Basics, Rashida Coleman-Hale, Cotton + Steel (2135)
  • Cats, Catnap, Lizzy House, Andover (1147)
  • Green Floral, Flea Market Fancy Reprint, Denyse Schmidt, Westminster/Free Spirit (5017)
  • Pearl Bracelet Tone on Tone, Lizzy House, Andover (2870)
  • Stars, 1001 Peeps, Lizzy House, Andover (2885)

Blue Group

  • Blomster, Mormor, Lotta Jansdotter, Windham (2864)
  • Diamonds, Lotus Pond, Made by Rae, Cloud 9 (2805)
  • Stems, Simply Color, V & Co, Moda (5006)
  • Circle Dot, Shape of Spring, Eloise Renouf, Cloud 9 (4182)
  • Stars, Constellations, Lizzy House, Andover (2783)

Grey Group (4670)

  • Kitestrings, Glimma, Lotta Jansdotter, Windham
  • Woodgrain, Les Amis, Patty Sloniger, Michael Miller Fabrics
  • XOXO, Basics, Rashida Coleman-Hale, Cotton + Steel
  • Kangaroos, Terra Australis, Emma Jean Jansen, Ella Blue Fabrics
  • Catmint, Catnap, Lizzy House, Andover

White Background Fabrics (2024)

  • RJR Supreme Solid in White
  • XOXO, Basics, Rashida Coleman-Hale, Cotton + Steel
  • Dottie, Basics, Rashida Coleman-Hale, Cotton + Steel
  • Netorious, Basics, Rashida Coleman-Hale, Cotton + Steel

Grey background fabric (2615)

Now, lest you think I am super organized and really clever, here is what my shocking original fabric reference sheet looks like!!

Aviatrix Color Chart ORIGINAL

Hahaha. It's been through the war.

I chose several coordinating threads and here they are in my little tin. If you are interested which Aurifil thread colors I chose, they are listed next to the fabric in parenthesis. For the grey family, rather than matching each color, I chose a nice variegated grey, and another, softer solid grey for the background grey. All of the white fabrics will be quilted with true white.

I need a few more reds...but I'm able to get going as my greys are here and they were next!

I do plan to quilt this quite close, so I am hoping this is a handy reference in case I need it in future. It's a bit of an outlay to invest in so much thread, but I know how much I love hand-quilting, so I'm certain that these colors will be in frequent rotation!

That's about it for fabric & thread - hit me in the comments if you have any questions! x

I could see the texture of this from across the room. I love it so much!!

Monday
Dec082014

Aussie Aviatrix QAL - Butterfly Border!

Hi everyone! Thanks for popping by to have a look at my quick post on how to do the beautiful butterfly border! I'm certain you enjoyed Daisy & Jack's post on the log cabin border, so full of great tips! Thanks again to Linden for organizing the QAL and inviting me to join. :)

A quick note on my design choices: I did follow Elizabeth Hartman's color chart, but instead opted to work from my stash and use prints. For the white fabric, the only pure white is in the centre star, and the rest are various white-on-white Cotton & Steel prints. The solid grey background is Michael Miller Cotton Couture in Ozone and the white in the medallion is the RJR Supreme Solids white that came with Cottn + Steel. (I will list all the fabrics eventually!)

Butterfly Border in situ

Let's get started!

First things first - butterfly wings! If you're not fussy cutting, I found it was very easy to just stack up several layers, draw around your template on the top layer, and use your rotary cutter and ruler to cut along the lines.

I did fussy cut a few, and I will show you how to do that. Gather up your tools - your templates, scissors, a half-chewed up pencil, a ruler, a rotary cutter (not shown because of grabby hand toddlers).

Tools & Supplies

I wanted little cheeky kitties for this one so I traced around a few. I'm missing a point there but it's okay as it's not inside the seam allowance (which is drawn on my template plastic).

Fussy cut

Now - my fabric for the background has a right side and a wrong side. If you double it over, wrong sides together, as shown, you can get all four pieces from just two cuts.

Wrong sides together

So lay down your BG template, draw the angle, and then turn it around and complete the rectangle.

Marking your background units

You can do this the whole strip of fabric, but since I'm just making the one block, I'll stop here and use my rotary cutter and ruler to cut them out. :)

Use rotary cutter to cut along lines

I had my neutral stems all cut out in advance, so I could lay the block out to admire it (and make sure I was sewing it correctly). :)

Lay it out

Here's where I deviated. I have sewn enough triangles to be able to eyeball a 1/4" seam and know where the little dog ear falls off, so I didn't bother marking a single one of these. I am a terrible blog hop person for not showing you how to do it with the marked dots, so if you are not a confident sewist, you should definitely mark yours! But if you're after a quick cheat, you can lay yours out like this and check the seam line against your ruler. See how that quarter inch line comes at where the points meet?

A 1/4" seam

Once you've sewn it, press the seams. I pressed mine outward from the centre, but you might want to press them open - that is up to you. (I opted for quick!)

Pressed and ready to meow

Sew your stem on. And voila! A very blurry picture. (Sorry. Don't know what is going on with my regular camera!)

Finished block

I pressed my blocks like this, with the stem being completely obscured on the back. It still lays pretty flat and looks pretty good, and as I know where all the seam lines are, I can hand-quilt it accordingly. (I use different needles for different thicknesses!)

Back of the block

So that's how to make a single block!

I organized mine for chain piecing by separating them into color piles. The butterflies are actually pretty easy as the colorful fabric coordinates with the neutrals, eg all the Fabric 1 colorful wings will have Neutral Fabric 1 stems. I then put them on a work tray and used my test butterfly block to encourage me along. :)

Encouragement is required for this final border.

It got a bit messy at times. I had to perk myself up with coffee. (Pun alert.) By the end I was just chain piecing entire sections one BG triangle at a time, snipping it, flipping it, and doing the other side. I pressed in bulk, then added stems to one side of every finished wing piece, pressed it, then added the other finished wing piece.

I am newly inspired to finish my Aviatrix Medallion quilt top since I get to meet @vinelines IRL tomorrow! #sewsewsew

Chain piecing it in sections does make it go a LOT quicker - and once you've made a few, you get a feel for where the seam line goes. Here are all my finished blocks, ready to be plucked from their little grid and sewn into rows! (This was very late at night a few weeks ago.)

YASSSSS.

I followed the pattern exactly, as it was much less of a bother than figuring out an alternative. Haha.

Here is my finished, basted quilt top as of yesterday! It's being hand-quilted.

The full quilt top, basted & ready for hand quilting! #aviatrixmedallion #aussieaviatrixqal At #sydmqg ready to show it off!!

(A close up of the hand quilting just to show it off a bit. I'm using Aurifil Mako 12wt and applique needles with a thick 16" hoop, and hoping to get it done in a few months. I've got a lot of TV shows saved up to watch while I quilt.)

Quilting has begun!

So that's it! I think the butterfly border was pretty quick once I got into a rhythm. It's not a one-hour border, but it's a solid half-day of sewing if you prep well. Even better if you don't have to check to see that your fabric is right sides together...there's an argument for using solids if ever I heard one. :)

Happy sewing and thanks again for having me!

Penny x

Saturday
Sep202014

English Paper Piecing

Hi everyone! Whew, it's been so rainy...today is such a nice day, so sunny and actually kind of warm, I'm really enjoying it! Of course I'm in a cafe with my computer but shh, let's just pretend I'm a beachy person. :)

A few evenings ago on Instagram I hosted an impromptu how-to on paper piece hexagons. I thought I would share that here and elaborate a little, answering the questions I got along the way!

(Firstly, let me say that I call myself a thread-baster but I do use glue. I will explain, but bear with me, you'll need both thread and glue for basting!)

Paper piecing tutorial starts now! Supplies: peeper (mine is from @kimbradleycreations), paper pieces, either a regular glue stick or a Sewline glue stick, fabric, thread, needle, scissors.

Gather your supplies. You need fabric to fussy cut, a peeper tool (or a home-made one, see below), good sturdy needles, sharp scissors, a glue stick (either a Sewline or a plain old school stick), a pencil, thread, and of course, paper pieces! I buy most of my paper pieces from www.paperpieces.com. They do what they do extremely well. (They also sell acrylic templates/peeper tools!)

Got everything? Sweet. Let's get going!

1. Centre your design for fussy-cutting, and trace around it with a pencil. (If you have sandpaper board, it helps to keep your fabric in place as you trace around your peeper!)

1. Centre fussy cut design in peeper, trace around outside if peeper with pencil.

2. Using sharp scissors, carefully cut along your traced line.

2. Cut out with scissors.

3. Smear a little tiny bit of glue onto the back of your paper piece -- NOT your fabric! I've found it's a lot easier to toss a too-gluey paper piece than try and rescue oversticky fabric. You do NOT want a lot of glue - really just enough to make the back of the paper tacky. It shouldn't move, but it should be easy to peel apart. Stick the sticky side of your paper to the wrong side of your fabric. Hold it up to a light source to centre your fussy cut design if needed!

3. A smidge of glue on your paper piece. Then wrong side of fabric meets paper!

4. Single thread a needle with a double loop knot. (I roll the thread around my finger and pull, and that usually forms a nice lumpy knot.) Fold the edges of your fabric down around the paper, tucking in the corners. Being careful not to pierce the paper, bring the needle under the fold of the fabric and pull through. Create a loop exactly over the same stitch -- this fastens the corner down.

4. Single thread, knotted. Fold one corner under. Tuck needle under and through all fabric but MISS the paper, pull thread through, and place needle in the same spot again to secure it.

Keep going around until you have double-looped each corner. Finish off by making another loop on your first seam. This keeps it basted until the end of days, pretty much. :)

(The back of a hexagon basted around, not through, the paper.)

That is how I thread-baste without going through the papers! This works for hexagons and diamonds up to 1.5" per side. (After that it gets a bit complex, and I find it easier to baste through the paper.)

Go ahead and make a few more! Then let's sew them together!

Place your hexies right-sides-together. Starting a little bit in from the end, make two stitches going back toward the end of the hexagon. I whip-stitch, so I push the needle through, then pull it across and repeat the exact same procedure. Top through to bottom, 1mm apart. Take care not to pick up the paper within the hexagons - you should be sewing around it. Once you have finished a row, make two securing stitches. 5. Right sides together. Starting 1-2mm in, whip stitch to the end and turn around. Whip stitch entire length using tiny, uniform stitches. Do not catch the paper inside - after a bit, you learn to feel for it. Back stitch after finishing a seam.

Now to make a Y-Seam. Sort out your next hexagon and match it, right sides together, with one of the two hexagons. Sew that seam inwards toward the Y, making sure to backstitch at the beginning. When it is attached on one side, but not the other, FOLD one of your paper pieces in half to match up the other seams. It's totally fine! Sew and finish as usual.

6. Worried about Y seams? Sew one side down the usual way. Turn it around and fold the paper in half to accommodate the other side. Easy peasy.

Look! You did it! Yay!

Ta-da!

That's how to do hexagons. These are 3/4" and I used Michael Miller Cotton Couture and Tula Pink for this tutorial. Let me know how you do and please let me know if you have any questions!

Cheers!

Penny x


Note: To make a peeper tool of your own, use template plastic or cardstock. Draw around your paper piece. Add 1/4" or 3/8" seam allowance to each side. Cutting carefully, cut out the centre of the peeper (your original shape) to form the viewing window, and then cut the outside line. Label it so you know what size it is, and you're good to go. :)