Wednesday
Apr162014

WIP Wednesday, the one where I realize it's been a month since I blogged!

Wow, April has gone by fast. March went by fast. Time is going by so fast! And yet I fail to blog. I used to do this every couple of days; something tells me I am on Instagram when I should be blogging...oh well, feel free to follow me over there! Anyway, linking up with Lee this week...

WIP Wednesday at Freshly Pieced

Anyway, let's get caught up, shall we? :)

Completed Quilts:

  • Spool Quilt - "A Raccoon in my Sewing Box" - I really enjoyed making this one. From Alexia Abegg's fantastic Liberty Love book. If you don't already have it, really, you should get it. Such a great book.

  • Teaching Tool - I made this color chart as a way of showing people how I work through color in a portable, cute way...but am considering releasing it as a pattern. So this will probably be a prototype!

  • Picnic Quilt (needs binding)

Completed Quilt Tops:

  • Constellations bee quilt - made by the members of the AusModBee, so I only had to make four blocks myself! It's destined for my couch. :)

In Progress Quilts:

  • Rose Gold (on the frame) - I am having a lot of fun with the quilting on this one. It was really helpful to draw out a pattern. I'm not sold on (my) feathers yet though!

  • Have a Heart Quilt - Pink (cut out)

  • Have a Heart Quilt - Purple (cut out)

  • Undersea Quilt (cut & trimmed but not yet on the design wall)

  • Cascade Show Quilt - blocks made, need setting

  • Southwest Sunrise Show Quilt - rows partially sewn

  • Rainbow Rays SydMQG Group Quilt - 2/6 Rows complete

  • Briar Swoon - all the blocks cut out

Stalled Quilts:

  • Sailor Stars - this keeps getting shoved down the list, for shame!

  • Rail Fence - I just need to get this one done
  • Magic Sherbet - Another one I need to just get done!
  • Oh Quilt - I've thought about retiring this, but I know if I just finish the damn thing I'll love it. So yeah.

Other Projects:

  • Supertote - Fabrics chosen but not cut out
  • DOG replacement - I received the pink fabric two days ago and the backup "dogs" arrived today. As soon as I'm able I'll start drafting a pattern!

That's me for this week - and my son is kicking up a fuss (how dare I not pay attention to him 24/7??? what a horrible mother I am) ;) so I'm off! much love and hopefully I'll blog again soon!

x


Wednesday
Mar122014

finished hexagon mini quilt

I love doing handwork. I love threading needles and wearing sore spots on my hands from my terrible technique and I love how hexagons look, piled up in colorful stacks. I maybe don't love the burning shoulder and throbbing neck I get when I sew too long, though...I really must visit my chiropractor!

Hexagon Mini

I have had this quilt top finished for ages but I left it at Kim Bradley Creations for a month or two as an example of the class I'm teaching there. I'm all set to go - I just need students! This is one of the variations on the original (king-size plus) quilt I am teaching. If you're in Sydney and interested, I teach

I have to take this back to Kim's but oh, I love it so, and I can't wait until it comes back to live with me in my house!

Finished Quilt Stats
Name: Hexagon Mini
Size: 31" square
Fabrics used: colors are all solid scraps (including shot cottons, Kona, Art Gallery Pure Elements, and Michael Miller Cotton Couture); sashing and binding are Architextures by Carolyn Friedlander for Robert Kaufmann.
Thread: Leftover Gutermann and shiny new Aurifil!


Friday
Mar072014

busy girl

I often remember to blog as soon as I'm tucked up in bed, and by that point it just seems too hard to get out of bed again and find my camera! Ugh at myself. I'll do a quick update and then talk about something that is very dear to my heart which will get me back on track for blogging!

Picture time. :) (These are all from my Instagram which is where you'll find me these days!)

I joined Hive 2 of the Aussie Instabee and this is my test block for my quilt - rainbow brights and low-volume fabrics for the Trellis block. It's a bit fiddly to make but I'm excited about making my 18 and getting 12 more in the post!

I'm extremely pleased with my test block.

On the last day of "summer" (aka neverending overwarm hell season) it was chilly enough I felt I could bust out my winter hat. GLORY BE!

Last day of summer, and it's chilly enough for my favorite hat. Winter is coming. BRING IT.

I cut out a HST quilt I've been dying to make for ages. Now to sew and slice and press and trim and sew again! No big deal or anything. *cries*

These colors can't be real.

AND! The Sydney Modern Quilt Guild group quilt is looking FABULOUS. This is just a corner of it. We used the Kaffe Fassett Pickle Dish pattern from Quilt Romance. Please buy the book if you're after the pattern - it's the easiest pickle dish pattern I've ever seen and totally machine pieced! I'll talk more about the variations we did over on the Sydney Modern Quilt Guild blog in a few days. :)

This is what 25% of our group quilt looks like :)

This is the stack for one of my show quilts. I am loving it. It's all Michael Miller Cotton Couture and very simple with only five colors (including white) and the pattern itself just sings. I designed it myself and I can't wait to show it off. But for now, a teaser!

Finally cutting this one up - it's from my Monday list!!

In the midst of having to get these quilts done to submit to show, I procrastinated and made a bag. This is a 241 Tote (the third one I've ever made) and it's upsized by 150%. This bag is ENORMOUS. I might try a 125% scaled 241 Tote next time! I will properly blog about this soon, too.

My 10 Gallon 241 Tote is finished! Complete with an iPhone & wallet pocket and a sleeve for my iPod too. :)

I'm not sure if I mentioned this but a few weekends ago I made an enormous quilt top by accident. I had the best AMH fabric, and some Pearl Bracelets and some of Tula Pink's meteors (from Birds and Bees) in blue, and they were stacked up waiting to become skirts. And oh they looked SO good together I made just one block...then another...then ten more...voila, quilt! I used the Hand Drawn Garden gold rose print (Social Climber) as a wide border to frame it, and perfection. Anyway I love it so much I decided it's for me. So I'm backing it with my carefully hoarded Mendocino Kelp Stripe in blush.

There are quilts you piece any old backing for, and then there are quilts which deserve nothing but the best: six carefully hoarded meters of perfect, pale pink Mendocino kelp stripe. #treatyoself

Just as I finished that quilt, a roll of batting arrived! That'll do me for a while. :)

My batting arrived... :)

For my second personal show quilt I'm entering in the modern category. I pulled out scraps and yardage and began making piles...sorting of course by color...

Second personal quilt cut out. My shoulder aches, but tomorrow I have help so I can sew these into blocks! :)

And I picked up my copy of the delectable Quilt Improv by Lucie Summers, gritted my teeth, and began doing something very foreign with my sewing: letting it get a bit crazy. No structure. No plan. Just color, and working in at least half of my color piles. I have three blocks to complete today (purple, green, red) and then I can measure, add the borders, and put it up on the design wall to photograph to submit. Whew.

Getting there! Three left. :)

Meanwhile, I have finished quilting my hexagon mini quilt. I love this thing so much. I finished up the straight line quilting last night and thought, hmm, how do I do those centres? I thought of hexagons...honeybees...beautiful flowers! I didn't bother sticking this on the frame, just FMQ on my Bernina. It's only 31" square and was eminently manageable. :)

It's not finished yet but I couldn't resist taking a picture. I love it!

So that's me all caught up! So far in this post I've promised to blog about the Ten Gallon 241 Tote! I must get tidying the house though, and myself...I just rubbed my ear to find it covered in biscuit. That would be my son, whose kisses are often open mouthed and full of food. But he's so lovely I can't help but kiss him back.

Oh and just as an aside, we have put Piper into speech therapy and I will probaby talk about that a bit. She needs weekly therapy to start but even after one day (and a few tips) I've noticed a positive change. Here's hoping we stay on a good trajectory!

Finally, I am hoping to begin a series on sewing notions and starter skills: what I use, why, where to find it, how it works, and ways to expedite the trickier parts of some techniques. It won't be too fancy, but perfect for beginners - stay tuned! I am hoping to have a weekly update!

Cheers,

Penny x


Monday
Feb172014

Rainbow Fins Tutorial, Part 3

Hi everyone!

This evening we're finishing off the rainbow fins for the Sydney Modern Quilt Guild group quilt. This tutorial covers how to sew the eyes and block squares on and discusses a final aesthetic tweak! If you're looking for the other tutorials, they're here:

Part One

Part Two

Our fins should have "corners" attached, and still be sewn to the foundation paper. Transfer the markings to the edge of the fabric side.

turn your block over!

Gently work the paper on the edge open with a finger.

test to see  if the paper comes away easily

Bracing your other hand against the paper, tear the first segment away.

gently tear the first seam

You can "pop" the seam of the next segment by just gently pulling the fabric at the seam. This makes it easier to get the next segment torn out.

Pull gently at the seam to "pop" it open

Once all the segments are out, go back and get the little 1/4" bits.

Pick off the extra bits!

If there are any stubborn bits of paper, you can simply pull them out with tweezers!

Pile of paper pieces

Find your "eye" piece and match it up with the markings on the fins!

Match marks on eyes and fins

Pin outward from the center, matching the markings up as you go, and easing the eye along the inside of the fin piece.

Many pins

Sew it VERY slowly!

Sewn

Take the second fin and your two square blocks. These are 4" in size and you can make them by rotary cutting them like you would any other piece of patchwork.

First fin complete, second fin laid out

Line them up against the edge of the fin piece and sew it together with a 1/4" scant seam.

Sew the squares on each end of the second fin

The two "halves" of your fin block will look like this.

The squares on either end of the second fin

To combine these two pieces, you attach the eye to the inner edge of the other fin piece. You need to pin the seam edges first, locking them as shown, and then match up the markers.

The seams should lock!

This shows the first two pins!

Line seams up

Pin like crazy as you ease it around. Sew slowly and be mindful of your pins!

Pins, so many pins!

When you are done you will have something that looks like this! Mine was very puffy and needed a good spray starching and a nice press with the iron.

In need of pressing

All four of the blocks I've made so far look like this. But they seem a little lacking!

Final Block Configuration!

So I added a pop of color in the form of HSTs to give those corner blocks some life! I think that's the way to go!

It was too plain in those corners. It needed something...those little scrappy HSTs save this block I think!!  #sydmqg #pickledish

Thanks for turning up and having a read of these tutorials - hopefully they were helpful!

Cheers!

Penny x


Monday
Feb172014

Rainbow Fins Tutorial, Part 2.

Hi guys! Thanks for visiting from the Sydney Modern Quilt Guild website!

Last time we left off with a perfectly paper pieced fin. That meant five rainbow fabrics and four low volume fabrics. Now we are going to talk about creating templates for the corners and the eyes of the block and how to piece the corners to your fin. Don't be nervous, today we're only doing ONE curve! (The next tutorial will cover the tricky bits. Don't worry about the square blocks and don't bother making a template for them - they can be rotary cut by ruler!)

Firstly, you need template plastic. It's stiff and you can get it cheaply at a local quilt shop or a bigger chain store like Spotlight.

Template Plastic and your pattern sheet

Then you need your pattern piece. Once you lay the template plastic on the pattern piece you can see through it well enough to trace!

Template plastic is see-through for tracing.

I like to line my straight edges up if possible, because I have a toddler and she knows the second I uncap a permanent marker and would do anything to get her hot little hands on it. So I do a shortcut but feel free to line up your edges or not!

Line up your corner with your template plastic

Trace the pattern pieces B and C onto the template, and be sure to transfer those match-up markings and pattern numbers. (If you ever do asymmetrical pattern pieces in future it can be handy to write "top" on the right side of the template as well. But that doesn't matter here.)

Trace your eye and corner!

Cut those babies out using crummy scissors. You know the ones, the sticky, ancient ones in the junk drawer -- NOT your nice knife-edge fabric scissors! (Look, mine are chicken-jointing kitchen shears.) :)

Cut out your templates. Use crummy scissors NOT nice ones!

Double up your fabric if you dare and trace the template carefully using a pen or pencil. This is your "corner". Cut it out using those nice, sacred fabric scissors.

Cut out your corners (do these two at a time)

Double up your fabric and trace your "eye" piece as well. Cut it out using your nice scissors. Maybe pet them a little. Scissors are so important.

Cut out your eyes (do these two at a time)

Transfer your markings as soon as you cut. I suggest this because I find transferring markings to be extremely boring, so I try and do it as soon as possible!

Mark your corners.

Keep your markings on the edge of the fabric. You don't want these marking showing up on the finished blocks!

(Mark your eyes.

Turn your fin over to find the markings on the still-attached paper. Transfer those to the front. the way I like to do this is with a pinprick and a pen.

Turn your ray over to find the markings.

Line up your centers. The fabrics should be right side together. Pin the centers together.

Pin center to center.

Pin outward, alternating sides. So pin the left middle, then right middle, then left again, then right again, then the ends. Make sure the diamonds line up, then ease it over those tricky curves and pin it firmly in place.

Pin like crazy

Turn it over and sew a scant seam (so a skosh on the outside of the printed 1/4" seam line) and sew very slowly, very carefully.

Sew it together!

I am really naughty and I leave my pins in right until the last second!

Press it outward and pat yourself on the back. You just sewed a curve! Aren't you great? (You are.) :)

Rainbow Fins Tutorial

Tomorrow I hope we will go over the trickier bits of attaching the eyes and the end squares - it depends entirely on how sick my little ailing family is. Stay tuned!

Penny xx


Tuesday
Feb042014

hello! i'm alive!

Phew! What a week. What a fortnight. I'm exhausted! Aside from making these little guys, I had a BIG couple of weeks.

Forced perspective, or A Lesson In Slowing The Heck Down. #hexagons

I did pretty well destashing my fabric. There were a few things I thought would go but didn't. And I have given up trying to sell my less popular quilting fabric. I might as well donate it. Apparently The Fabric Cave is now somewhere/something else, so I'll ring them up and see if I can drop my excess yardage and patterns off there. I am always happy to contribute to a good cause and Achieve Australia is a GREAT organization.

The Australia Day weekend was a biggie for me. Since I had two significant events happening on Wednesday the 29th, I had to work like a beast to get everything in order!

Friday night I hosted an Appreciation Night - basically me and my best three gal pals get together and watch a movie with someone we can "appreciate". For example, Ryan Gosling! Or Karl Urban! (Actually those might be the only two we appreciate.)

Untitled

HOW CUTE ARE WE ALL THO.

Saturday, Mr Poppleton did a big bushwalk and Kris came to hang out (and keep me company!) while he was out. That Sunday he went to an Australia Day party and the next day, Monday, the public holiday, since we were both home (and had two sitters for the kids, thanks Kat and Kris!!) we decided to move the bookcases out of the dining room into the living room.

Untitled

Untitled

Untitled

We have a LOT of books. Once the books were on the dining room table, we moved the units themselves, and fixed them to the wall! LIKE ACTUAL ADULTS! But oh, geez, I was kind of glad we had friends over to watch the kids because if there is one thing we Poppletons fight about, it's MOVING OR BUILDING FURNITURE. But it looks okay for the time being. After it was all done, Mr Poppleton said it finally felt like a real living room. I know exactly what he means. Books make a home.

Untitled

Since we still have to put the TV somewhere, we simply put the Expedit bookcases in front of our proper, adult ones.

Untitled

Someday I'll mount that TV on the wall above the fireplace. Then those two Expedit units can join forces and become a cutting table for my studio. :)

After the bookcases were done, I turned my attention to the sewing room. I had to clear off all three bookcases. Now, my husband's bookcase was easy to clear out - he'd never used it!! (Shocker, I know.) But you've all seen my stash. It's involved. So we stayed up embarrassingly late Tuesday night clearing those bookcases. My poor stash had to sit in a pile all night. Crowded. Unloved.

Untitled

My excellent builder/friend Clark was back at 10am sharp on Wednesday morning to add rails and shelves to these beautiful bookcases. Clark is AMAZING. I sent him a little chicken scratch over email, had a five minute conversation about shelves, and he divined exactly what I wanted – and absolutely exceeded expectation.

Untitled

Look at those perfect rails.

Untitled

And those perfect shelves!

Untitled

Best builder EVER.

From two shelves to six. He added twenty shelves total, and the new shelves are totally removable (you know, in case I ever start a fabric shop and need them to be bolt-height)!

Even though I was supposed to stain the new shelves, I couldn't help but stack a little bit of fabric on them...just to see how they look...

Untitled

They looked so great I added more fabric...

Untitled

And some more fabric...and notions too...

Untitled

Before I knew it, I was loading the shelves all the way. STAIN SCHMAIN. I'll do it later. When the kids are in high school, probably. :)

Something else MOMENTOUS happened on Wednesday. My QUILTING FRAME arrived!

Untitled

Wednesday night we were both so knackered that we ended up collapsing in a heap! But Thursday afternoon my husband got that wonderful, determined look on his face, and he whipped out his power drill and Leatherman and BROUGHT IT.

Untitled

Mister Blister in the bouncer because he refused to sleep! Too bad, we are busy building!!

Untitled

Drill baby drill!

Untitled

This is it, mostly done! Don't mind the carriage on backwards. That was just to get it off the floor!

Untitled

Then I had to piece my hexagons together. I stayed up all hours Saturday night to get this mini quilt top finished! This is the class I'm teaching at Kim Bradley Creations. But I'm starting next month!

Untitled

I LOVE THIS. It is one of the few things I've ever made for myself. I can't wait to quilt it! For now, it's hanging at Kim's!

Untitled

And, where the bookshelves were in the dining room? We put the table. And behind that, my favorite ever quilt.It's not properly hung but I don't care. I love having it up and I can't wait to stare at it while I quilt!


That's it for now - dinner is ready!

Cheers!

Penny xx

Wednesday
Jan222014

The Great Aussie Destash

Hi everyone!

I'm putting some details for the #greataussiedestash up on my blog! Link in profile. :)

This is very loosely organized but allow me to note a few things.

  • There are two start times, midday and 7pm. You can do one or both or just keep posting as much as you like during the day.
  • Please don't post the same things over & over again - you can wait until another day to repost if you are committed to destashing a certain item.
  • Please tag your posts with #greataussiedestash so others can find you!
  • It is up to you if you choose to ship to other countries and how you organize payments. I like using the Paypal invoicing system myself and I will gladly ship overseas but it's expensive - part of the reason for going with an Aussie destash! You can accept bank transfers or swaps too!
  • I know it says Aussie but hey, let's not forget our friends down in Middle Earth. New Zealanders, you're invited too! 
  • If you want to clarify something for a single buyer, feel free to use the individual picture feature in Instagram! That might keep your feed free of unrelated pictures!

Cant wait to see what you're all destashing! I have TONS of fabric and scrap packs, including books!!

(sneak peek of mine!)

Destash!

Happy Destashing!!


Wednesday
Jan222014

wip wednesTHURSDAY!

Oh hi, THURSDAY.

I'm not behind. I've been busy.

I have been fairly productive this week, surprisingly. I washed the car on Sunday and hung out the washing on Monday, so of course, it's rained all week! There is no rain dance stronger than a clean car and four loads on the Hills Hoist, is there?

WIP Wednesday at Freshly Pieced

Of course I'm linking up with Lee!

This week, due to the rain, I've been spending some quality time scrivening away. I am really ready for my manuscript to be done, so my betas can read it again and give feedback and then I can look for an agent and maybe...get it...published...someday...ellipses...so many ellipses...

My manuscript's biggest problem is that I have other things to do! But I pick up my laptop, and there it is, full-screen, begging for edits. And an hour goes by and I look up and realize that Piper has taken off all her clothes and Owen has pulled all the toys off the shelf. (Whoops.)

All right, that is as it is, so let's get on with quilty and sewing stuff!

Last week the Sydney Modern Quilt Guild kicked off the first meeting of 2014! We talked over color choices for the group quilt and happily I got some hexagons started for my teaching samples. That starts in, GULP, just a few weeks!! WOW!

Meanwhile, how cute is our BOM quilt? Yeah? You jealous? Join up, it's a free pattern...that I wrote, so I plan on teaching this as well! (But you really should join, it is a super great group.) :)

Sydney MQG sampler complete! There is a good chance I'll be teaching this quilt this year, INCLUDING how to sew a machine binding that looks amazing. :)

I loved showing off my quilt, but I needed to get organized for my hexie samples. I raided my scrappy solids for warm and cool colors. I use both glue and thread basting techniques for these little 1" hexagons. I use a dab of glue stick to stick the paper to the fabric, then I go around and thread-baste around (not THROUGH) the paper. It means I can take a whole stack and get them ready to baste in no time, and I only have to process big batches once in a while!

Hexies for teaching

I also decided to use my shot cottons for hexagons. I've only had these 8" square packs for a year and a half, oops! Haha!

Hexies for teaching

Since school starts next week, I've gone off the beaten quilty path and decided to make a new wardrobe for Piper. I have enough fabric for a million dresses but I decided on six. So far three are in the cut out/partly contstructed stage...

Piper's School Wardrobe

I like to do this in little phases so I can go around and finish the inside seams with my serger and then just sew the top to the bottom, hem, and add a zipper!

Here is some fabric for more.

Baby dresses to be

And I did have a single quilty finish this week. Or a few weeks ago. Who can remember! It was gifted this week, which is the important detail. This is Mila's quilt.

Mila's Quilt

I made this with some solids (probably Kona?) and some of Lily Ashbury's lovely Trade Winds fabric. I got a lot out of that fat eighth bundle - it really makes me wonder why I buy half yard bundles!! :)

And here the back, using a gorgeous piece of Rooftop Garden.

Mila's Quilt

I quilted this with Aurifil on my Juki TL98P, using a crosshatch in the centre, stitching in the ditch around the pink border, and free-motion loops in the greeny border.

Today I spent ALL DAY destashing. I didn't sell everything but I made enough to buy my Mama a really nice sewing machine for her birthday. (Girls, if you read this, DO NOT TELL HER!) I was on Instagram for eight solid hours. I am a bit sick of it, to be honest, but so glad I participated. We have over 1,500 pictures under the #greataussiedestash hashtag! I didn't do much (I picked a date, whoop-de-doo) but I still feel really proud.

So yes, a lot of this was sold today! Hopefully I can spend tomorrow morning packing it all up and maybe even walk up to the post office to get it posted out! Wouldn't that be nice!


Destash!

GOODBYE FABRIC.

Since I destashed so much, a lot of people were asking if I have any stash left! I do. Oh, I definitely do. My poor, untidy "keepers" need to be cleaned up! My chippy came by yesterday morning to measure these beautiful bookcases up for extra shelves, so until he gets back to me, messy they shall remain!

My messy stash!

I'm going to love having a properly organized house. Which I will have to do anyway, since...MY QUILTING FRAME IS ON ITS WAY!!!

I'm dancing around with joy. It's all happening! Yay!

So that's almost it for this WIP Wednesday except a very special happy (belated) birthday to my friend Kat. You are amazing Kat and I am so glad we are friends!

Have a good weekend if I don't catch you before then!

Penny xx

Wednesday
Jan152014

color, in theory.

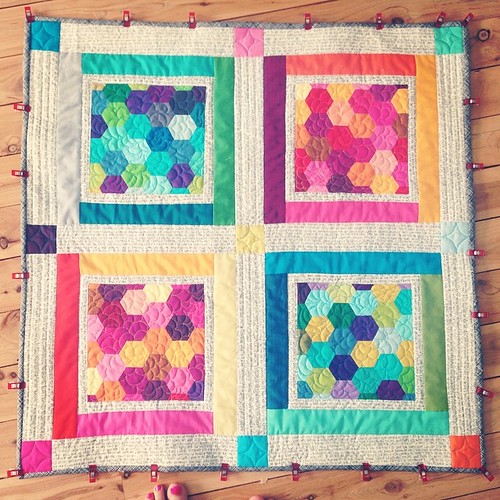
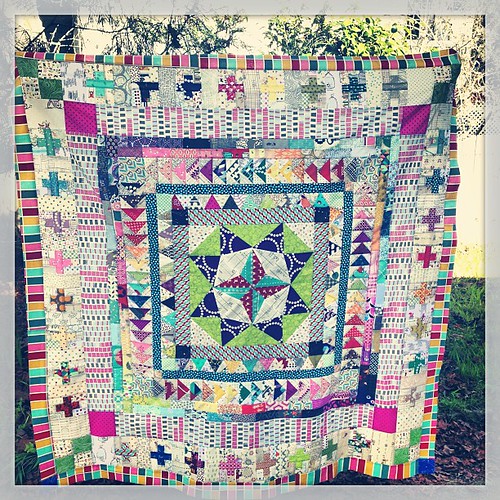
Hi, you gorgeous people. (Yes, you. You are looking exceptionally nice today.) I'm writing up this tutorial super-quickly for the fab folks over at the Sydney Modern Quilt Guild. Our group quilt this year is none other than the famous pickle dish pattern! While the Kaffe Fassett book has its own color ideas, of course we do things BRIGHT and BOLD, so here goes.

Playing with color today.

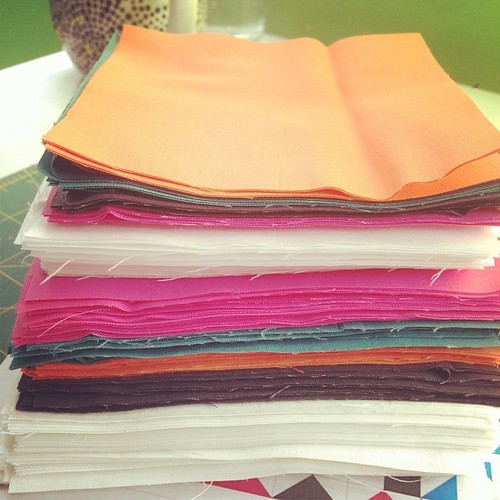
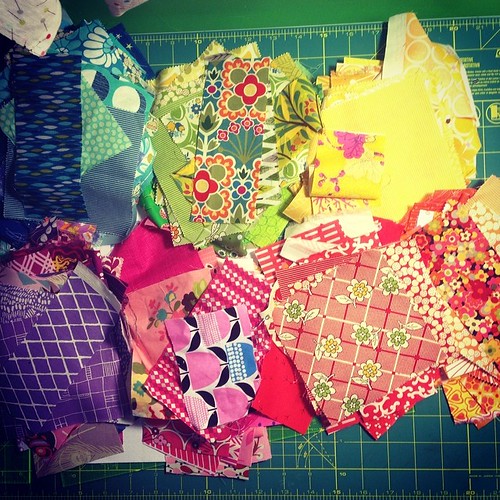
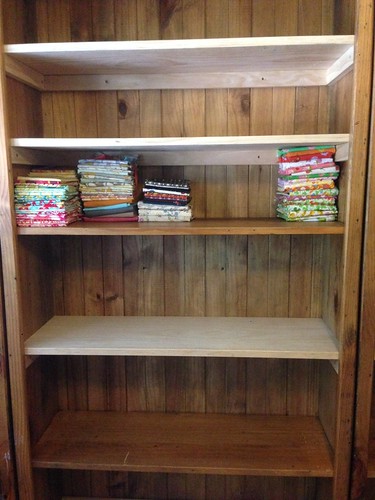
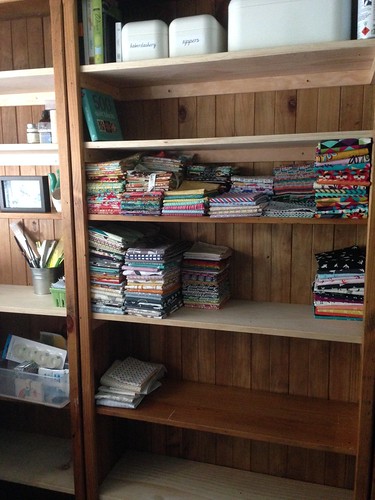
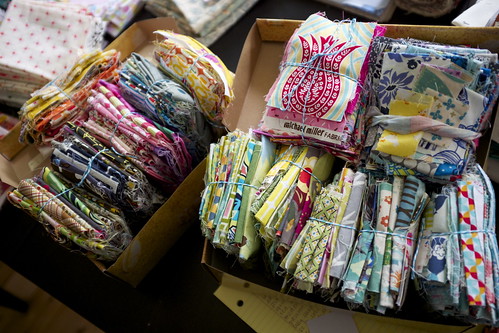
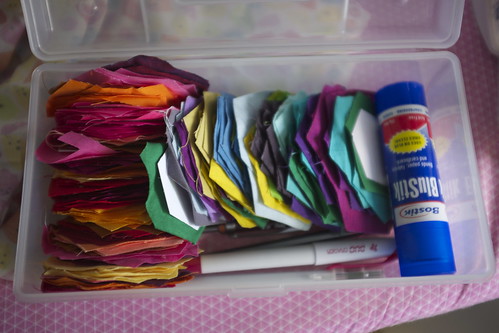
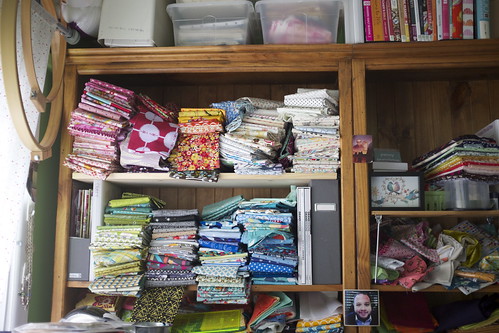
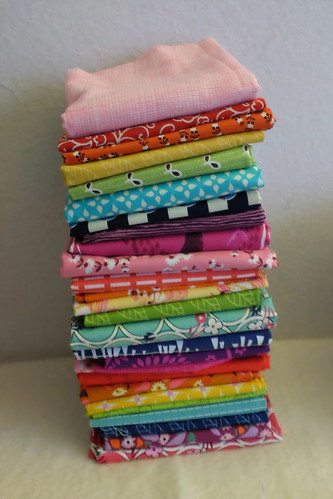
I'll start with talking about color versus low-volume. Low-volume fabrics are fabric that read as mostly white or neutral. Text prints, tonals, white on white and white with light or little prints all fall into this category. I have an obsession with low-volume fabric so I tend to stash it like mad. Here's a little stack for an idea:

Rainbow Fins Tutorial

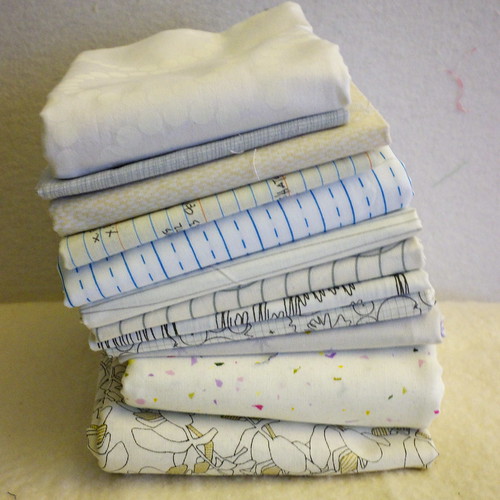
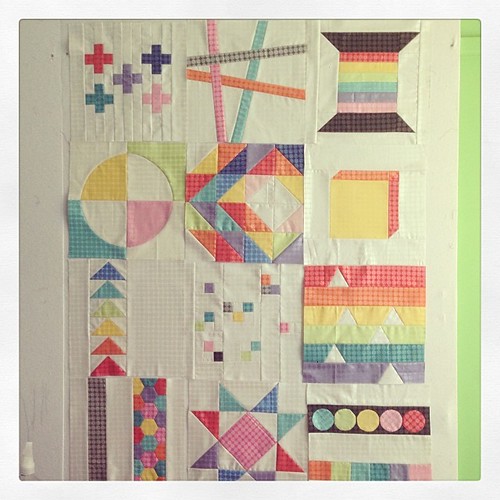
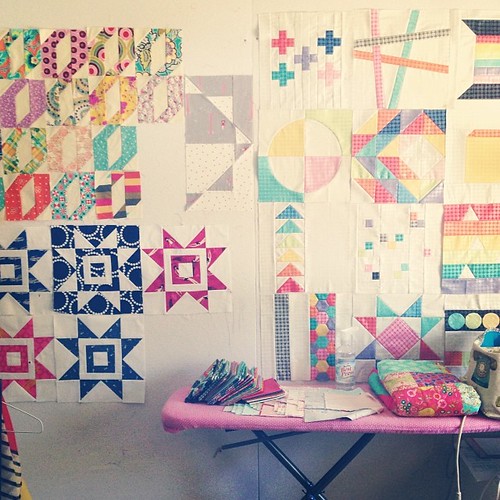
See how those all read white or light? Low-volume fabric works great as a background fabric, especially if you're going for a really scrappy look. I used low-volume as the background for both my Marcelle Medallion quilts (and probably will for the third one I'm planning) and you can see how scrappy and lovely they look.

marcelle medallion

Marcelle Medallion Quilt top - finished!

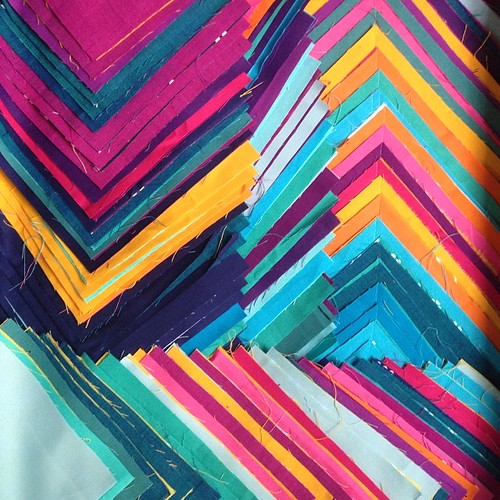
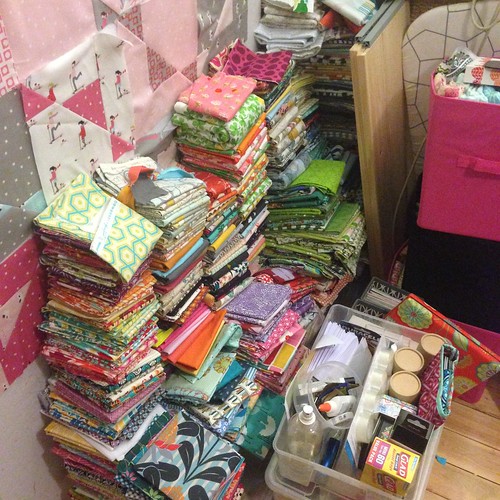
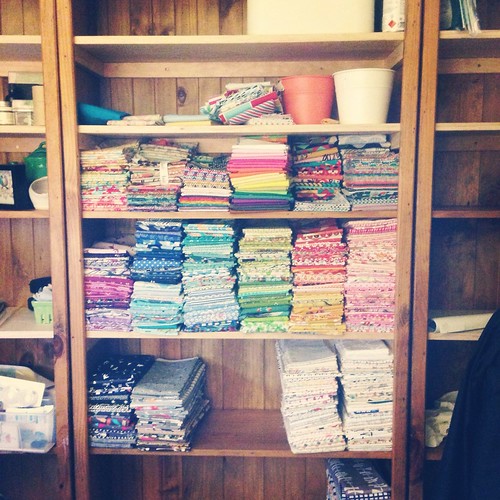
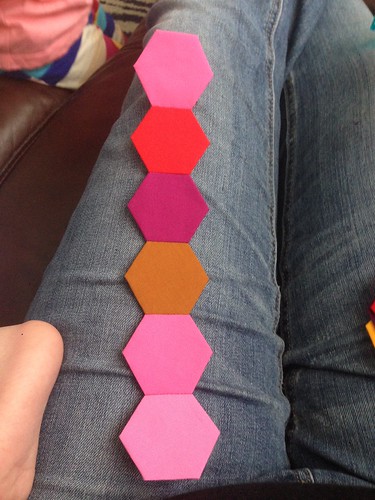
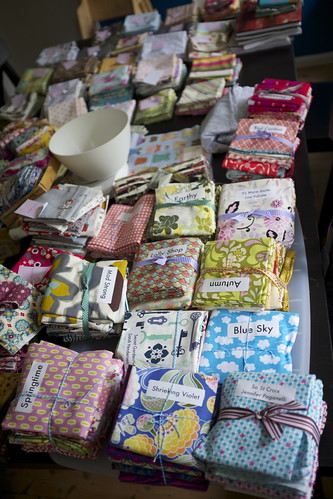
Now, for this pickle dish quilt, we're going for a contrast between low-volume and rainbow BRIGHTS. Brights are generally fabrics that make you sit up and take notice. Most of my colored stash is bright, modern, and fresh. (I also organize it in color order, to make a pretty rainbow effect.) Here we have a stack ordered on the spectrum:

Rainbow Fins Tutorial

And another stack, of a great range of basics called Rain (by Timeless Treasures):

Rainbow Fins Tutorial

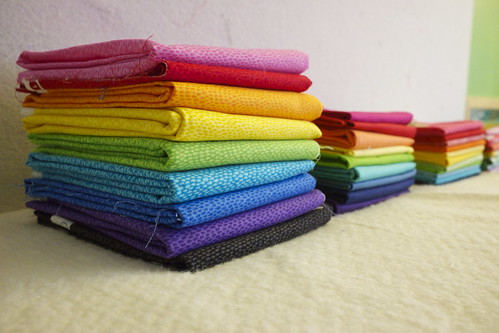
You can see how these LEAP out at you. HI THERE! BE MY FRIEND! I AM COLOR!

Playing with color today.

Also, note how they read as one color. While the prints vary in scale, design, and may even have touches of other colors, for the most part, they read as a single color.

Now, if your fabrics are muddy, muted, or very dark - as is the case with a lot of Civil War Repro fabric - they probably aren't brights. I'm allergic to those colors, so I never stash them, but as with all things quilting, someone else out there can make something really beautiful with fabric I would never look twice at! For this tutorial, though, it is essential that we have bright, rainbow-spectrum fabrics that read as one color. Not sure what color a printed fabric might be? Take a piece of fabric and shake it around in the air. What color is it then? If you still can't tell, it's probably too mixed to use as one particular color, and it qualifies as a 'feature fabric' - something you would build a quilt around.

The spectrum we're working from going something like this:

  • RED
  • ORANGE
  • YELLOW
  • GREEN
  • BLUE (medium/aqua)
  • NAVY BLUE
  • PURPLE
  • MAGENTA
  • PINK

On the the actual tutorial!

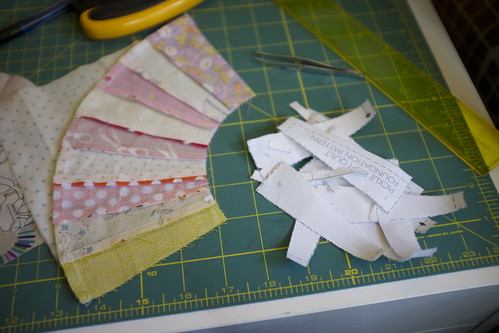
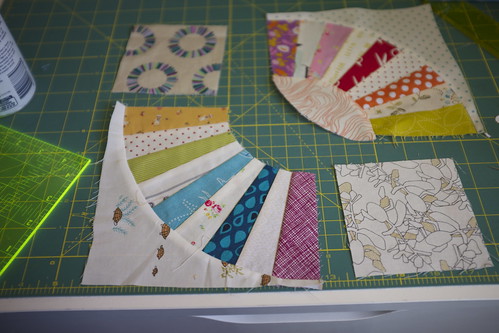
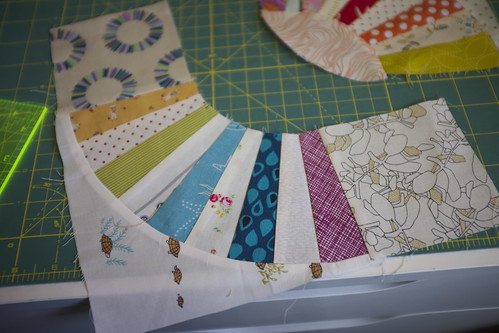
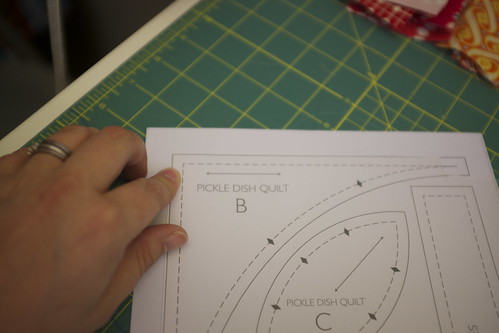
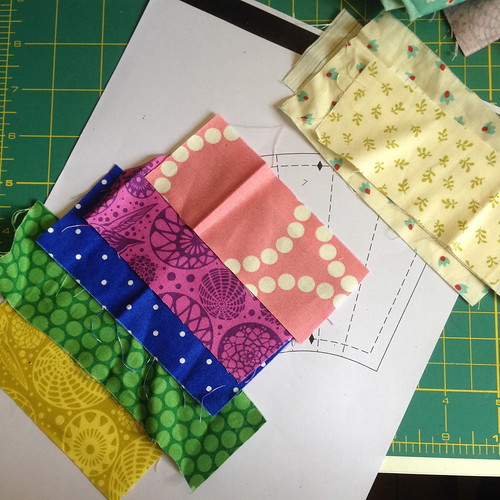
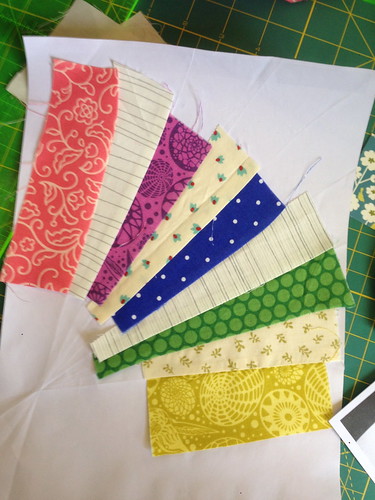
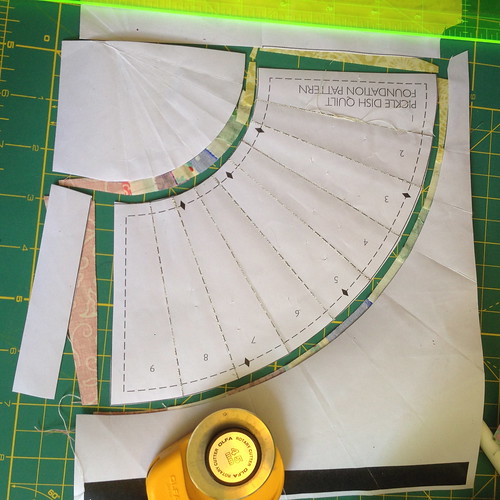
You will need nine pieces for each paper-pieced fan section.

  • Four low-volume strips (2" x 5.5" is what I cut mine)
  • Five spectrum strips (2" x 5.5")

To make a spectrum, simply start at one color and go down the list until you have all five. So if I decide my first fin is GREEN, the next ones will be BLUE, NAVY, PURPLE, MAGENTA. You can start anywhere on the spectrum and if you get to the end simply loop back around to the top of the list.

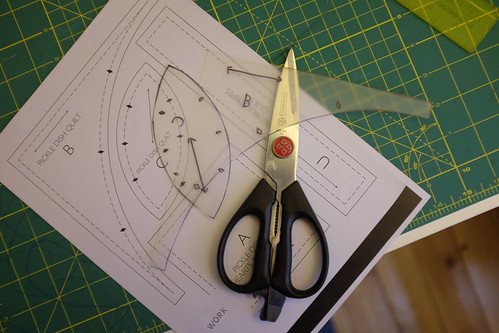
Now, look. I'm not going to go into a great deal of depth teaching you how to foundation piece, because a) small children, and b) literally hundreds of other people have done it so much better. (See here, here, and here.) So if this is too basic, please shoot me an email or leave a comment and I'll try and address your questions as best as I can!

Suffice to say, this is the easy kind of foundation piecing, as it only builds one line at a time!

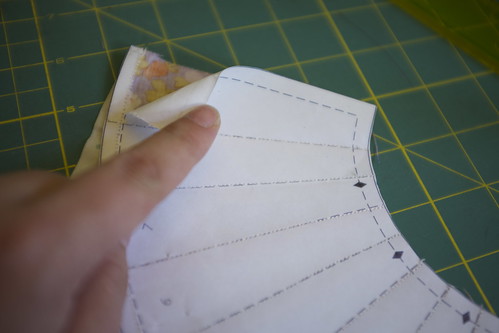
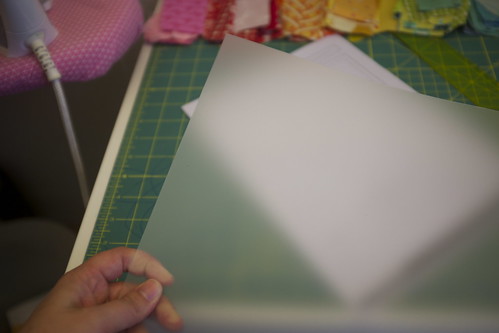
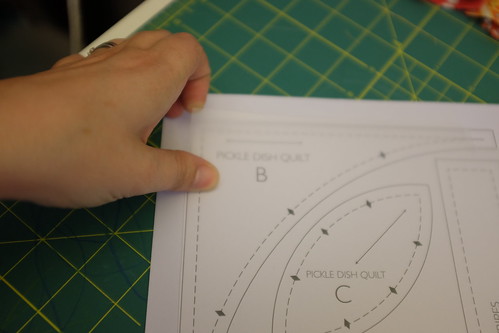
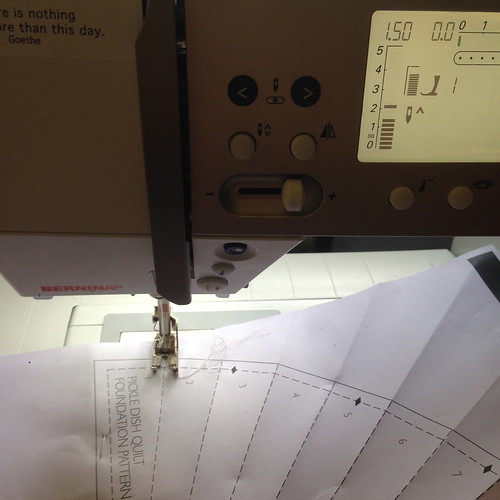
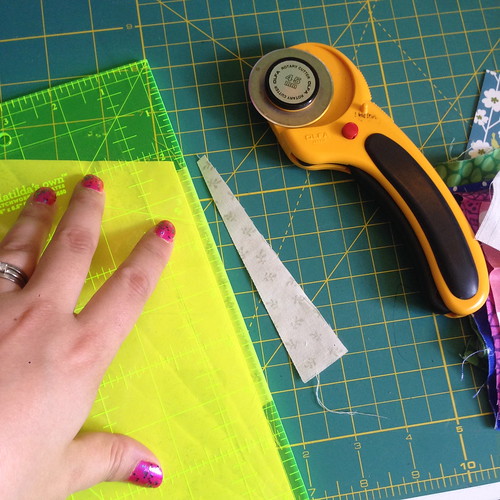
Start with your pattern piece and your fabric strips. Have your iron on, your rotary cutter handy, a ruler with a 1/4" measurement (a Quarter Plus or Add-A-Quarter are tops), and set your stitch length short. (Mine is usually 1.5 or 1.6 on my Bernina.)

Rainbow Fins Tutorial

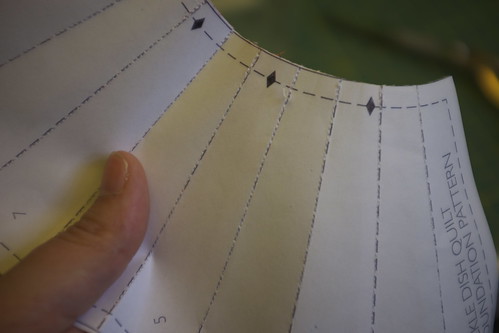
(I always fold the lines on my pattern before I start.)

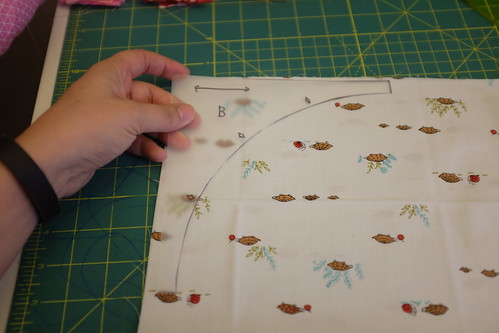
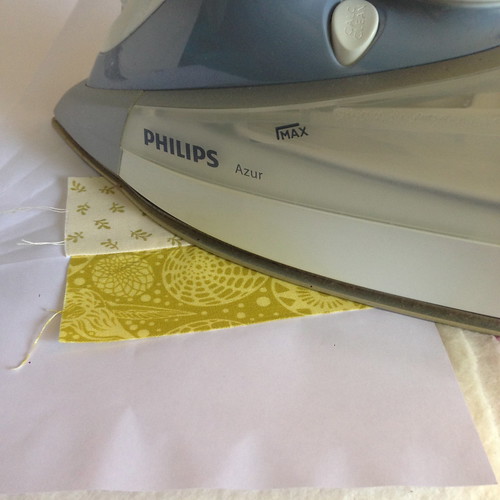
Put piece one (in this image, my yellow strip) and your low-volume separator piece RIGHT SIDES TOGETHER.

Rainbow Fins Tutorial

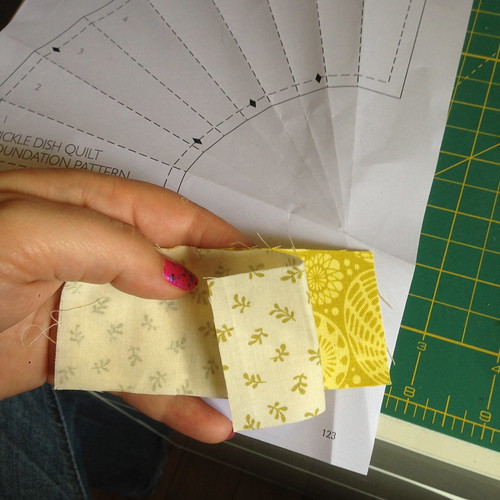
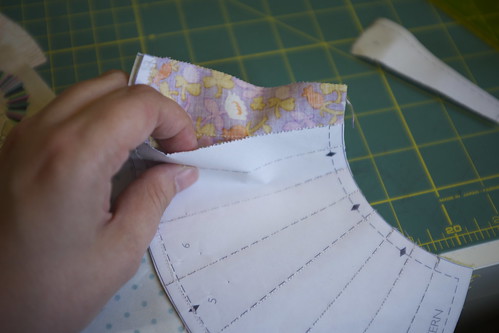
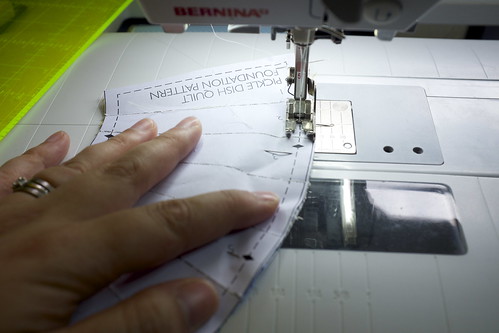
Hold your paper up against a window or light source, and, turning your paper so that the blank back of the page faces you, place the fabric, COLOR PRINT DOWN, on the back of the paper. The line between steps 1 ans 2 should be covered by both pieces of fabric by 1/4". You should be looking at the wrong side of the low-volume piece.

Rainbow Fins Tutorial

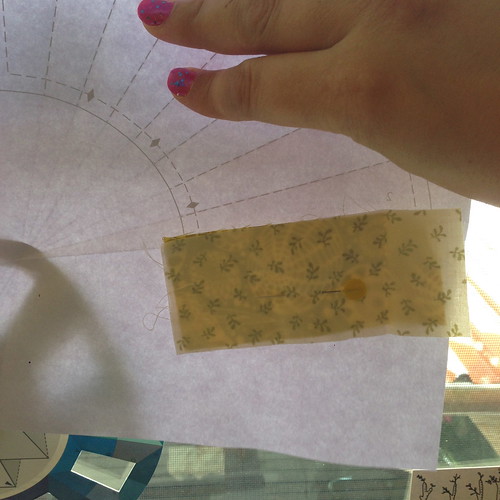
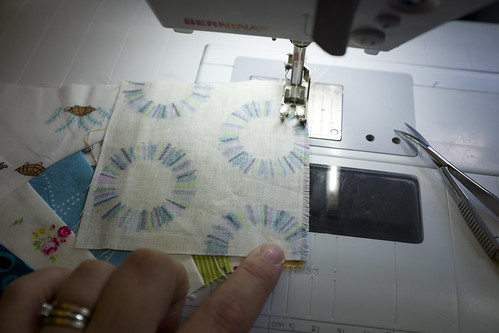
Place it, fabric down, in your sewing machine. Now you just get to sew along the lines! (Note my stitch length here, 1.5. My machine defaults at 2.4)

Rainbow Fins Tutorial

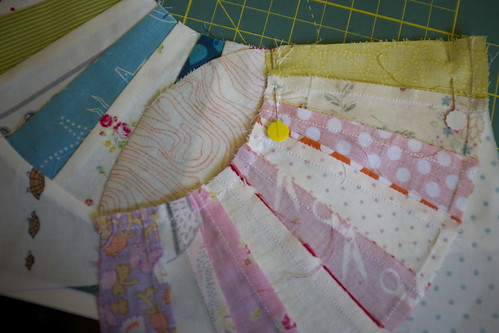
Once you've sewn the seam, open it up, and press it.

Rainbow Fins Tutorial

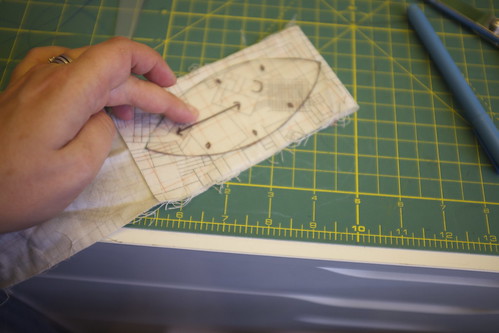
Now the line between the second and third fins should have a fold: find this fold, and fold the paper back beneath the stitch line so the fabric hangs out of the edge of the seam line. See it?

Rainbow Fins Tutorial

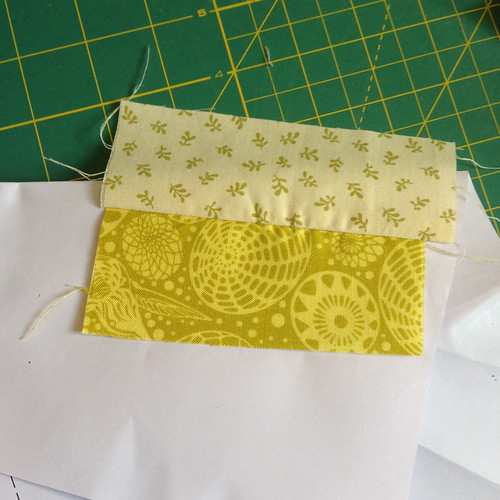
Take your ruler and measure 1/4" from the edge of the PAPER. Trim the excess fabric off. Now you can unfold the paper and move on to the next step.

Rainbow Fins Tutorial

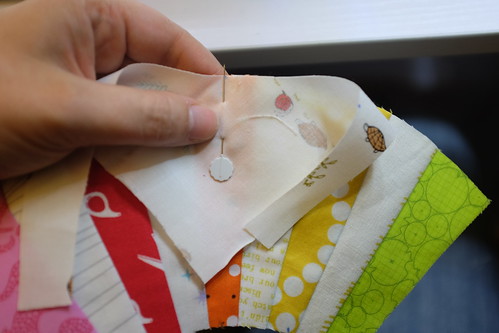
Now you will get your next COLOR piece. Set it, right sides together, on top of the low-volume middle piece, and pin.

Rainbow Fins Tutorial

Sew it on the printed side of the paper, then repeat the pressing, folding, trimming steps, alternating rows of your spectrum and low-volume prints!

Rainbow Fins Tutorial

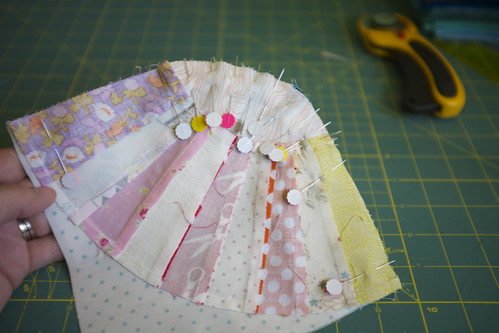
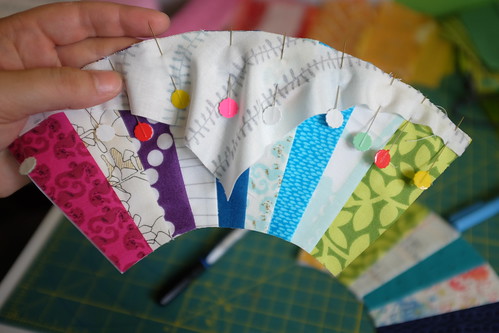
OH LOOK YOU SO FANCY

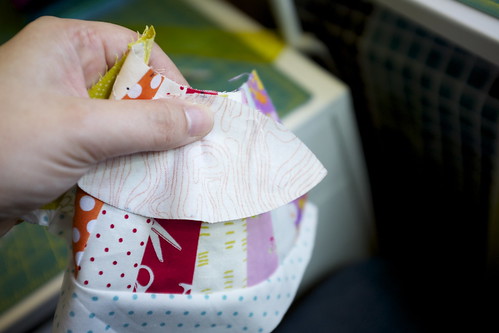
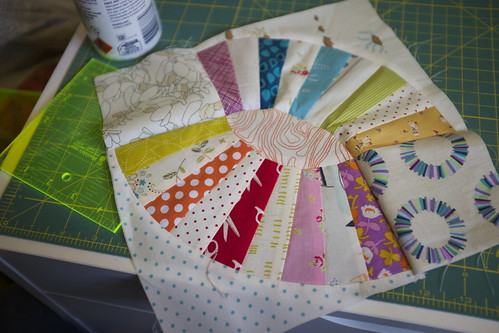
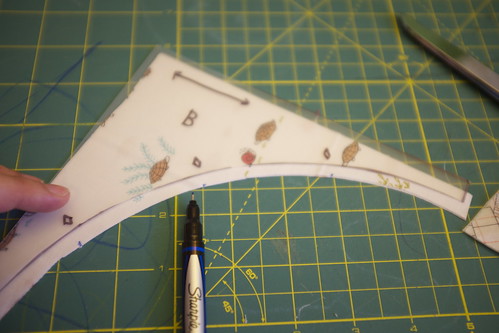
Now it's time to trim up the block! I just CAREFULLY freehand around with my rotary cutter on those curves, but I use a ruler on the straight edges and go zip zip!

Rainbow Fins Tutorial

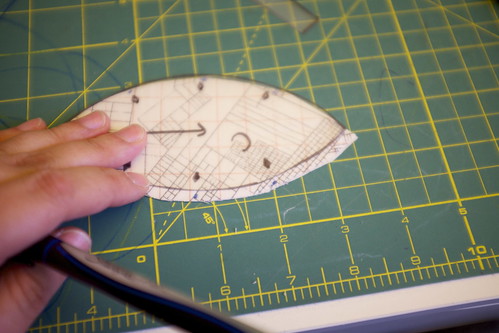
TA-DA. You've made a fan!

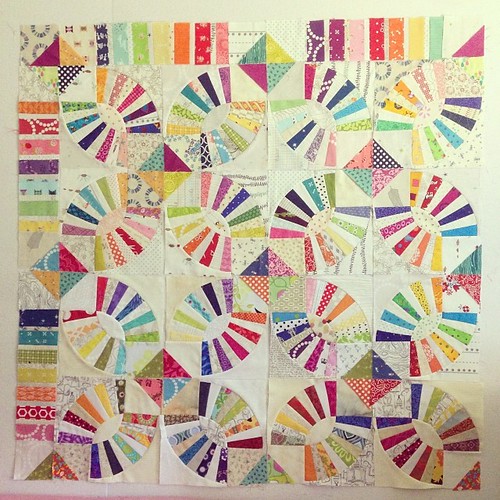
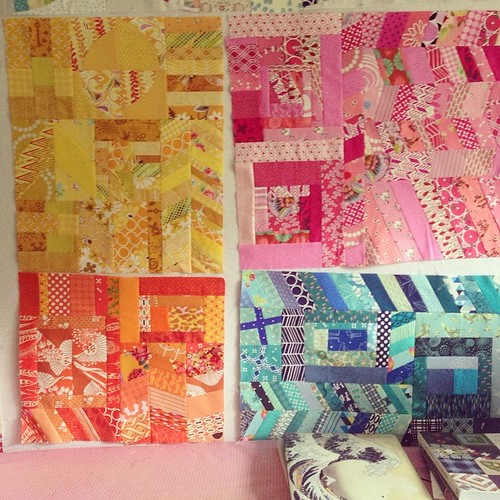
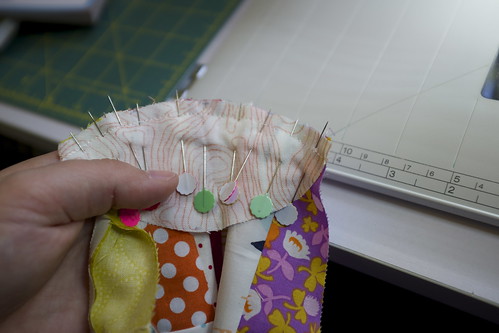
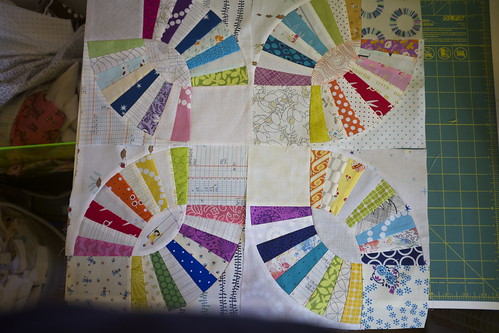
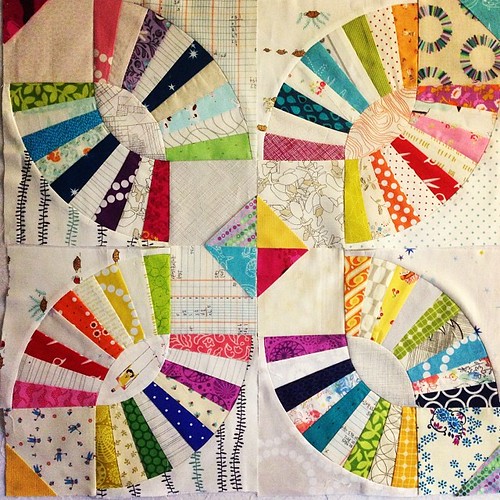
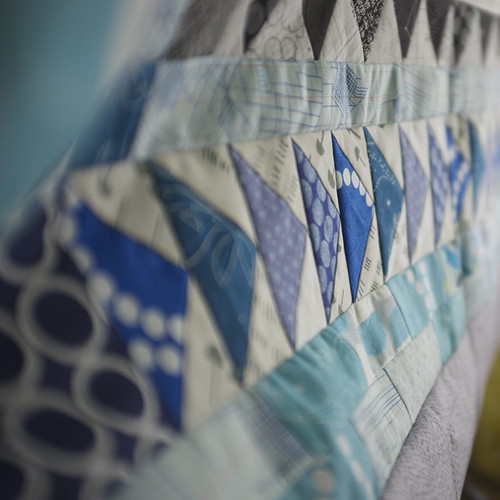
Next tutorial we'll talk about plastic templates for those curved corners and center eyes, but for now, here's a very "design wall" idea of what each block should look like!

Rainbow Fins Tutorial

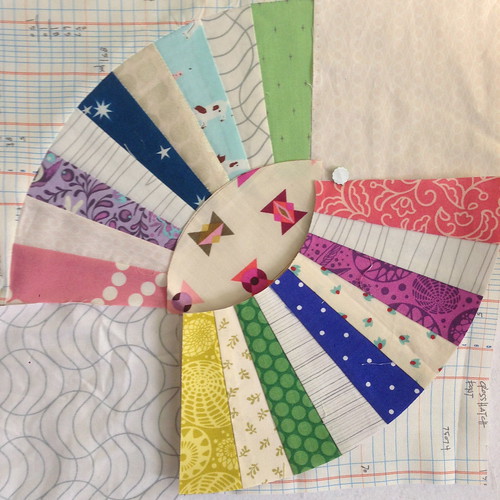
You can see how the brights really pop in that bottom one. In the top, I used too light a blue, and it's been bugging me, so I'll probably re-do it. I just make photocopies of the existing pattern piece before I start any paper piecing - it's insurance against mistakes and you can always make a cushion out of the "not quite right" pieces!

Let me know how you find the tutorial and if you have any questions shoot me an email or leave a note in the comments!

Cheers

Penny x

Tuesday
Jan142014

catching up, eternally.

It has been sixteen days since my last fabric purchase, and the very last thing I bought is now on its way. It's not the last quilty parcel, but it IS the last fabric parcel. It is a half-yard bundle of Catnap by Lizzy House, so I am happy. It's the perfect bundle to go out on, but an honorable mention goes to this stack of Liberty FQs, courtesy of my husband.

BY THE POWER OF GREYSKULL... #liberty

My goal, as you might remember, is to buy NO FABRIC until 1 July. And except for the month of July (my birthday; Cotton + Steel comes out) I hope I can last the year. It means missing out on a lot of great ranges, but let's be honest - would I sew them up straight away? Not at this point in time!

Pretty great mail day! :)

It has been a weird couple of weeks. Since deciding not to buy any more fabric, I've gone through a couple of stages. I destashed a bunch of scraps. I pulled out a lot of yardage and it has just been sitting in piles. I've bought several magazines in preparation of all the scrap quilts I plan to make. And I've been sewing and writing patterns.

Oh my good gravy it's done. WHEW! #sydmqg #bom #testblocks

I spent the last few months sorting out the entire year of meetings for the Sydney Modern Quilt Guild (a lot of crazy angst goes into finding a venue and luckily we have two great ones) and the above quilt is for our Block of the Month club. The pattern is free if you're a member but never fear - at the end of the year the pattern will be for sale! (All proceeds will go to the Guild.) So stay tuned for that, or, if you're local, consider joining - we'd love to have you.

Guild business aside, I've been busy preparing to make class samples - yes, I am teaching this year! I am so excited because I'll be teaching Tacha Bruecher's pattern Over the Rainbow.

You might remember this pattern from the enormous quilt our guild made! (Photo credit to the amazing Selina of course.)

It runs over four classes, the first Thursday of the month starting in February at Kim Bradley Creations in Castle Hill. I will be teaching the basics of color theory, English paper piecing, and variations on the (king size plus) pattern to make smaller projects! If you're interested in the class, please call up the shop and reserve a space - 02 9659 2912. 

Officially the last hexie blob to sew. Whew!

I have also been trying to purchase a quilting frame for my Juki. So far, no dice. I know what I want, and I've even opened a dialogue with the company that sells it, only to be referred to the so-called "Australian distributor" (who had no idea what I was asking about, and no stock, and no idea of stock would ever come in). After FINALLY promising to investigate shipping quotes, they fell silent. It's been more than a week since they've responded. I am about to take my money elsewhere, to be honest. Luckily, I am blessed to have a best friend who will let me direct expensive, awkwardly huge things to her home in the States while I sort out freight to Australia. A proper longarm is out of my reach for a little while (maybe five or ten years?) but you can do a lot with a Juki on a frame. I mean, just look at Trudi! She's a wizard.

So! On to my to-do list. My design wall was so crowded this week!

Chaos. Beloved chaos.

So from my old to-do list:

Tops that need piecing:

  • Terrain challenge Finished & gifted to Grandma Jean!
  • Kat's quilt
  • O quilt
  • trade winds II Finished & gifted to Baby Milla!
  • triangles Finished & gifted to brother- and sister-in-law!

Tops that need quilting:

  • spool quilt (scalp and requilt)
  • picnic rug (quilt, simple lines)
  • blue Marcelle Medallion (waiting to receive this from longarm basting)

Projects to be started:

  • hexagon sample quilt
  • hexagon table runner
  • third marcelle medallion - all in pinks and greens
  • pixel quilt not this year I think
  • show quilt - pattern resolved, fabric ordered, ready to be cut out!
  • voile quilt - decided on pattern! a giant sawtooth star
  • cushion covers - 3 more scrappy dresdens

New projects that crept onto my list:

  • SydMQG BOM quilt sample 1 quilting this on Thursday
  • SydMQG BOM quilt sample 2
  • Magic stars lap quilt

And, as I've determined that I am GETTING A FRAME, I'm going to earmark these quilts as ones I must quilt on my new frame, myself.

  • kat's quilt
  • picnic quilt
  • show quilt
  • voile quilt
  • spare rail fence quilt top I found

So that's it. This evening I have to write a tutorial - it'll be over at the Sydney Modern Quilt Guild page, and it'll be for our show quilt! (Which means, sneak peak!)

Hope I can make it back here sooner next time!

Cheers xx