Thursday
Oct172013

MMQAL: Cutting Border 7 

Hi everyone!

First off, let me apologize for this post being up three days late. I have been legitimately, awfully sick. I had a cold six or so weeks ago which turned into bronchitis and my poor body finally gave up in disgust last Friday. I've spent the last six days struggling with basic things like making sure my toddler doesn't climb up the bookshelves and remembering to brush my teeth. I have not felt this genuinely awful since Owen was freshly born. Yikes.

So: I am VERY sorry. I would much rather have been blogging (and SEWING!)

Anyway, due to gross, aforementioned illness and resultant embarrassingly late blog post, I won't be doing a giveaway this week but NEXT WEEK I will do TWO and they will be BIG! We are getting close to the end of the QAL so the grand prize(s) giveaway is on my list...just sorting out the last few details... :)

This week I want to chat a bit about Border 6, as promised last week, and we will talk about cutting the pieces for Border 7.

Border 6

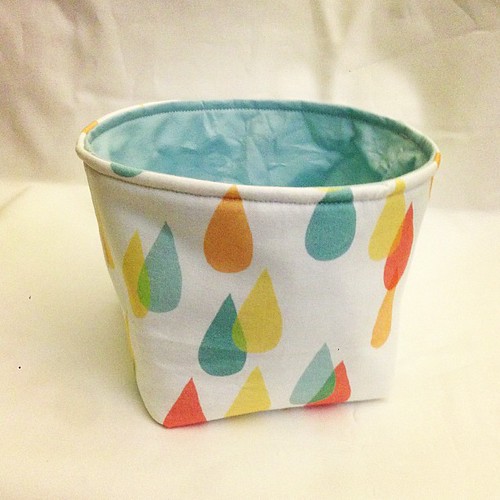
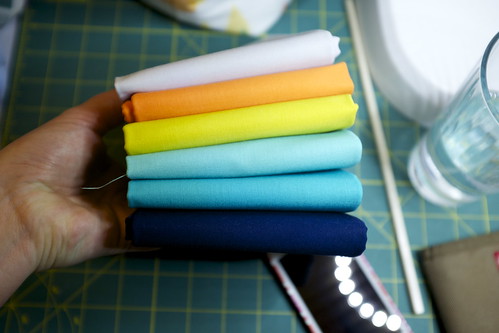
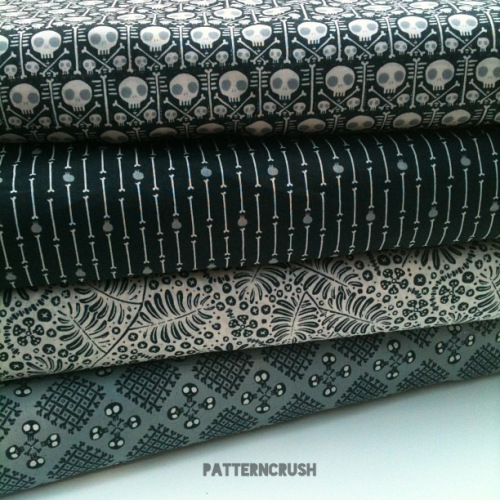
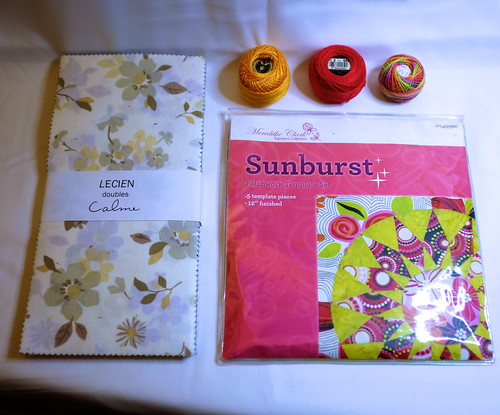
These are some of the fabric choices I auditioned for Border 6.

possible borders

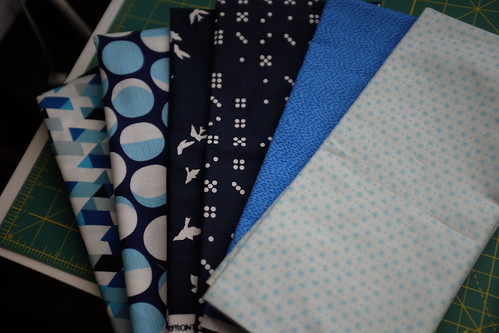
Constellations, Constellations, Waterfront Park, Waterfront Park, Rain Basics, Constellations.

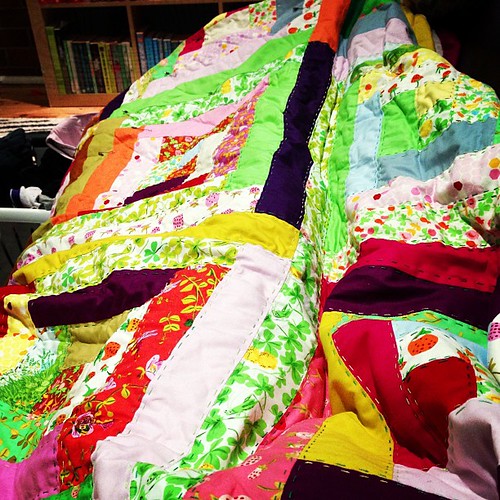
Because Border 6 is a large swathe of fabric compared to the scrappy borders either side, it needs to either stand out or blend in. In my first Marcelle Medallion, I opted for a scrappy-looking print that exacerbated the overall scrippity-scrap look.

marcelle medallion

So for my first MM, I ended up choosing the scarves print from Sherbet Pips, which I love, and it looks fabulously clashy in all the right ways. (That is sort of the beauty of this quilt, though. It's really hard to make ugly.)

I knew that this quilt was a bit more austere, though, and since I had so much restrained scrappiness going on everywhere else, I wanted to stick to the cool, very small-print idea. I wanted a print so fine and soft that the eye could rest. White was out, and I'd used black, navy, aqua and medium blue in other places. I needed something to fill that space.

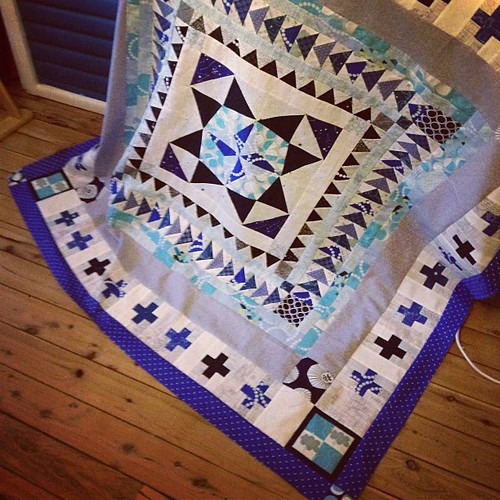
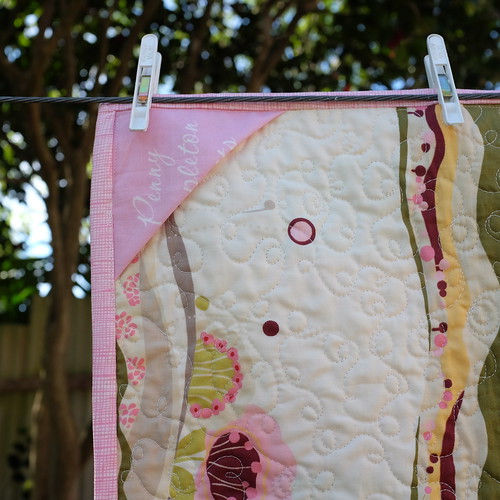
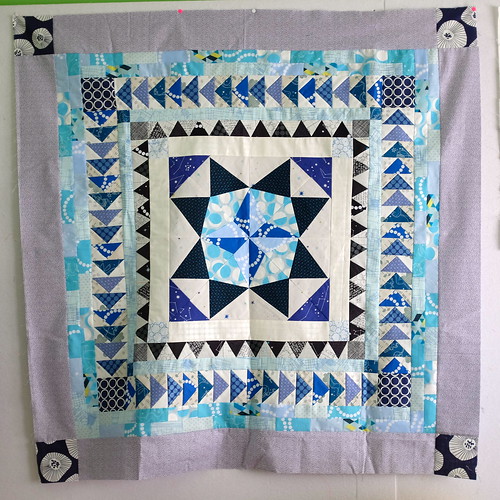
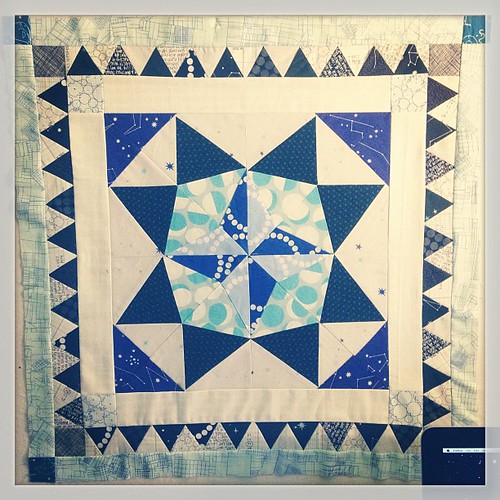
Ultimately, I chose Rain Basics in grey.

MMQAL

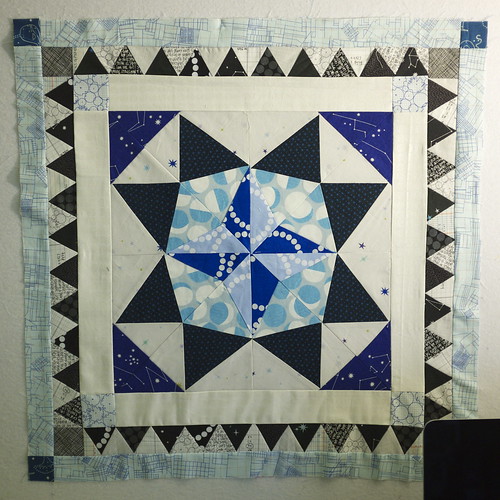
In the overall quilt, it gives a place to pause, visually. It stops you before your eye roves to those scrappy outer borders and lets you have a little rest. Like a rainy day does. Enforced calm. Ahhh.

Now, I have seen a few others doing amazing things with their sixth border...I am jealous of their fabric stash and of their boldness and brilliance! Check these out.

Mary on Lake Pulaski - love the gorgeous vintage vibe of this one!

Deb - this bright blue border adds zingy interest and makes the orange patchwork pop!

Becky - this truly amazing Waterfront Park themed quilt

Jess at The Elven Garden - I love this AMH border, it's like its own patchwork here!

I wish I had written down the quilts I particularly doted over...the ones that were so great, I would jab my poor husband in the knee with my iPhone saying, "LOOK AT THIS ONE!" but there are so, so many. And they are all so, so beautiful. :)
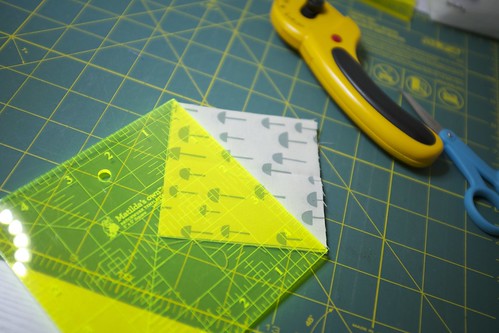
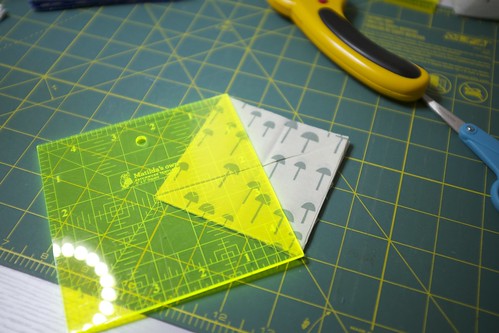
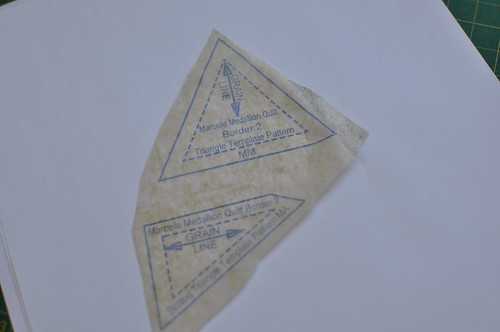
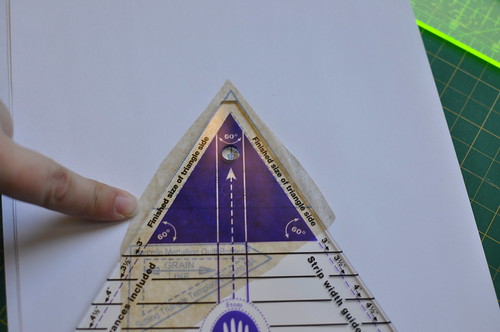
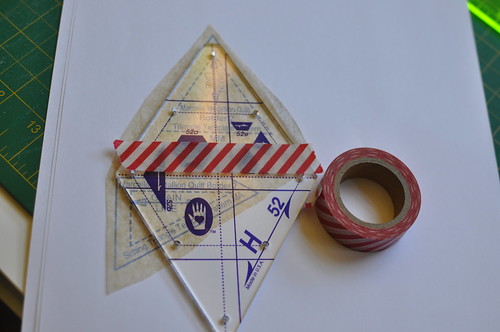
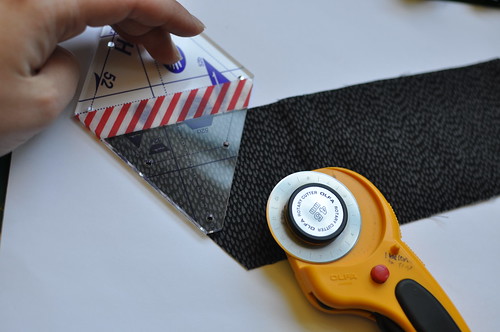
Cutting Border 7

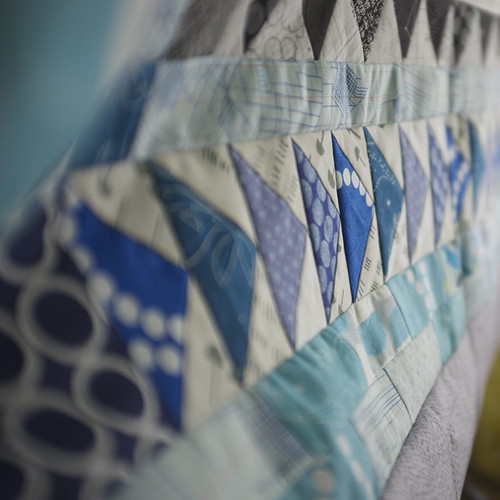
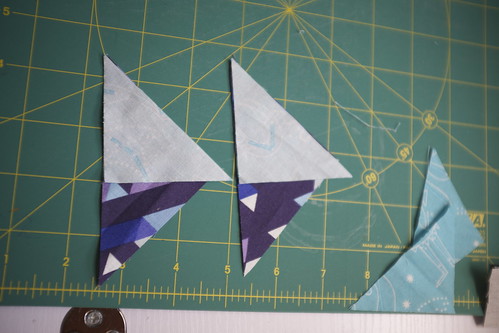
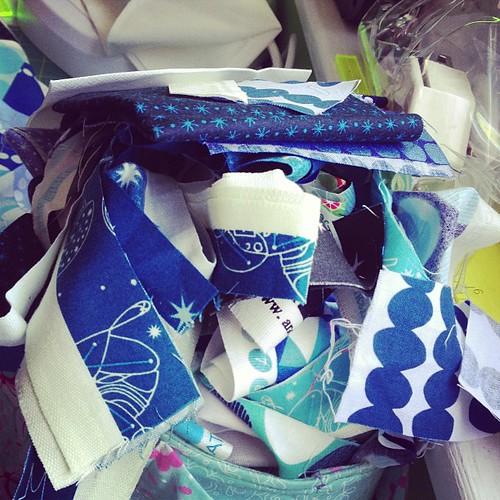
By the time I got to Border 7, I knew I would have plenty of scraps. And hoo boy, did I ever.

Concerned about cutting those flying geese? Head on over to the blog for a quick cutting tutorial & this week's giveaway (sponsored by @patterncrush)! #mmqal #marcellemedallion www.pennypoppleton.com

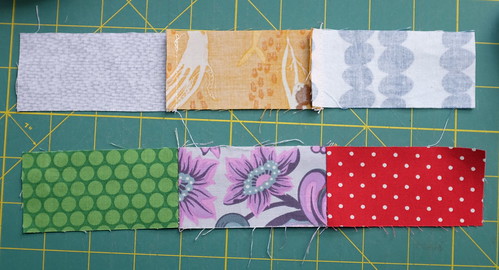
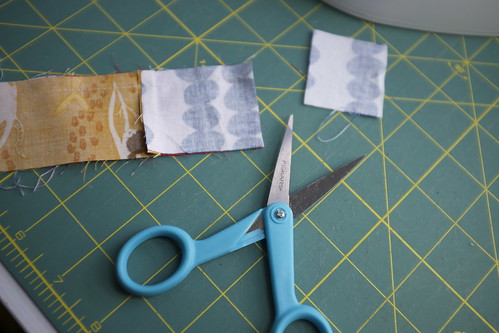
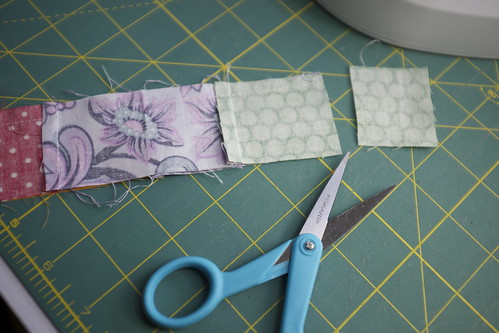
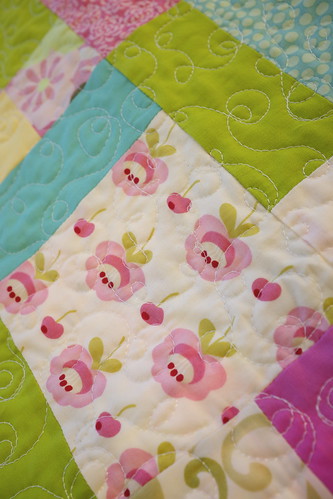
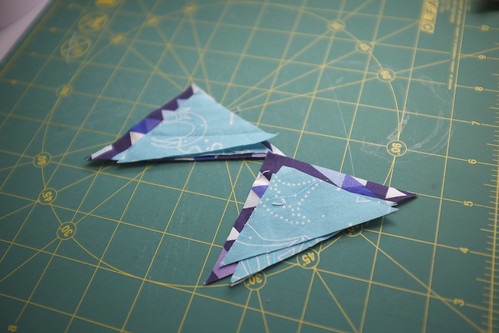
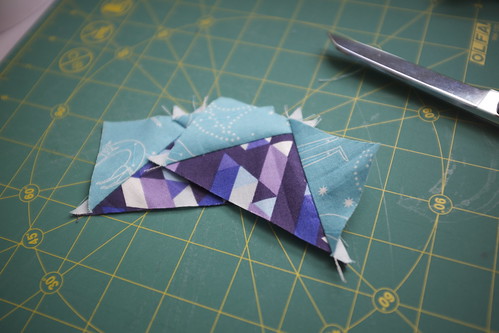
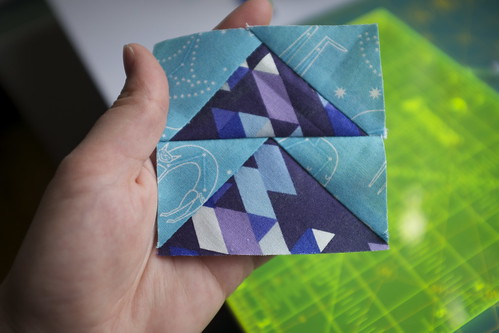
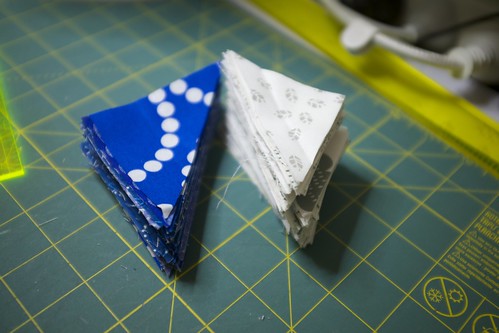
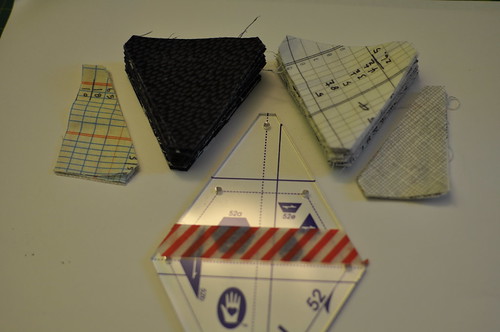
I narrowed my scraps down to four feature fabrics in nearly the same color range - there are three different medium blues and one black with blue accents! I wanted mainly the best constrast between my crosses and the background as I could get. I also wanted to stay away from something paler - it would have been washed away by my rainy 6th border.

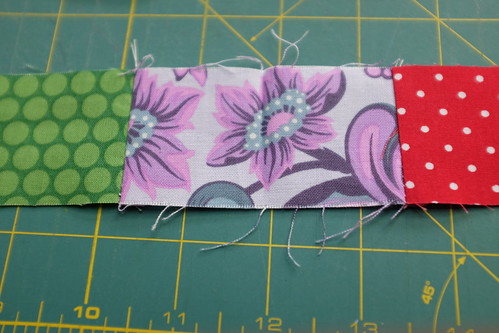
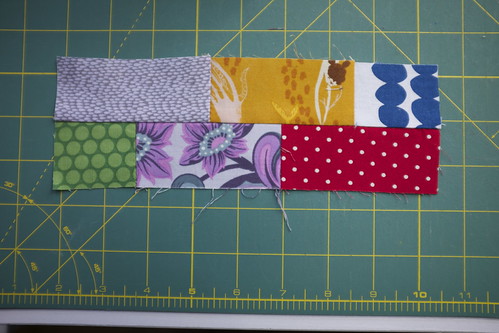
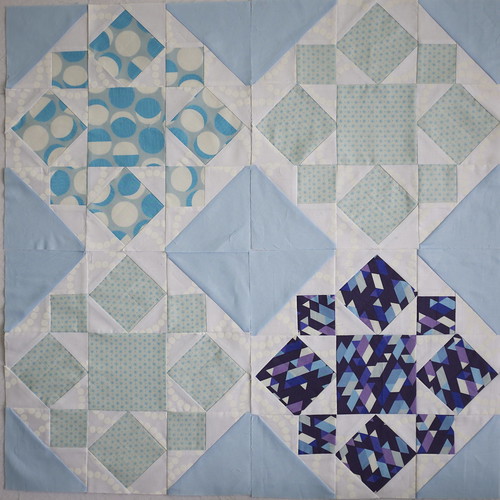
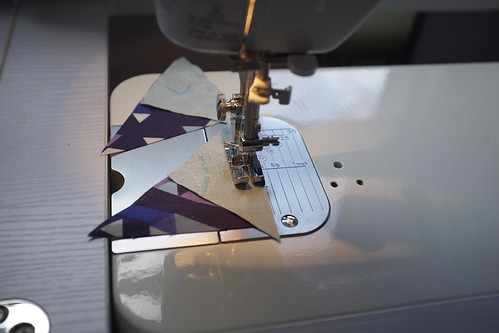
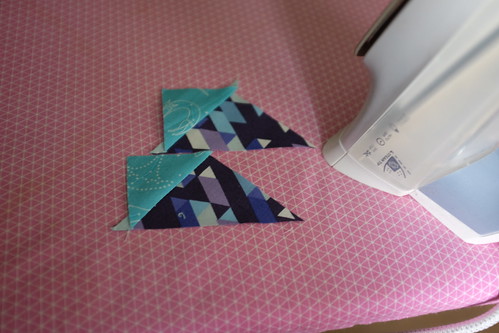
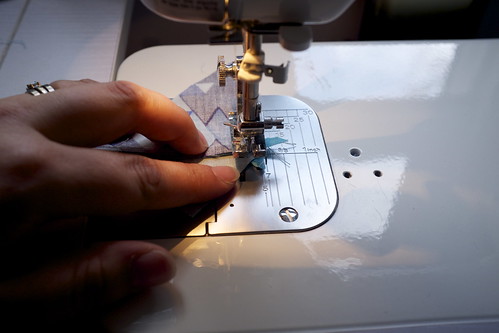
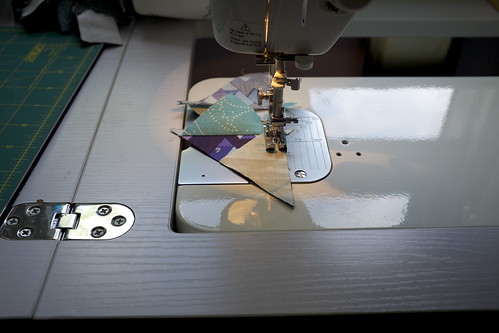
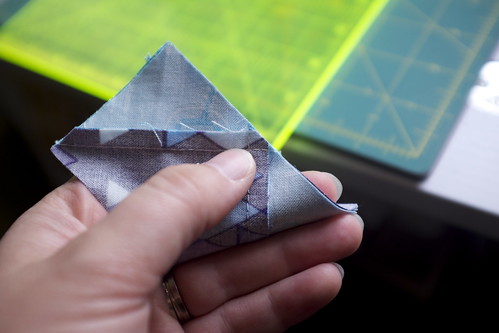
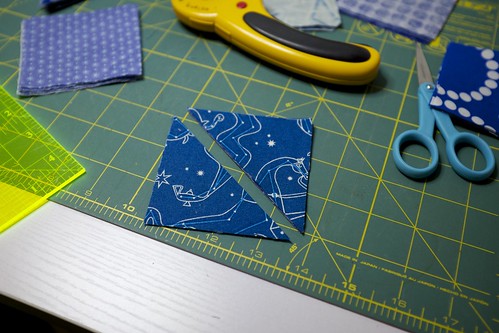
These I cut first into piles according to color, and then I sorted them into individual crosses. It was easy enough to chain piece them, as they were squares!

marcelle medallion

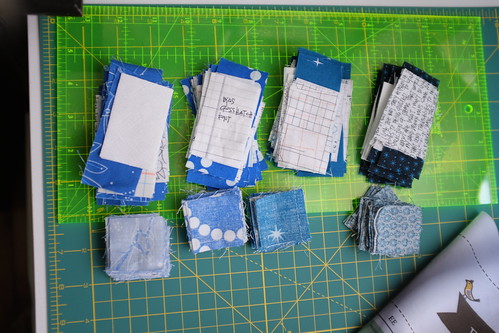
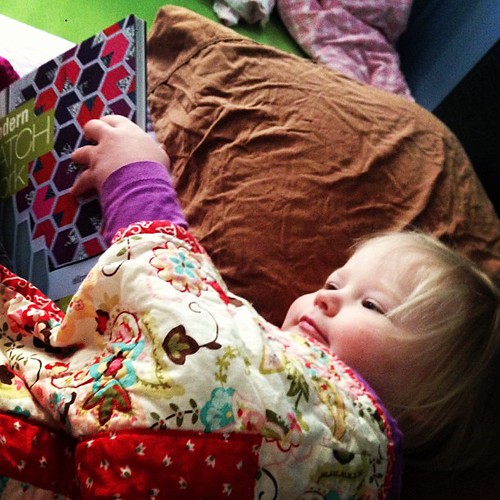
Of course I had sewing company that day, so they got done rather quickly. Thank you Sel. :)

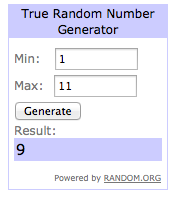
All right! NO LINKUP this week, just because germs are gross and I have them, but I'll do TWO PRIZES next week, so look for me on Monday!

Hope your week and weekends are really lovely - think of me, I'll be attending my guild meeting as I'm not contagious, but I hope no one asks me any questions...I might not be able to answer coherently! ;)

Cheers!

Penny xx


Monday
Oct142013

MMQAL: Giveaway Winner!

Hi folks!

Apologies for the late post! I have been trying to recover from bronchitis, which is apparently not something to be trifled with! Luckily for me, blogging is a fairly low-key activity. :)

Last week the giveaway was of all this great swag...

Swag!

And the winner was lucky number 9!

Congratulations Kristy of Handmade Retro!! Your email has been sent! Can't wait to send your lovely parcel!

I will be back tomorrow or possibly Wednesday for another update on the QAL, including my promised talk about border 6. :)

Cheers!

Penny xx


Tuesday
Oct082013

MMQAL: Borders 5 & 6

Hi everyone!

So I'm hoping you all have managed border 4 without any major hiccups! I've been stalking your Marcelle Medallion Quilts on Instagram and I am absolutely BESOTTED with the gorgeousness out there. Really. I can't remember who I was chatting with but I mentioned that this quilt is really hard to stuff up color-wise because as long as you alternate values it all comes out looking so scrappy/piecey/wonderful!

It has also been really excellent to see so many beginning quilters gain confidence with what looks like a tricky, impressive quilt...that will WOW people...but is actually, once you get down to brass tacks, not too hard to do! (So says me. Ha!)

This week we're going to talk about border 5, the brick border.

First of all, gather your bricks. You need to split them into four piles - two with 22 and two with 24 bricks. Here I've just used a few. :)

MMQAL

Press your seams to one side.

MMQAL

To start your first brick border, use your fingernail to make a crease in the center of the SECOND brick.

MMQAL

There we go! A nice little crease.

MMQAL

Line the crease up with the seam of the second strip.

MMQAL

Line them up and pin to help accuracy!

MMQAL

Once you've sewn them together, I like to snip the ends off.

MMQAL

(Both sides!)

MMQAL

Press and admire! A brick border!

MMQAL

Now for both of these brick strips, you'll need to fold it in half and cut it so you have four. Mine ended up a little big so I had extra room on the ends, but no big deal!

Now, I have to confess...I finished my quilt top! My good great friend Sel came over on Thursday for a rainy day of sewing and I kept on sewing...and sewing...and then I was suddenly out of sewing to do! Because I was done! I'll be pin-basting my quilt in the upcoming week.

I feel like lots of other people have been run away finishing their quilts...I know I'm not alone! :)

DONE. Whew! #marcellemedallion #mmqal

Later this week I'll pop in and have a quick chat about border 6!

Okay! GIVEAWAY TIME! For this week's swag we have a charm pack of Briar Rose, two coordinating colors of perle cotton, and some Amy Butler stationery! Be sure to link up with pictures of your Marcelle Medallion progress* and spread the word too! I love seeing these and sending out pretty parcels makes me so happy!

Swag!

Here's the link up - good luck!!

*PLEASE submit photo/blog pages that are clearly linked to a Marcelle Medallion quilt. I do check time stamps and I do read every one of the entries submitted - this should be a Marcelle you started after 1 September 2013 and must be past the stack stage. Instagram and Flickr photos totally count, but linking up to a non-related photo or blog post does not. Thank you!

Monday
Oct072013

MMQAL: Winner!

Hi everyone! It's a long weekend in Australia so I'm enjoying some time to myself while blogging this! I've got my coffee, the cafe is buzzing, and I feel like the kind of grownup who doesn't utter the phrase "potty in the big girl potty" forty-seven times a day. Ahh. So nice. :)

But on to business!

Last week for the link-up we had this fabulous prize:

MMQAL

And the winner of this week's giveaway is....

Lucky number 3! Ali at AliMakes!! Congrats Ali! An email has been sent. :)

Tomorrow we'll be talking about the next border - all those tiny strips!! - and I'll be exploring a few alternative borders, too!

Can't wait to see all your progress! Keep on posting on Flickr, Instagram and linking up here!

Cheers!

Penny xx


Wednesday
Oct022013

WIP Wednesday

I keep forgetting to update my WIP Wednesday! And I love WIP Wednesdays!!

WIP Wednesday at Freshly Pieced

Well, it has been a busy week. I got a bit of my sew-jo back and whipped up a cot quilt for my new little niece Lola. I have been hoarding a charm pack of Hunky Dory for two years, just waiting for the right moment. I pulled it out and found a few bright solids...then began stitching. It was done in a day.

lola

I quilted it with a simple double-loop (my favorite for little girl blankets), and bound it with some Alexander Henry Heath in pink (one of my favorite fabrics).

lola

The label is perfect to use as a handle too.

Can you see "Lola" in the stitching?

lola

I have been working hard on the Marcelle Medallion Quilt, too! I am up to border 6, which is a little far ahead for the Quilt-Along, but I had so much fun I didn't want to stop!

the sea, the sky

I love these geese flying everywhere.

marcelle medallion

I'm about to start piecing border 7. That will start tomorrow.

marcelle medallion

This month is my month for AusModBee. I made four blocks and will receive 26 back, so I plan to make a quilt with 30 blocks (in a 5 x 6 configuration). I might save this quilt top for after I buy my quilting frame. I like the look of it so much!

aus mod bee blocks

I managed to finally make a few fabric bowls out of some extra-precious Kathrine Codega fabric. I love it, but when I used some of it on a quilt, it started fading within three washes. We use and wash our quilts a lot so I am going to use her beautiful prints in things like this, that don't get so grungy they need washing!

I keep foolishly making these for other people.  It this one though! #mine #allmine

This fabric bowl is from the Nesting Bowls pattern by A Cuppa & A Catchup.

Last night we watched TV and I took a break to work on my Briar Rose log cabin quilt. I've almost got the whole middle quilted. It's a long-term project so I'm not super fussed.

It's not done, but I really needed to snuggle underneath it. :)

And, in need of another quick finish, I found an orphan block and made it into a cushion cover! It'll go nicely with my bee quilt, eh? :)

Needed a cushion too!

This isn't so much a WIP as it is a potential project...new Konas arrived from Pink Chalk this week.

new konas

I'm stalled on:

  • Oh Quilt
  • Swoon Quilt
  • Terrain Challenge quilt
  • Trade Winds 2 quilt

I'd like to start making these soon:

  • passport wallets
  • actual wallet
  • Wonderland quilt
  • West Hill quilt
  • Pajama pants

And, just for kicks... the cutest children alive.

owen!

I might be biased.

Last night during Owen's last feed before sleep I brought both my Elizabeth Hartman books into the bedroom to page through. This morning, when Piper found them, she lit up like a birthday cake. She grabbed Modern Patchwork, cuddled up under our quilt, and opened it up.

I woke up to this! Well, she has great taste in books... :) #modernpatchwork

That's my girl!

So what are your WIPs this week? Visit Lee and link up! Can't wait to see what projects everyone else has been up to! :)

Cheers!

Penny xx

Tuesday
Oct012013

MMQAL: Assembling Border 4

Hi everyone!

Hope your week is starting out nicely! I am currently blogging from the car, and my little monster is NOT very happy. (I took the plastic wrap off her sandwich. HOW COULD I! Toddlers, lol.) So I hope this is coherent (and that I don't type "please stop screaming" by accident)! :)

Last week we talked about cutting the flying geese for border number four. Now we're going to talk about chain-piecing your cut triangles to make the flying geese units (FGUs). I've had reports of varying success using a scant seam versus a true seam. For me, both times (on two different machines), scant worked well. I will talk a little bit about how big they need to be in a moment, but I'd love to hear your feedback!

So, gather up your triangles, two little ones for each big one.

MMQAL

Find the right angle of the smaller triangle and line it up with the longest side of your larger triangle (this is called the hypotenuse). Make sure your points match up.

MMQAL

I like to chain piece these slowly, adding a small triangle to the larger one before I feed each one in. It's slower going but it's very accurate and still chain piecing (which makes it speedier than making the individual units).

MMQAL

Carefully press these outward. I always, ALWAYS press the seams to one side on flying geese, and it is always outward toward the smaller triangle.

MMQAL

Now get your other small triangle and repeat the right-angle against the hypotenuse, making sure those points match up (I'm pointing to them).

MMQAL

Sew sew sew. (That, by the way, is a scant 1/4" foot for my Juki. It's okay. I should review it later.) If you look carefully you can see that the stitching line will come out exactly at the intersection of the tag and the FGU.

MMQAL

You can chain piece these too.

MMQAL

I didn't bother trimming mine (!) because I knew they were pretty accurate, so I just snipped the tags off and evened up any really wonky edges with scissors. IF YOU DO TRIM YOURS, they need to be the width of the cornerstone block. Flying geese height is width ÷ 2 + .25".

So if you had a FGU of 6.5" width, the height would be 6.5" ÷ 2 = 3.25" + .25" = 3.5".

But that is NOT the measurement of this FGU. I will let you sort that out amongst yourselves. :)

MMQAL

Now to sew them together, they should be right sides facing, the point of the top one against the hypotenuse of the bottom one. If my point was a bit shy of 1/4" then I try to make it 1/4" by moving the bottom piece up a bit. This is probably not very good advice, but I did it more than once and mine turned out okay! (Luckily?)

MMQAL

Sew them together, and press. I always press the point upward, so the hypotenuse end of the FGU is pressed under the one directly below it. I hope that makes sense - I am regretting not taking a picture of the back now!

MMQAL

This is a sneaky sneak peek of where I am at with my quilt top. So far I am pretty impressed that my points are as nice as they are - I blitzed through this border Sunday night while my husband was watching a movie behind me!

MMQAL

This week's giveaway is pretty sweet - two books, Treasures from the '30s and Link to the 30s, plus a charm pack of Briar Rose and a mini rounded dresden template set (4" - 9")! All you have to do to be eligible to link up down below!

MMQAL

Now, if you don't have a blog, and you are on Instagram, as long as your account is set to public you can access your Instagram picture from a web browser. The url looks something like this: http://instagram.com/p/ezyAvqzPSD/#

That should work!

Here is the linky, and I can't wait to see how you are all going!!

Penny xx


Monday
Sep302013

MMQAL: Winner!

Hiya everyone!

This week's giveaway was provided by the lovely Samantha at Pattern Crush - a half yard bundle of Dem Bones by Sarah Watson for Cloud 9 Organics!

This week's winner is lucky unmber 13, ChelsieCreates!

Congrats ChelsieCreates! We'll have that half yard bundle in the post for you ASAP!

See you all tomorrow for part II of our tricksy border 4!

Cheers

Penny xx


Tuesday
Sep242013

MMQAL: Border 4 (cutting)

Hi everyone!

This week we tackle a slightly scary border. So scary, in fact, there are two weeks alloted for this border...one for cutting, and one for piecing!

As you can see, I am up to border 3, and am ready to start my flying geese!

It's another giveaway for the #mmqal!! Head on over to the blog (www.pennypoppleton.com)and link up!! ❤❤

Firstly, there are several ways to make this border, but I am going to illustrate how I cut it (according to the book)! In order to accurately piece this, it must be accurately cut. This block is so teensy that it needs definite care!

Tools needed:

  • rotary cutter
  • cutting mat
  • squaring-up ruler with 45º line

I chose to use a bright medium blue for my geese centers, and low-volume fabric as my geese corners. I cut the fabric to the directions in the book, in squares.

Then I lined the top edge of the main fabric square up with the 45º angle on my ruler. I made sure my points were exact!

Flying Geese

Then you cut along the ruler line. I try to cut four or fewer at a time. Any more and you'll definitely lose accuracy. Cutting two at once would be even cleverer, but I'm pretty confident in my rotary cutting skills by this point!

Flying Geese

Next up are the background triangles. You will do the same, lining the top of the square against the 45º line, then cutting across the diagonal.

Flying Geese

Only this time you will carefully turn your ruler (and yourself, be safe!) and you will line the left hand side of the square up against your 45º line, crossing over the existing cut.

Flying Geese

There you are - all your half square triangles (HSTs) and quarter-square triangles (QSTs!)

Flying Geese

Now, next week there's a fabulous prize donated by the amazing Samantha at Pattern Crush. She is offering this gorgeous half-yard bundle of Dem Bones by Sarah Watson for Cloud 9 Organic.

All you need to do to be eligible for the prize is to link up with a progress shot and let everyone see how you're going! Can't wait to see how everyone is going!!

Cheers

Penny xx

Tuesday
Sep242013

MMQAL: Winner!

Hi there folks!

It's winner time! Last week we went over 60º triangles and many of you linked up to show your gorgeous progress!

Number six is Lisa at Modern Balabusta! The email has been sent and soon she shall have all this fabulous swag!

Swag - Sept 23

I'll be back tomorrow with more...it's time to talk tiny flying geese! Can't wait. :)

Cheers!

Penny xx

Tuesday
Sep172013

MMQAL: Those pesky 60º triangles!

Howdy there quilt-alongers! Hope you're all going splendidly!

I apologize for this post going up so late - it has been a day. The concise version is that the Tiny Blonde One is cutting her 2 year molars at top volume, The Little Fellow is going through a fearsome growth spurt, and I was laid low by a sneak-attack headache! But some proper food and a pot of green tea later, I am feeling much chattier - so let's get to it!! :)

Are you all on Instagram? Or Flickr? Or clicking on the links other people are posting here, on this very blog? I have been trying to keep up with comments and favorites but even if I don't manage to say something, I have read each and every linked blog entry and looked at every picture! You all are amazing. This should be called the Amazing Quilter Quilt-Along. I am LOVING everyone's medallion quilts. Here's mine! (Please ignore my computer in the bottom right hand corner...haha!)

up to border 3!

Let's talk about that second border. Those tiny triangles look pretty tricky, don't they? But here's a secret: they are 60º triangles. These are kind of a big deal in my world. I love triangles, especially 60º triangles! But these are pretty tiny. The instructions in the book direct you to make a template out of template plastic, which is a great way to do it.

Border 2

But if you are me, and you have a few (okay, many) specialty rulers in a drawer, there's bound to be a 60º ruler in there somewhere! Like this one by Marti Michell. It's specifically for 60º triangles and it has a handy blunt tip which means you get accurate pieces with no "tags".

Border 2

I found my Large 60º Triangle was still a bit too big, so I had a little rummage around and found another Marti Michell ruler that would work. This is from her Hexagons H kit, and it was pretty perfect!

Border 2

I marked the pattern's cutting line on the template with washi tape.

Border 2

Then it was simply a matter of cutting a strip of fabric bigger than the height of the triangle and beginning to cut strips!

Border 2

As you can see in this (poorly lit, late-night, sorry!) picture, I turned my triangles and snipped all the corners. I found that the turning and trimming made for more accurate pieces, which meant that when I finally did piece my borders, they were almost perfect!

Border 2

(I also like how Marti Michell rulers have a built in seam allowance for half-pieces - see that thick purple line to the left of the centre line?)

So that's a quick shortcut, if you happen to have a 60º triangle ruler anywhere around!

There is more swag this week! Here it's a pretty Lecien "Doubles" charm pack, three spools of perle cotton, and a Sunburst Template Set!

Swag - Sept 23

All you have to do to be eligible to win this swag is to link up and show your progress! Can't wait to see!!

Cheers!

Penny xx

Page 1 ... 3 4 5 6 7 ... 19 Next 10 Entries »