Entries in color theory (2)

Thursday
Dec112014

Aviatrix Medallion - Fabric & Thread

Hi everyone!

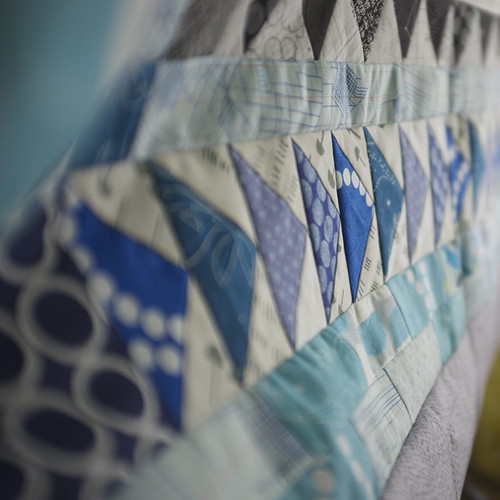
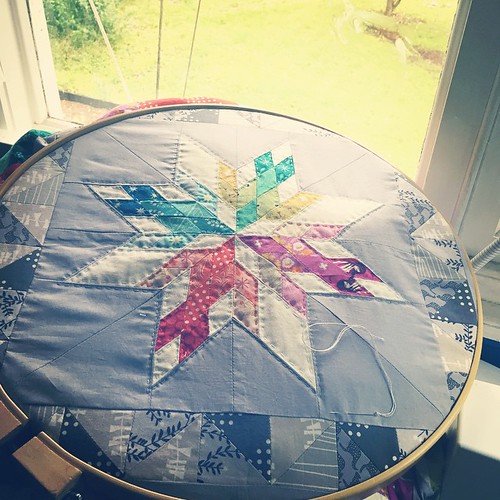
Having finished the Aviatrix Medallion quilt top and rather hastily basted it, I was ready to quilt. I have had the vision for it for some time: I wanted to echo quilt most of it by hand, using perle cotton.

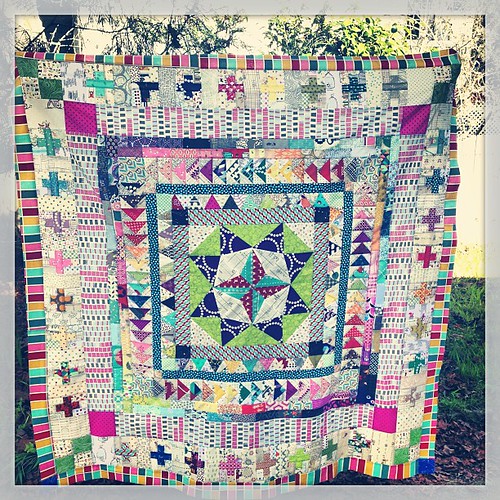
Now, for a quick refresher, in the Aviatrix Medallion pattern, there are 25 FQs (plus neutral and white bg yardage) required. Each of those, in my version and Elizabeth Hartman's original, is a different color or shade. (If you want to see something cool, you can check out her alternate colorway page. I am seriously considering that winter palette in print fabrics.)

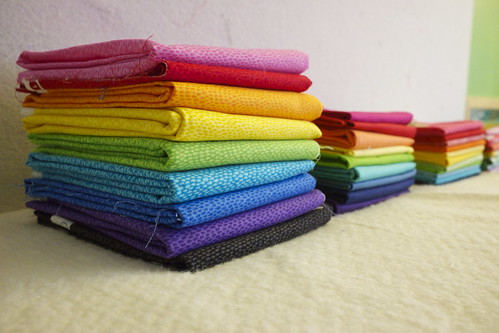
Here are my colors. I stuck pretty close to her original palette.

Aviatrix Color Chart

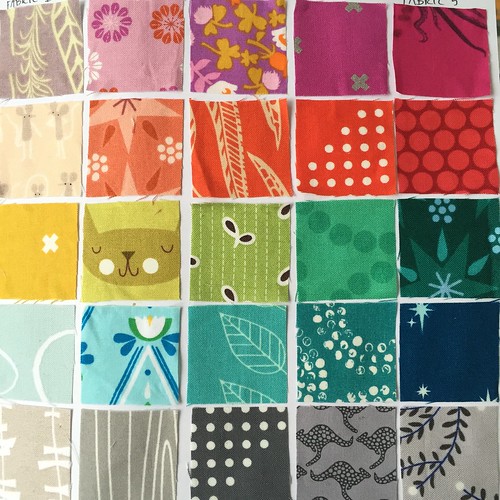
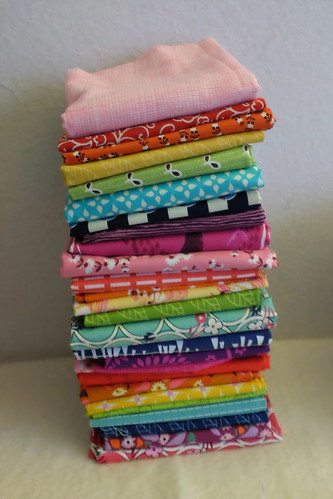
Each of the fabrics is grouped according to a color family. I will list them all here, left to right. BE WARNED, I am not digging up all the proper names or item codes of these fabrics for this write up. If you're DESPERATE to know, I'll search it out for you, just let me know in the comments. :)

Violet Group

  • Feather, Field Study, Anna Maria Horner, Westminster/Free Spirit (2564)
  • Floral, Mustang, Melody Miller, Cotton + Steel (2515)
  • Calico, Briar Rose, Heather Ross, Windham (2540)
  • XOXO, Basics, Rashida Coleman-Hale, Cotton + Steel (2535)
  • Swimming Sisters, Mendocino, Heather Ross, Westminster/Free Spirit (4020)

Orange Group

  • Mice, Catnap, Lizzy House, Andover (2205)
  • Stars, 1001 Peeps, Lizzy House, Andover (2220)
  • Feather, Field Study, Anna Maria Horner, Westminster/Free Spirit (2277)
  • Dottie, Basics, Rashida Coleman-Hale, Cotton + Steel (2277)
  • Red Spot, Rainy Days & Mondays, Riley Blake Designs (1103)

Green Group

  • XOXO, Basics, Rashida Coleman-Hale, Cotton + Steel (2135)
  • Cats, Catnap, Lizzy House, Andover (1147)
  • Green Floral, Flea Market Fancy Reprint, Denyse Schmidt, Westminster/Free Spirit (5017)
  • Pearl Bracelet Tone on Tone, Lizzy House, Andover (2870)
  • Stars, 1001 Peeps, Lizzy House, Andover (2885)
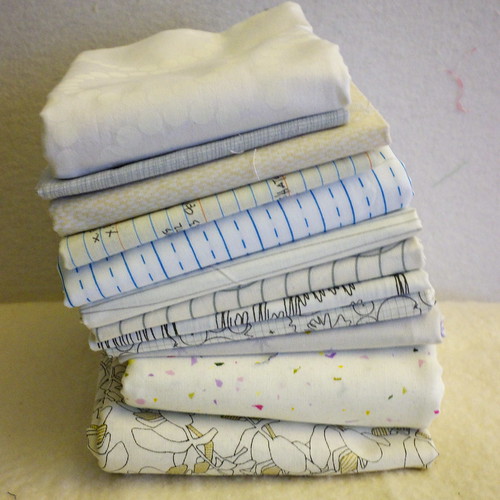
Blue Group

  • Blomster, Mormor, Lotta Jansdotter, Windham (2864)
  • Diamonds, Lotus Pond, Made by Rae, Cloud 9 (2805)
  • Stems, Simply Color, V & Co, Moda (5006)
  • Circle Dot, Shape of Spring, Eloise Renouf, Cloud 9 (4182)
  • Stars, Constellations, Lizzy House, Andover (2783)

Grey Group (4670)

  • Kitestrings, Glimma, Lotta Jansdotter, Windham
  • Woodgrain, Les Amis, Patty Sloniger, Michael Miller Fabrics
  • XOXO, Basics, Rashida Coleman-Hale, Cotton + Steel
  • Kangaroos, Terra Australis, Emma Jean Jansen, Ella Blue Fabrics
  • Catmint, Catnap, Lizzy House, Andover

White Background Fabrics (2024)

  • RJR Supreme Solid in White
  • XOXO, Basics, Rashida Coleman-Hale, Cotton + Steel
  • Dottie, Basics, Rashida Coleman-Hale, Cotton + Steel
  • Netorious, Basics, Rashida Coleman-Hale, Cotton + Steel

Grey background fabric (2615)

Now, lest you think I am super organized and really clever, here is what my shocking original fabric reference sheet looks like!!

Aviatrix Color Chart ORIGINAL

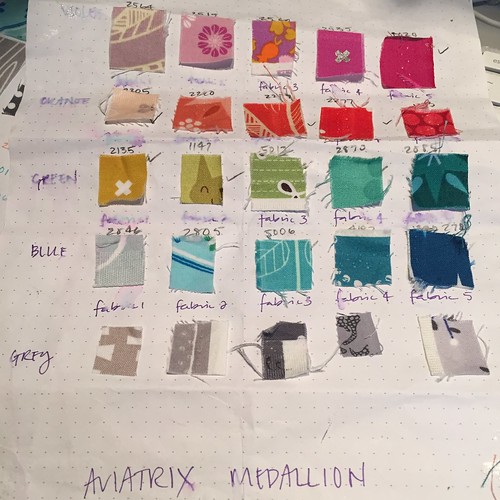
Hahaha. It's been through the war.

I chose several coordinating threads and here they are in my little tin. If you are interested which Aurifil thread colors I chose, they are listed next to the fabric in parenthesis. For the grey family, rather than matching each color, I chose a nice variegated grey, and another, softer solid grey for the background grey. All of the white fabrics will be quilted with true white.

I need a few more reds...but I'm able to get going as my greys are here and they were next!

I do plan to quilt this quite close, so I am hoping this is a handy reference in case I need it in future. It's a bit of an outlay to invest in so much thread, but I know how much I love hand-quilting, so I'm certain that these colors will be in frequent rotation!

That's about it for fabric & thread - hit me in the comments if you have any questions! x

I could see the texture of this from across the room. I love it so much!!

Wednesday
Jan152014

color, in theory.

Hi, you gorgeous people. (Yes, you. You are looking exceptionally nice today.) I'm writing up this tutorial super-quickly for the fab folks over at the Sydney Modern Quilt Guild. Our group quilt this year is none other than the famous pickle dish pattern! While the Kaffe Fassett book has its own color ideas, of course we do things BRIGHT and BOLD, so here goes.

Playing with color today.

I'll start with talking about color versus low-volume. Low-volume fabrics are fabric that read as mostly white or neutral. Text prints, tonals, white on white and white with light or little prints all fall into this category. I have an obsession with low-volume fabric so I tend to stash it like mad. Here's a little stack for an idea:

Rainbow Fins Tutorial

See how those all read white or light? Low-volume fabric works great as a background fabric, especially if you're going for a really scrappy look. I used low-volume as the background for both my Marcelle Medallion quilts (and probably will for the third one I'm planning) and you can see how scrappy and lovely they look.

marcelle medallion

Marcelle Medallion Quilt top - finished!

Now, for this pickle dish quilt, we're going for a contrast between low-volume and rainbow BRIGHTS. Brights are generally fabrics that make you sit up and take notice. Most of my colored stash is bright, modern, and fresh. (I also organize it in color order, to make a pretty rainbow effect.) Here we have a stack ordered on the spectrum:

Rainbow Fins Tutorial

And another stack, of a great range of basics called Rain (by Timeless Treasures):

Rainbow Fins Tutorial

You can see how these LEAP out at you. HI THERE! BE MY FRIEND! I AM COLOR!

Playing with color today.

Also, note how they read as one color. While the prints vary in scale, design, and may even have touches of other colors, for the most part, they read as a single color.

Now, if your fabrics are muddy, muted, or very dark - as is the case with a lot of Civil War Repro fabric - they probably aren't brights. I'm allergic to those colors, so I never stash them, but as with all things quilting, someone else out there can make something really beautiful with fabric I would never look twice at! For this tutorial, though, it is essential that we have bright, rainbow-spectrum fabrics that read as one color. Not sure what color a printed fabric might be? Take a piece of fabric and shake it around in the air. What color is it then? If you still can't tell, it's probably too mixed to use as one particular color, and it qualifies as a 'feature fabric' - something you would build a quilt around.

The spectrum we're working from going something like this:

  • RED
  • ORANGE
  • YELLOW
  • GREEN
  • BLUE (medium/aqua)
  • NAVY BLUE
  • PURPLE
  • MAGENTA
  • PINK

On the the actual tutorial!

You will need nine pieces for each paper-pieced fan section.

  • Four low-volume strips (2" x 5.5" is what I cut mine)
  • Five spectrum strips (2" x 5.5")

To make a spectrum, simply start at one color and go down the list until you have all five. So if I decide my first fin is GREEN, the next ones will be BLUE, NAVY, PURPLE, MAGENTA. You can start anywhere on the spectrum and if you get to the end simply loop back around to the top of the list.

Now, look. I'm not going to go into a great deal of depth teaching you how to foundation piece, because a) small children, and b) literally hundreds of other people have done it so much better. (See here, here, and here.) So if this is too basic, please shoot me an email or leave a comment and I'll try and address your questions as best as I can!

Suffice to say, this is the easy kind of foundation piecing, as it only builds one line at a time!

Start with your pattern piece and your fabric strips. Have your iron on, your rotary cutter handy, a ruler with a 1/4" measurement (a Quarter Plus or Add-A-Quarter are tops), and set your stitch length short. (Mine is usually 1.5 or 1.6 on my Bernina.)

Rainbow Fins Tutorial

(I always fold the lines on my pattern before I start.)

Put piece one (in this image, my yellow strip) and your low-volume separator piece RIGHT SIDES TOGETHER.

Rainbow Fins Tutorial

Hold your paper up against a window or light source, and, turning your paper so that the blank back of the page faces you, place the fabric, COLOR PRINT DOWN, on the back of the paper. The line between steps 1 ans 2 should be covered by both pieces of fabric by 1/4". You should be looking at the wrong side of the low-volume piece.

Rainbow Fins Tutorial

Place it, fabric down, in your sewing machine. Now you just get to sew along the lines! (Note my stitch length here, 1.5. My machine defaults at 2.4)

Rainbow Fins Tutorial

Once you've sewn the seam, open it up, and press it.

Rainbow Fins Tutorial

Now the line between the second and third fins should have a fold: find this fold, and fold the paper back beneath the stitch line so the fabric hangs out of the edge of the seam line. See it?

Rainbow Fins Tutorial

Take your ruler and measure 1/4" from the edge of the PAPER. Trim the excess fabric off. Now you can unfold the paper and move on to the next step.

Rainbow Fins Tutorial

Now you will get your next COLOR piece. Set it, right sides together, on top of the low-volume middle piece, and pin.

Rainbow Fins Tutorial

Sew it on the printed side of the paper, then repeat the pressing, folding, trimming steps, alternating rows of your spectrum and low-volume prints!

Rainbow Fins Tutorial

OH LOOK YOU SO FANCY

Now it's time to trim up the block! I just CAREFULLY freehand around with my rotary cutter on those curves, but I use a ruler on the straight edges and go zip zip!

Rainbow Fins Tutorial

TA-DA. You've made a fan!

Next tutorial we'll talk about plastic templates for those curved corners and center eyes, but for now, here's a very "design wall" idea of what each block should look like!

Rainbow Fins Tutorial

You can see how the brights really pop in that bottom one. In the top, I used too light a blue, and it's been bugging me, so I'll probably re-do it. I just make photocopies of the existing pattern piece before I start any paper piecing - it's insurance against mistakes and you can always make a cushion out of the "not quite right" pieces!

Let me know how you find the tutorial and if you have any questions shoot me an email or leave a note in the comments!

Cheers

Penny x