MMQAL: Those pesky 60º triangles!
Howdy there quilt-alongers! Hope you're all going splendidly!

I apologize for this post going up so late - it has been a day. The concise version is that the Tiny Blonde One is cutting her 2 year molars at top volume, The Little Fellow is going through a fearsome growth spurt, and I was laid low by a sneak-attack headache! But some proper food and a pot of green tea later, I am feeling much chattier - so let's get to it!! :)
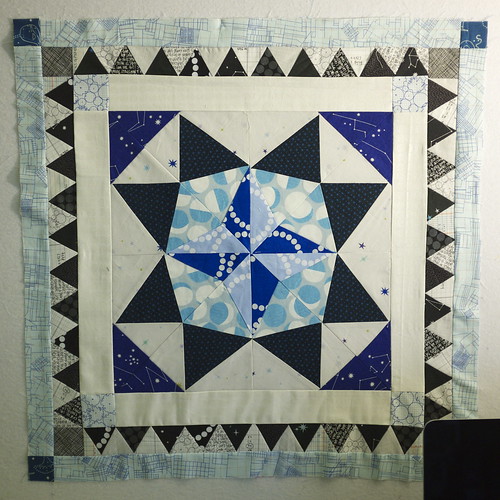
Are you all on Instagram? Or Flickr? Or clicking on the links other people are posting here, on this very blog? I have been trying to keep up with comments and favorites but even if I don't manage to say something, I have read each and every linked blog entry and looked at every picture! You all are amazing. This should be called the Amazing Quilter Quilt-Along. I am LOVING everyone's medallion quilts. Here's mine! (Please ignore my computer in the bottom right hand corner...haha!)
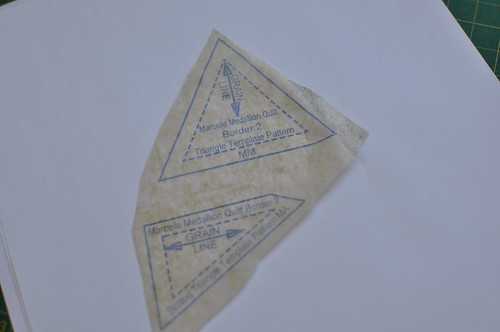
Let's talk about that second border. Those tiny triangles look pretty tricky, don't they? But here's a secret: they are 60º triangles. These are kind of a big deal in my world. I love triangles, especially 60º triangles! But these are pretty tiny. The instructions in the book direct you to make a template out of template plastic, which is a great way to do it.
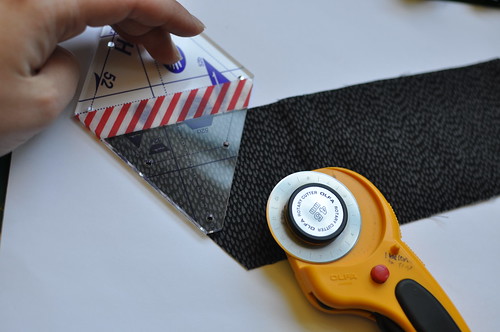
But if you are me, and you have a few (okay, many) specialty rulers in a drawer, there's bound to be a 60º ruler in there somewhere! Like this one by Marti Michell. It's specifically for 60º triangles and it has a handy blunt tip which means you get accurate pieces with no "tags".
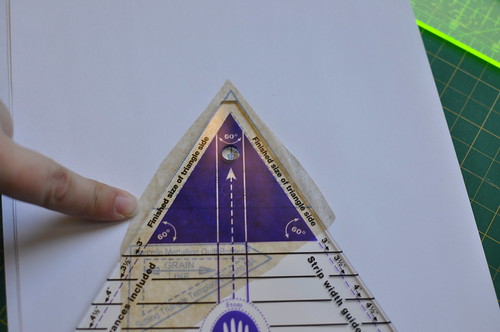
I found my Large 60º Triangle was still a bit too big, so I had a little rummage around and found another Marti Michell ruler that would work. This is from her Hexagons H kit, and it was pretty perfect!

I marked the pattern's cutting line on the template with washi tape.
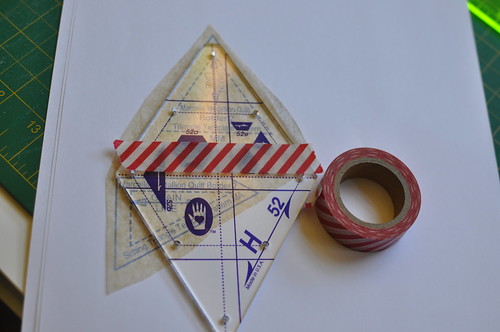
Then it was simply a matter of cutting a strip of fabric bigger than the height of the triangle and beginning to cut strips!
As you can see in this (poorly lit, late-night, sorry!) picture, I turned my triangles and snipped all the corners. I found that the turning and trimming made for more accurate pieces, which meant that when I finally did piece my borders, they were almost perfect!
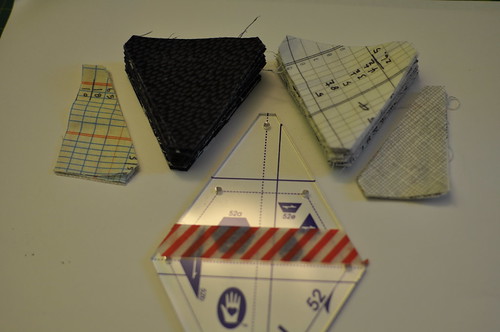
(I also like how Marti Michell rulers have a built in seam allowance for half-pieces - see that thick purple line to the left of the centre line?)
So that's a quick shortcut, if you happen to have a 60º triangle ruler anywhere around!
There is more swag this week! Here it's a pretty Lecien "Doubles" charm pack, three spools of perle cotton, and a Sunburst Template Set!
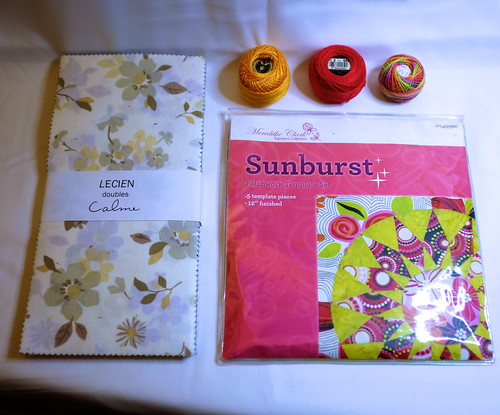
All you have to do to be eligible to win this swag is to link up and show your progress! Can't wait to see!!
Cheers!
Penny xx
 Penny Poppleton
Reader Comments (5)
Hi Penny! Thanks for hosting this sew along!!! I found a tutorial by Molly Flanders on Pinterest on how to make 60. triangles, that creates two triangles sewn together at once, backgrounb and chosen fabric. You make a tube of the two chosen fabric by cutting two strips, sew them together top and bottom of the strip (width is the height ofthe triangle). Then just use the template and cut triangles, use the seam ripper to take away the few top stotches and voila- you have two triangles sewn together, minimum work!!! (Well, check her tutorial in pictures, they'll show you how to! ). That helped me alot, and was so easy to sew together!!!
Hi Penny, have been enjoying your Quilt-a-Long as an observer. The MM is on my list.....for maybe next year! Just wanted to thank you for having one of my templates as part of your give away prize - such a thrill to see it there!!
Cheers
Meredithe
Thanks for the great tips on the triangles!! I hope you have something equally fabulous on how to create the flying geese so they aren't wonky and they all fit!
I blunted all the corners of my triangles like you suggested and it worked fabulously! Thanks so much :)
Wow, the quilts in the link up are looking fabulous! I'm intimidated by choosing fabric for one later on but every time I see one they all just work and they tend to look better when they're not too planned and matchy matchy which is giving me the confidence to have a go... When I have some time!