Entries in sydmqg (2)

Friday
Mar072014

busy girl

I often remember to blog as soon as I'm tucked up in bed, and by that point it just seems too hard to get out of bed again and find my camera! Ugh at myself. I'll do a quick update and then talk about something that is very dear to my heart which will get me back on track for blogging!

Picture time. :) (These are all from my Instagram which is where you'll find me these days!)

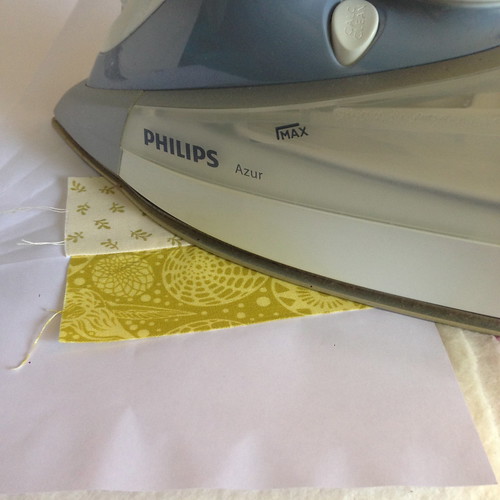
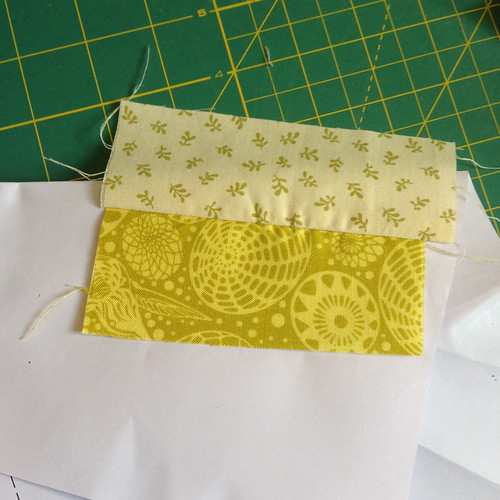
I joined Hive 2 of the Aussie Instabee and this is my test block for my quilt - rainbow brights and low-volume fabrics for the Trellis block. It's a bit fiddly to make but I'm excited about making my 18 and getting 12 more in the post!

I'm extremely pleased with my test block.

On the last day of "summer" (aka neverending overwarm hell season) it was chilly enough I felt I could bust out my winter hat. GLORY BE!

Last day of summer, and it's chilly enough for my favorite hat. Winter is coming. BRING IT.

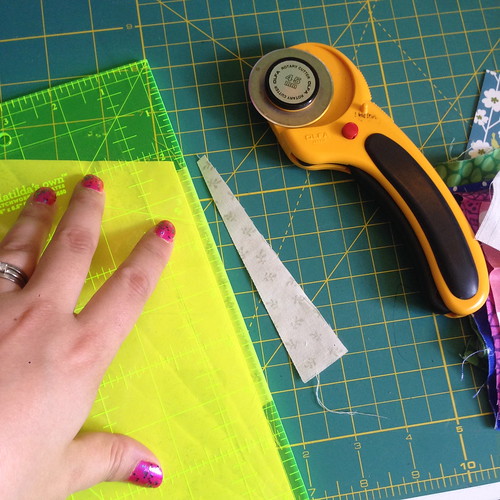
I cut out a HST quilt I've been dying to make for ages. Now to sew and slice and press and trim and sew again! No big deal or anything. *cries*

These colors can't be real.

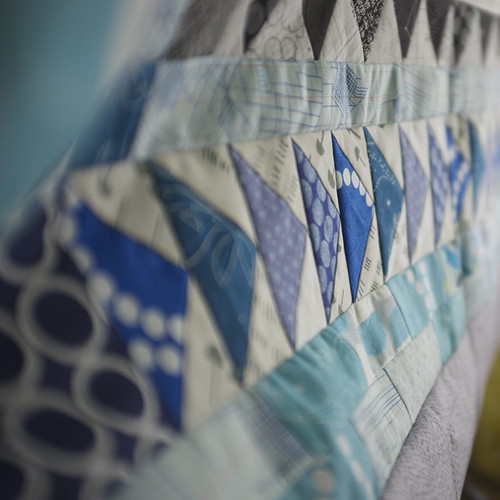
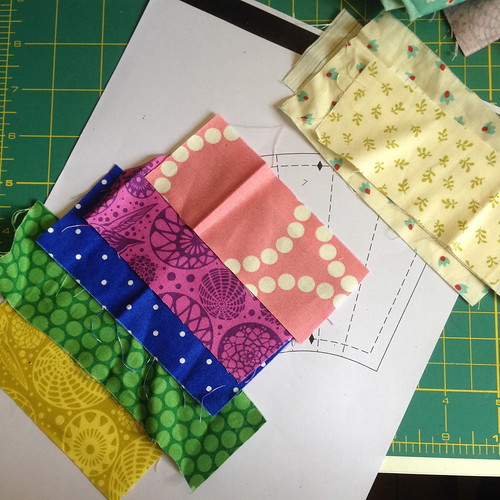
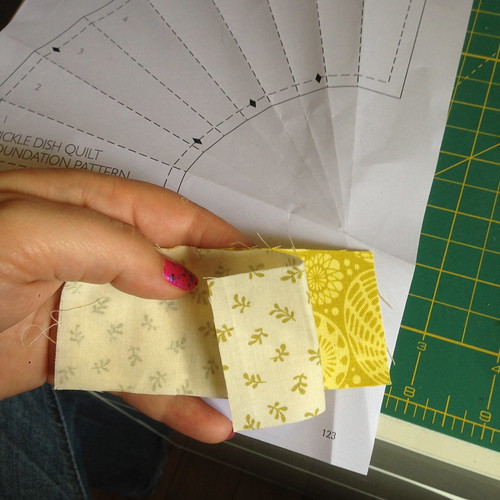
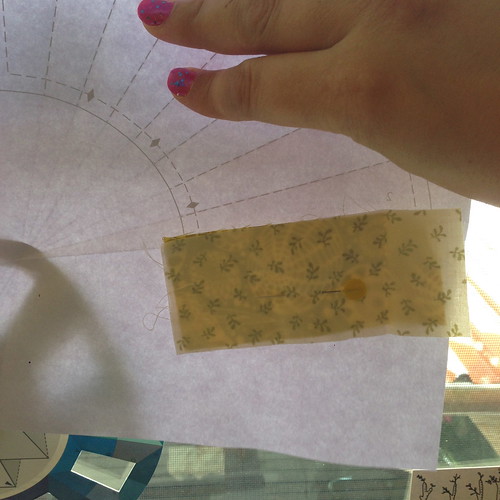
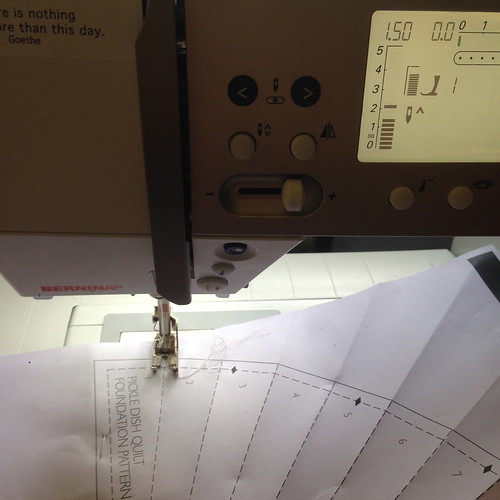
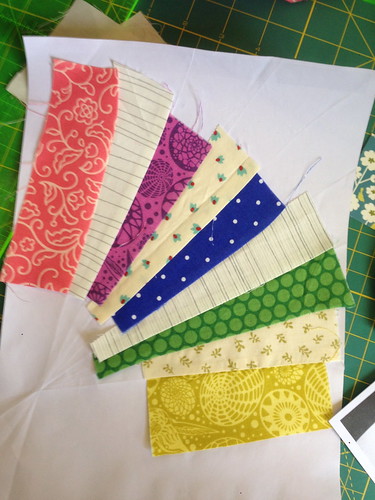
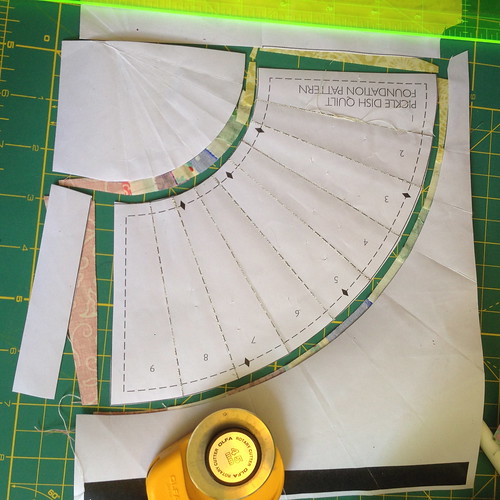
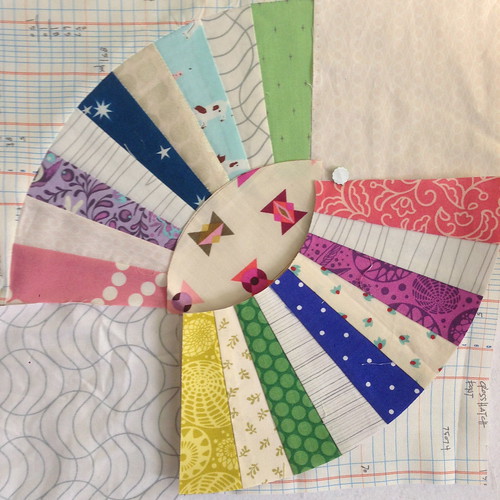
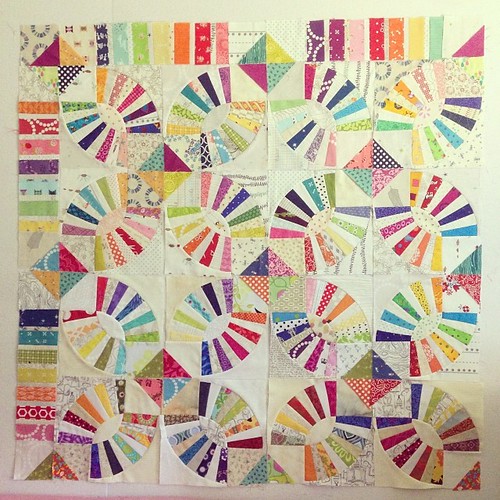
AND! The Sydney Modern Quilt Guild group quilt is looking FABULOUS. This is just a corner of it. We used the Kaffe Fassett Pickle Dish pattern from Quilt Romance. Please buy the book if you're after the pattern - it's the easiest pickle dish pattern I've ever seen and totally machine pieced! I'll talk more about the variations we did over on the Sydney Modern Quilt Guild blog in a few days. :)

This is what 25% of our group quilt looks like :)

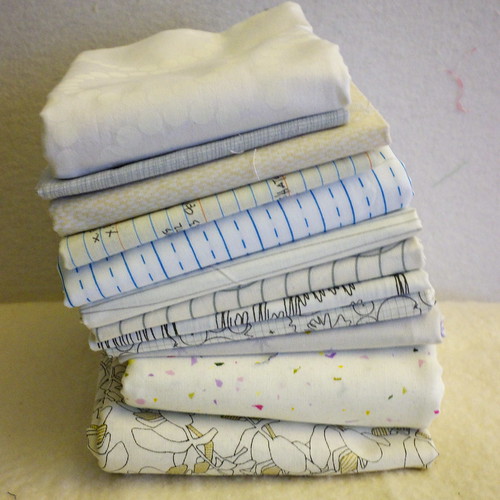
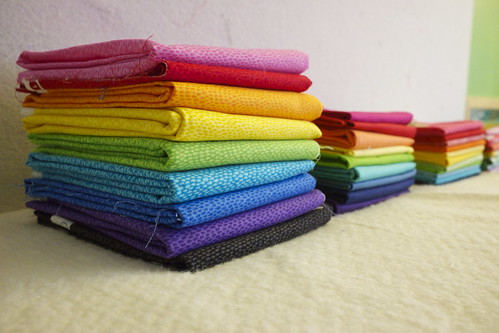
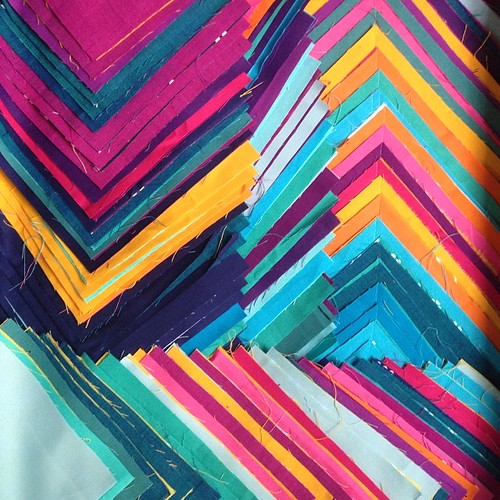
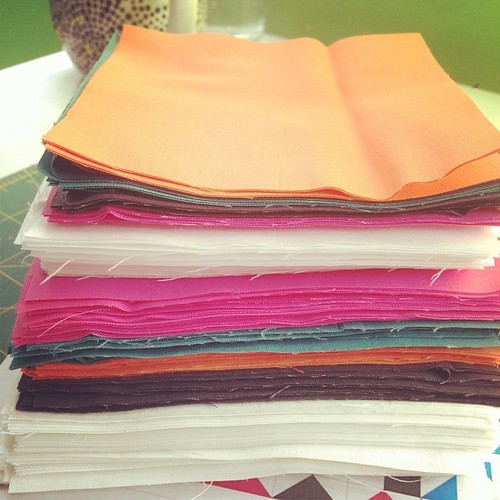
This is the stack for one of my show quilts. I am loving it. It's all Michael Miller Cotton Couture and very simple with only five colors (including white) and the pattern itself just sings. I designed it myself and I can't wait to show it off. But for now, a teaser!

Finally cutting this one up - it's from my Monday list!!

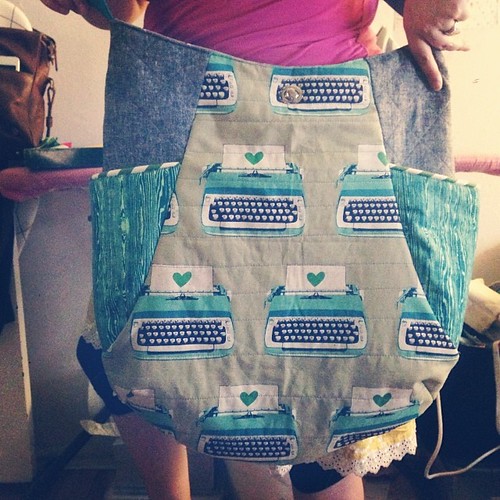
In the midst of having to get these quilts done to submit to show, I procrastinated and made a bag. This is a 241 Tote (the third one I've ever made) and it's upsized by 150%. This bag is ENORMOUS. I might try a 125% scaled 241 Tote next time! I will properly blog about this soon, too.

My 10 Gallon 241 Tote is finished! Complete with an iPhone & wallet pocket and a sleeve for my iPod too. :)

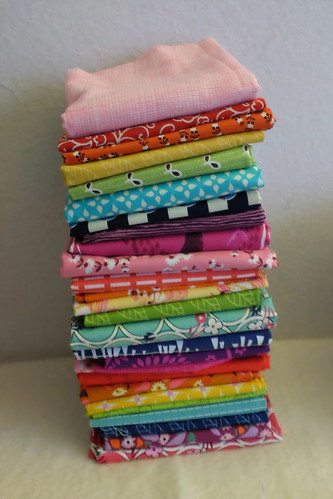
I'm not sure if I mentioned this but a few weekends ago I made an enormous quilt top by accident. I had the best AMH fabric, and some Pearl Bracelets and some of Tula Pink's meteors (from Birds and Bees) in blue, and they were stacked up waiting to become skirts. And oh they looked SO good together I made just one block...then another...then ten more...voila, quilt! I used the Hand Drawn Garden gold rose print (Social Climber) as a wide border to frame it, and perfection. Anyway I love it so much I decided it's for me. So I'm backing it with my carefully hoarded Mendocino Kelp Stripe in blush.

There are quilts you piece any old backing for, and then there are quilts which deserve nothing but the best: six carefully hoarded meters of perfect, pale pink Mendocino kelp stripe. #treatyoself

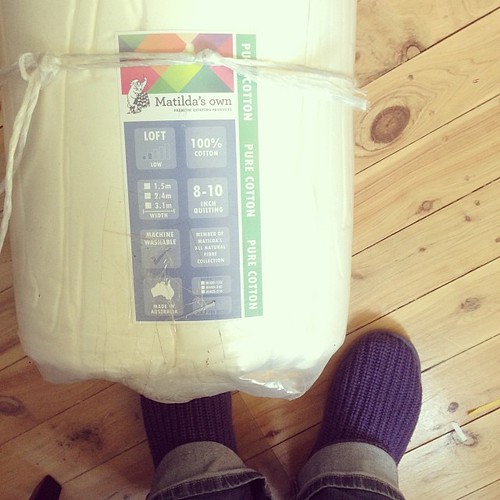
Just as I finished that quilt, a roll of batting arrived! That'll do me for a while. :)

My batting arrived... :)

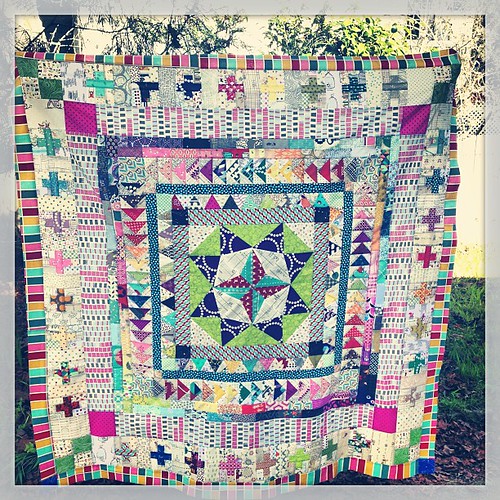
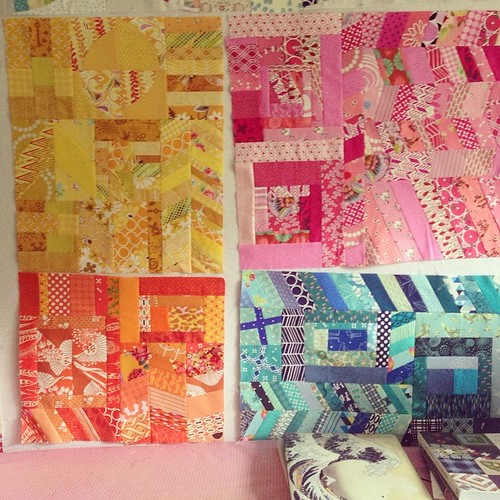
For my second personal show quilt I'm entering in the modern category. I pulled out scraps and yardage and began making piles...sorting of course by color...

Second personal quilt cut out. My shoulder aches, but tomorrow I have help so I can sew these into blocks! :)

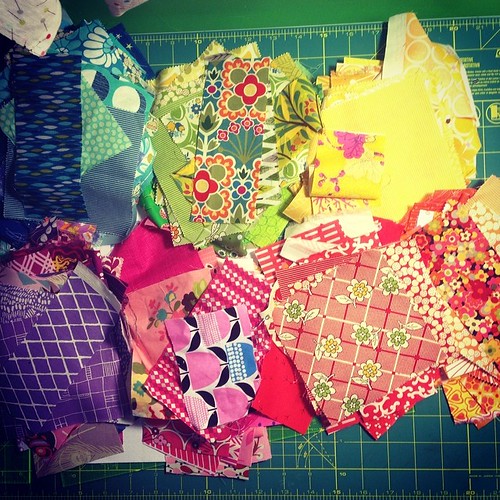
And I picked up my copy of the delectable Quilt Improv by Lucie Summers, gritted my teeth, and began doing something very foreign with my sewing: letting it get a bit crazy. No structure. No plan. Just color, and working in at least half of my color piles. I have three blocks to complete today (purple, green, red) and then I can measure, add the borders, and put it up on the design wall to photograph to submit. Whew.

Getting there! Three left. :)

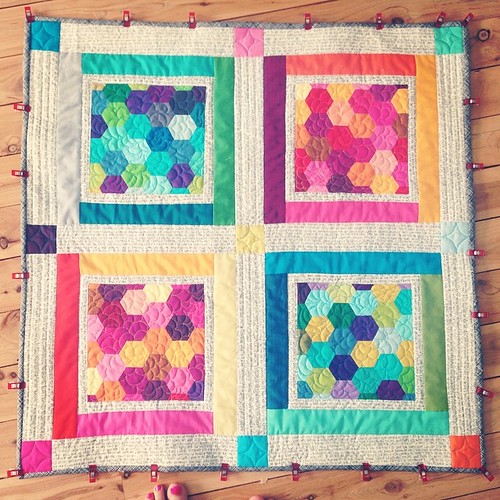
Meanwhile, I have finished quilting my hexagon mini quilt. I love this thing so much. I finished up the straight line quilting last night and thought, hmm, how do I do those centres? I thought of hexagons...honeybees...beautiful flowers! I didn't bother sticking this on the frame, just FMQ on my Bernina. It's only 31" square and was eminently manageable. :)

It's not finished yet but I couldn't resist taking a picture. I love it!

So that's me all caught up! So far in this post I've promised to blog about the Ten Gallon 241 Tote! I must get tidying the house though, and myself...I just rubbed my ear to find it covered in biscuit. That would be my son, whose kisses are often open mouthed and full of food. But he's so lovely I can't help but kiss him back.

Oh and just as an aside, we have put Piper into speech therapy and I will probaby talk about that a bit. She needs weekly therapy to start but even after one day (and a few tips) I've noticed a positive change. Here's hoping we stay on a good trajectory!

Finally, I am hoping to begin a series on sewing notions and starter skills: what I use, why, where to find it, how it works, and ways to expedite the trickier parts of some techniques. It won't be too fancy, but perfect for beginners - stay tuned! I am hoping to have a weekly update!

Cheers,

Penny x


Wednesday
Jan152014

color, in theory.

Hi, you gorgeous people. (Yes, you. You are looking exceptionally nice today.) I'm writing up this tutorial super-quickly for the fab folks over at the Sydney Modern Quilt Guild. Our group quilt this year is none other than the famous pickle dish pattern! While the Kaffe Fassett book has its own color ideas, of course we do things BRIGHT and BOLD, so here goes.

Playing with color today.

I'll start with talking about color versus low-volume. Low-volume fabrics are fabric that read as mostly white or neutral. Text prints, tonals, white on white and white with light or little prints all fall into this category. I have an obsession with low-volume fabric so I tend to stash it like mad. Here's a little stack for an idea:

Rainbow Fins Tutorial

See how those all read white or light? Low-volume fabric works great as a background fabric, especially if you're going for a really scrappy look. I used low-volume as the background for both my Marcelle Medallion quilts (and probably will for the third one I'm planning) and you can see how scrappy and lovely they look.

marcelle medallion

Marcelle Medallion Quilt top - finished!

Now, for this pickle dish quilt, we're going for a contrast between low-volume and rainbow BRIGHTS. Brights are generally fabrics that make you sit up and take notice. Most of my colored stash is bright, modern, and fresh. (I also organize it in color order, to make a pretty rainbow effect.) Here we have a stack ordered on the spectrum:

Rainbow Fins Tutorial

And another stack, of a great range of basics called Rain (by Timeless Treasures):

Rainbow Fins Tutorial

You can see how these LEAP out at you. HI THERE! BE MY FRIEND! I AM COLOR!

Playing with color today.

Also, note how they read as one color. While the prints vary in scale, design, and may even have touches of other colors, for the most part, they read as a single color.

Now, if your fabrics are muddy, muted, or very dark - as is the case with a lot of Civil War Repro fabric - they probably aren't brights. I'm allergic to those colors, so I never stash them, but as with all things quilting, someone else out there can make something really beautiful with fabric I would never look twice at! For this tutorial, though, it is essential that we have bright, rainbow-spectrum fabrics that read as one color. Not sure what color a printed fabric might be? Take a piece of fabric and shake it around in the air. What color is it then? If you still can't tell, it's probably too mixed to use as one particular color, and it qualifies as a 'feature fabric' - something you would build a quilt around.

The spectrum we're working from going something like this:

  • RED
  • ORANGE
  • YELLOW
  • GREEN
  • BLUE (medium/aqua)
  • NAVY BLUE
  • PURPLE
  • MAGENTA
  • PINK

On the the actual tutorial!

You will need nine pieces for each paper-pieced fan section.

  • Four low-volume strips (2" x 5.5" is what I cut mine)
  • Five spectrum strips (2" x 5.5")

To make a spectrum, simply start at one color and go down the list until you have all five. So if I decide my first fin is GREEN, the next ones will be BLUE, NAVY, PURPLE, MAGENTA. You can start anywhere on the spectrum and if you get to the end simply loop back around to the top of the list.

Now, look. I'm not going to go into a great deal of depth teaching you how to foundation piece, because a) small children, and b) literally hundreds of other people have done it so much better. (See here, here, and here.) So if this is too basic, please shoot me an email or leave a comment and I'll try and address your questions as best as I can!

Suffice to say, this is the easy kind of foundation piecing, as it only builds one line at a time!

Start with your pattern piece and your fabric strips. Have your iron on, your rotary cutter handy, a ruler with a 1/4" measurement (a Quarter Plus or Add-A-Quarter are tops), and set your stitch length short. (Mine is usually 1.5 or 1.6 on my Bernina.)

Rainbow Fins Tutorial

(I always fold the lines on my pattern before I start.)

Put piece one (in this image, my yellow strip) and your low-volume separator piece RIGHT SIDES TOGETHER.

Rainbow Fins Tutorial

Hold your paper up against a window or light source, and, turning your paper so that the blank back of the page faces you, place the fabric, COLOR PRINT DOWN, on the back of the paper. The line between steps 1 ans 2 should be covered by both pieces of fabric by 1/4". You should be looking at the wrong side of the low-volume piece.

Rainbow Fins Tutorial

Place it, fabric down, in your sewing machine. Now you just get to sew along the lines! (Note my stitch length here, 1.5. My machine defaults at 2.4)

Rainbow Fins Tutorial

Once you've sewn the seam, open it up, and press it.

Rainbow Fins Tutorial

Now the line between the second and third fins should have a fold: find this fold, and fold the paper back beneath the stitch line so the fabric hangs out of the edge of the seam line. See it?

Rainbow Fins Tutorial

Take your ruler and measure 1/4" from the edge of the PAPER. Trim the excess fabric off. Now you can unfold the paper and move on to the next step.

Rainbow Fins Tutorial

Now you will get your next COLOR piece. Set it, right sides together, on top of the low-volume middle piece, and pin.

Rainbow Fins Tutorial

Sew it on the printed side of the paper, then repeat the pressing, folding, trimming steps, alternating rows of your spectrum and low-volume prints!

Rainbow Fins Tutorial

OH LOOK YOU SO FANCY

Now it's time to trim up the block! I just CAREFULLY freehand around with my rotary cutter on those curves, but I use a ruler on the straight edges and go zip zip!

Rainbow Fins Tutorial

TA-DA. You've made a fan!

Next tutorial we'll talk about plastic templates for those curved corners and center eyes, but for now, here's a very "design wall" idea of what each block should look like!

Rainbow Fins Tutorial

You can see how the brights really pop in that bottom one. In the top, I used too light a blue, and it's been bugging me, so I'll probably re-do it. I just make photocopies of the existing pattern piece before I start any paper piecing - it's insurance against mistakes and you can always make a cushion out of the "not quite right" pieces!

Let me know how you find the tutorial and if you have any questions shoot me an email or leave a note in the comments!

Cheers

Penny x