Hi everyone! Whew, it's been so rainy...today is such a nice day, so sunny and actually kind of warm, I'm really enjoying it! Of course I'm in a cafe with my computer but shh, let's just pretend I'm a beachy person. :)
A few evenings ago on Instagram I hosted an impromptu how-to on paper piece hexagons. I thought I would share that here and elaborate a little, answering the questions I got along the way!
(Firstly, let me say that I call myself a thread-baster but I do use glue. I will explain, but bear with me, you'll need both thread and glue for basting!)
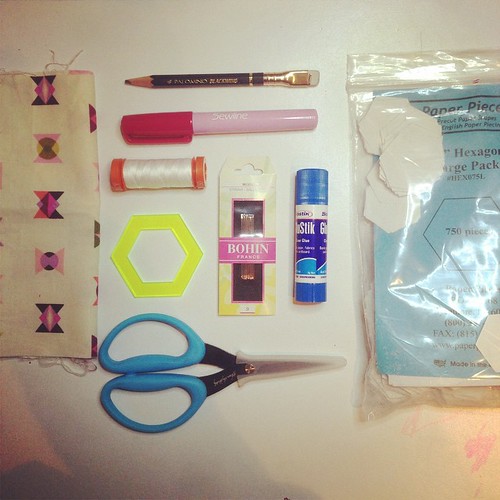
Gather your supplies. You need fabric to fussy cut, a peeper tool (or a home-made one, see below), good sturdy needles, sharp scissors, a glue stick (either a Sewline or a plain old school stick), a pencil, thread, and of course, paper pieces! I buy most of my paper pieces from www.paperpieces.com. They do what they do extremely well. (They also sell acrylic templates/peeper tools!)
Got everything? Sweet. Let's get going!
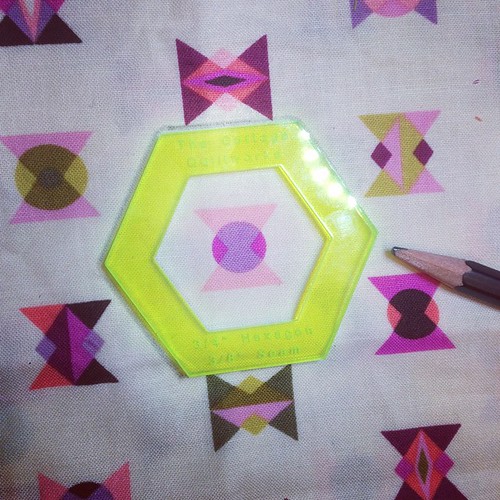
1. Centre your design for fussy-cutting, and trace around it with a pencil. (If you have sandpaper board, it helps to keep your fabric in place as you trace around your peeper!)
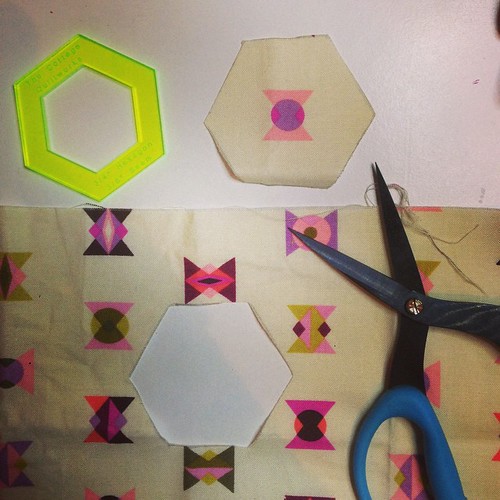
2. Using sharp scissors, carefully cut along your traced line.
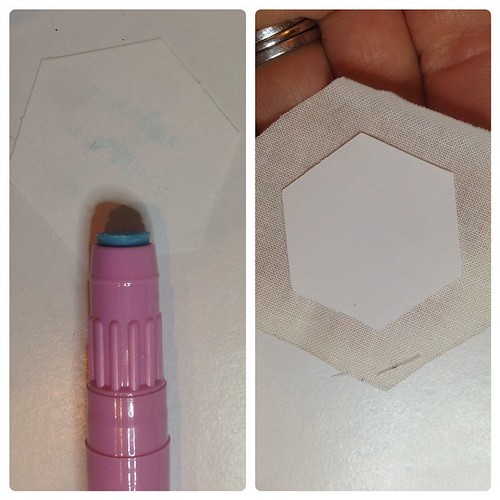
3. Smear a little tiny bit of glue onto the back of your paper piece -- NOT your fabric! I've found it's a lot easier to toss a too-gluey paper piece than try and rescue oversticky fabric. You do NOT want a lot of glue - really just enough to make the back of the paper tacky. It shouldn't move, but it should be easy to peel apart. Stick the sticky side of your paper to the wrong side of your fabric. Hold it up to a light source to centre your fussy cut design if needed!
4. Single thread a needle with a double loop knot. (I roll the thread around my finger and pull, and that usually forms a nice lumpy knot.) Fold the edges of your fabric down around the paper, tucking in the corners. Being careful not to pierce the paper, bring the needle under the fold of the fabric and pull through. Create a loop exactly over the same stitch -- this fastens the corner down.
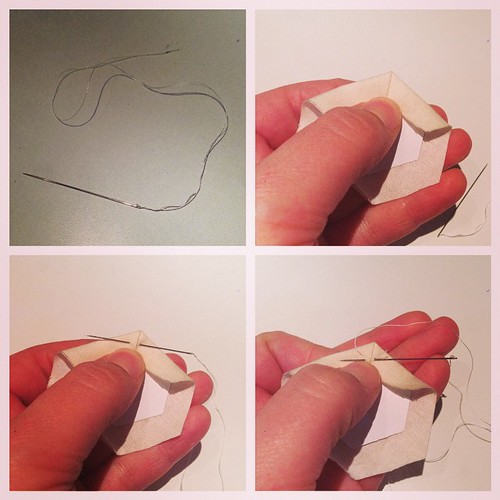
Keep going around until you have double-looped each corner. Finish off by making another loop on your first seam. This keeps it basted until the end of days, pretty much. :)
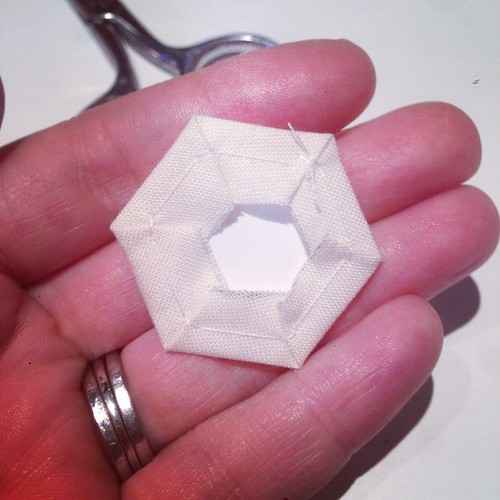
That is how I thread-baste without going through the papers! This works for hexagons and diamonds up to 1.5" per side. (After that it gets a bit complex, and I find it easier to baste through the paper.)
Go ahead and make a few more! Then let's sew them together!
Place your hexies right-sides-together. Starting a little bit in from the end, make two stitches going back toward the end of the hexagon. I whip-stitch, so I push the needle through, then pull it across and repeat the exact same procedure. Top through to bottom, 1mm apart. Take care not to pick up the paper within the hexagons - you should be sewing around it. Once you have finished a row, make two securing stitches. 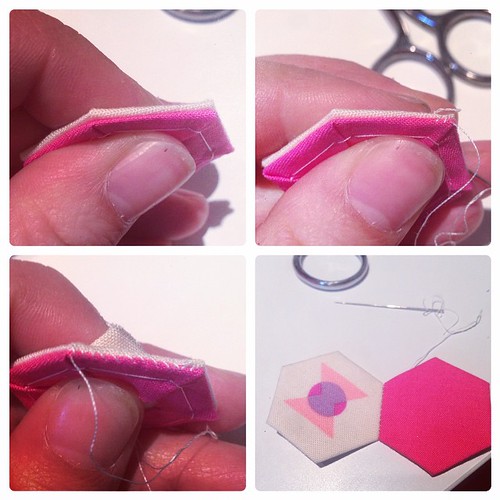
Now to make a Y-Seam. Sort out your next hexagon and match it, right sides together, with one of the two hexagons. Sew that seam inwards toward the Y, making sure to backstitch at the beginning. When it is attached on one side, but not the other, FOLD one of your paper pieces in half to match up the other seams. It's totally fine! Sew and finish as usual.
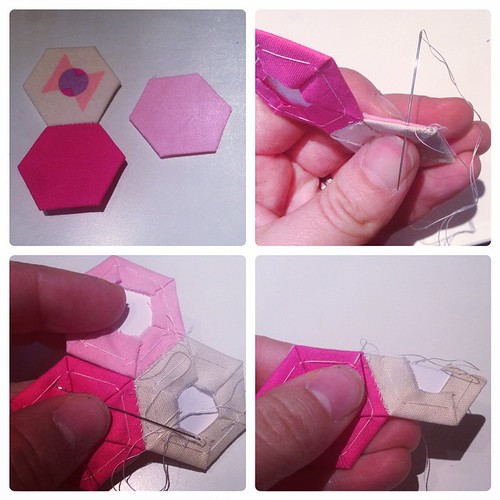
Look! You did it! Yay!
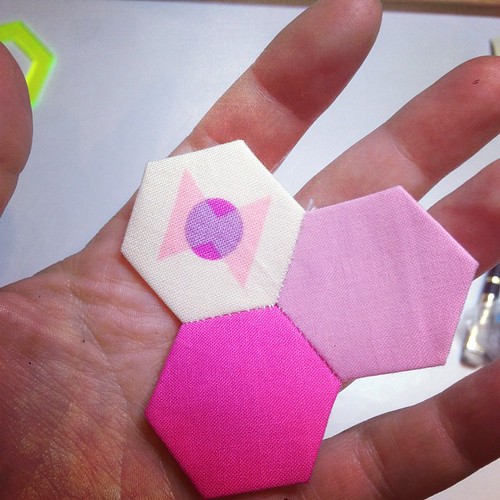
That's how to do hexagons. These are 3/4" and I used Michael Miller Cotton Couture and Tula Pink for this tutorial. Let me know how you do and please let me know if you have any questions!
Cheers!
Penny x
Note: To make a peeper tool of your own, use template plastic or cardstock. Draw around your paper piece. Add 1/4" or 3/8" seam allowance to each side. Cutting carefully, cut out the centre of the peeper (your original shape) to form the viewing window, and then cut the outside line. Label it so you know what size it is, and you're good to go. :)